
Mastering the warmup: A guide for your Gaggia Classic with a PID
Installing a PID (Proportional-Integral-Derivative) controller on a Gaggia Classic or Classic Pro is arguably the single best upgrade for this iconic machine. It transforms the Gaggia from a capable entry-level device with wild temperature swings into a precise and consistent espresso powerhouse. However, simply installing the PID is only half the battle. A common misconception is that as soon as the PID display shows your target temperature, the machine is ready to brew. This can lead to frustratingly inconsistent and often sour shots. This article will delve into the best practices for properly warming up your PID-equipped Gaggia Classic, ensuring that every component is thermally stable and ready to produce exceptional espresso, shot after shot.
Why a proper warmup matters, even with a PID
A PID controller is incredibly effective at one specific job: precisely managing the temperature of the water inside the boiler. It constantly monitors the temperature and makes tiny, intelligent adjustments to the heating element to keep it within a fraction of a degree of your set point. This completely eliminates the need for the “temperature surfing” required with a stock Gaggia Classic. So, why isn’t the machine ready to go in five minutes when the display hits 93°C?
The answer lies in thermal mass. The Gaggia Classic’s group head and portafilter are made of heavy chrome-plated brass. These components act as significant heat sinks. While the water in the boiler might be perfectly hot, if it travels through a cool group head and into a cold portafilter, its temperature will plummet just before it hits the coffee puck. This sudden temperature drop is a primary cause of under-extraction, resulting in a sour, acidic, and thin-tasting espresso. A PID controls the boiler, but a consistent user routine is what brings the entire brew path up to a stable temperature.
The optimal warmup routine step-by-step
Achieving thermal stability is about patience and process. By following a consistent routine, you create a repeatable environment for extraction, which is the key to dialing in your coffee and pulling great shots every time. This routine ensures the group head and portafilter are just as ready as the water in your boiler.
Here is a simple yet highly effective warmup procedure:
- Step 1: Engage and wait. As soon as you turn on your Gaggia Classic, make sure your portafilter is locked into the group head. This physical contact is crucial for heat transfer from the group head to the portafilter. Set your desired brew temperature on the PID and walk away for at least 20 minutes. While 15 minutes is a bare minimum, 20-25 minutes is ideal to ensure the heavy brass components are fully saturated with heat. Pro tip: A smart plug can automate this process, turning your machine on 30 minutes before you wake up.
- Step 2: The stabilizing flush. After the waiting period, your machine is almost ready. The final step is to perform a short flush. With the portafilter still locked in, place a cup underneath and run the brew pump for about 5-8 seconds. You will see the temperature on your PID display dip slightly as cooler water from the lines is replaced and the boiler works to recover.
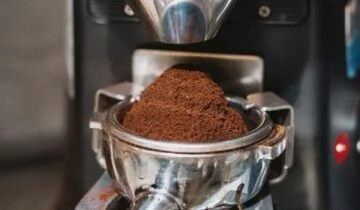
- Step 3: Lock and load. Immediately after the flush, remove the portafilter, quickly dry the basket, dose and tamp your coffee, and lock the portafilter back into the group head. By now, the PID should show the temperature has recovered back to your set point. You are now ready to pull your shot with a fully stabilized machine.
Fine-tuning your process and understanding recovery
The beauty of a PID is the real-time data it provides. You can use this to further refine your technique. After you perform the stabilizing flush in Step 2, watch the PID display. You’ll see the temperature drop and then climb back up. The goal is to start your shot just as the temperature has fully recovered and stabilized at your target. This ensures the water hitting your coffee is at the precise temperature you intended.
This process becomes even more important when making multiple drinks back-to-back. After pulling a shot, the group head will have lost some heat. Before preparing your next shot, it’s good practice to run another very short flush (2-3 seconds) to help the group head’s temperature rebound. Wait for the PID to stabilize again before pulling the second shot. This attention to detail prevents the common issue of the second shot tasting different from the first due to a cooler brew path.
A comparative look at warmup methods
To truly understand the impact of a proper warmup, let’s compare different approaches. The differences may seem small, but in the world of espresso, a few degrees can completely change the flavor profile of your shot.
| Warmup method | Time required | System stability | Likely shot outcome |
|---|---|---|---|
| The impatient method Pulling a shot as soon as the PID reaches its target. |
5-7 minutes | Very low. The boiler is hot, but the group head and portafilter are cold. | Sour, under-extracted. The cold metal will drastically reduce the brew water temperature. |
| The partial warmup Waiting 20 minutes but not flushing before the shot. |
20 minutes | Moderate. The group and portafilter are warm, but there may be cooler water in the lines. | Mostly good, but potentially inconsistent. May be slightly less extracted than optimal. |
| The recommended method Waiting 20+ minutes and performing a stabilizing flush. |
20-25 minutes | Excellent. The entire system is at a stable, repeatable temperature. | Balanced, sweet, and consistent. The ideal scenario for dialing in and enjoying espresso. |
As the table illustrates, investing that extra time and adding one simple step—the flush—makes a world of difference. It moves you from a game of chance to a process of precision.
Conclusion
A PID controller is a powerful tool that gives you unprecedented control over the most critical variable in espresso brewing: water temperature. However, it’s not a magic bullet. The device perfectly heats the water in the boiler, but it’s your thoughtful routine that ensures this perfectly heated water arrives at the coffee puck without losing its thermal energy. By embracing a patient warmup of at least 20 minutes with the portafilter locked in, and by performing a short, stabilizing flush right before you brew, you complete the thermal circuit. This simple, repeatable process is the final step in unlocking the full potential of your modified Gaggia Classic, allowing you to consistently produce cafe-quality espresso in the comfort of your own home.

 No products in the cart.