The art of pressure: How to achieve a perfect 9-bar shot on a manual lever machine
The allure of a manual lever espresso machine is undeniable. It offers a tactile, engaging experience that connects you directly to the craft of pulling a perfect shot. However, this hands-on approach comes with a steep learning curve, especially when trying to achieve the industry-standard 9 bars of pressure. Many new users struggle with consistency, resulting in shots that are either sour and under-extracted or bitter and channeling. This guide is here to change that. We will demystify the process, breaking down the mechanics, variables, and techniques required to master your lever machine. By the end, you will not only understand how to hit that 9-bar target consistently but also how to use pressure as a creative tool to unlock the best in every coffee bean.
Understanding pressure in a manual machine
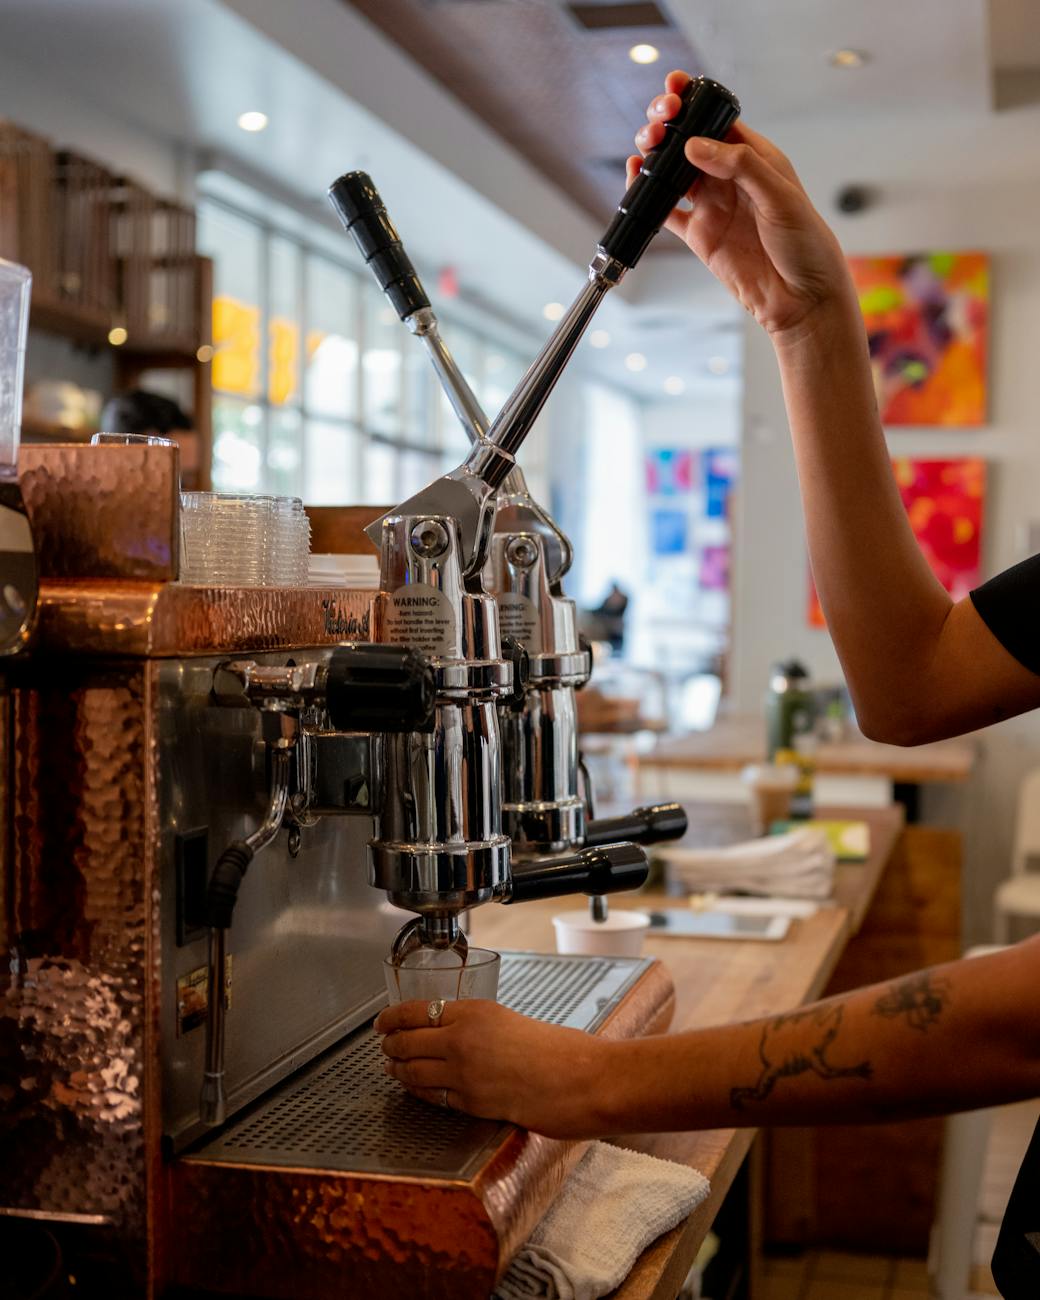
Before you can control pressure, you must understand where it comes from. In a manual lever machine, you are the pump. The pressure is generated when you pull the lever down, forcing a piston to push hot water through the compacted bed of coffee grounds. The resistance created by this coffee puck is what allows the pressure to build. Without a properly prepared puck, the water would just rush through, resulting in a weak, under-extracted shot with little to no pressure.
Why 9 bars? This figure became the standard because it represents a sweet spot for espresso extraction. It’s enough pressure to force water through a finely ground puck in about 25-30 seconds, extracting the desirable oils and solids that create espresso’s signature flavor and crema, but not so much that it causes channeling and over-extraction. On a lever machine, however, pressure is rarely static. You are creating a pressure profile: a gentle pre-infusion as water enters the chamber, a ramp-up to a peak pressure (ideally around 9 bars), and then a gradual decline as the shot finishes. This natural curve is one of the lever’s greatest strengths, often leading to a sweeter, more balanced shot.
The essential variables you control
Achieving consistent pressure isn’t about raw strength; it’s about a symphony of variables working together. Your primary job is to create the perfect amount of resistance in the portafilter. Get these fundamentals right, and the lever will do the rest.
- Grind and dose: This is your foundation. The coffee must be ground fine enough to slow the water down. If your shot pulls too quickly with little effort, your grind is too coarse. If the lever is impossible to move and only a few drips come out, it’s too fine. Your dose, or the amount of coffee in the basket, also plays a crucial role. A proper dose fills the basket correctly, allowing for an even tamp and preventing a soupy puck. You must dial in these two variables together for every new bag of coffee.
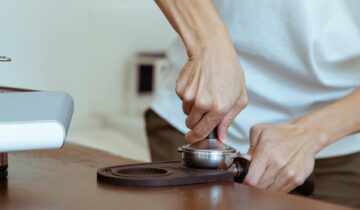
- Tamping: The goal of tamping is not to press as hard as you can, but to create a level and uniformly compacted coffee puck. An uneven tamp will create weak spots where water can rush through, a phenomenon known as channeling. This kills your pressure and ruins the extraction. Focus on a comfortable, repeatable pressure and ensure the tamper is perfectly level.
- Pre-infusion: This is the secret weapon of the lever machine. By lifting the lever slightly (on a spring-lever) or fully (on a direct-lever) and letting water enter the chamber, you gently saturate the coffee puck at a very low pressure. Holding this pre-infusion for 5-10 seconds, or until you see the first drops appear on the bottom of the basket, allows the coffee to swell. This minimizes the risk of channeling when you apply full pressure.
Tools for measurement and feedback
While espresso can be made by feel, using tools to gather data will accelerate your learning curve and make your results far more repeatable. Moving from guesswork to precise measurement is the key to mastering consistency.
A bottomless portafilter is your best diagnostic tool. It provides a clear view of the extraction, immediately revealing any flaws in your puck preparation. If you see jets of espresso spraying out or the extraction looks uneven, you know you have channeling issues to address. Another invaluable tool is an espresso scale with a timer. Weighing your dose in and your liquid yield out allows you to follow recipes and make precise adjustments. A typical starting point is a 1:2 ratio (e.g., 18 grams of coffee in, 36 grams of espresso out) in about 25-30 seconds.
To measure pressure directly, a pressure gauge is the ultimate accessory. Some machines come with one, but you can also find aftermarket kits that attach to the group head. This gives you real-time feedback, showing you exactly how your force on the lever translates to bars of pressure. For a low-tech alternative, you can place your machine on a bathroom scale to learn the physical force required. For example, on a machine with a 50mm piston, you’d need to apply roughly 35 lbs of force to the lever to generate 9 bars of pressure.
| Parameter | Target Range | Common Problem & Solution |
|---|---|---|
| Dose | 16-20 grams | Too little pressure? Try increasing the dose slightly to add more resistance. |
| Grind | Fine (espresso setting) | Shot chokes? Grind a little coarser. Shot runs too fast? Grind finer. |
| Yield | 1:2 ratio (e.g., 18g in, 36g out) | Shot is sour? Increase the yield (e.g., to 40g) to extract more. |
| Time | 25-35 seconds (inc. pre-infusion) | Use time as a diagnostic, but prioritize taste over a specific number. |
Beyond 9 bars: The art of pressure profiling
Once you can consistently pull a 9-bar shot, you can begin to explore the true artistry of a manual lever: pressure profiling. The 9-bar standard was developed for classic Italian espresso blends. However, modern specialty coffees, especially light roasts, often benefit from different approaches. The beauty of a lever is that you are in complete control of the entire pressure curve.
For a delicate, floral light roast, you might try a very long, gentle pre-infusion followed by a pressure profile that peaks at only 7 or 8 bars before slowly declining. This softer approach can reduce acidity and highlight nuanced flavors without introducing bitterness. Conversely, for a rich, syrupy dark roast, you might use a shorter pre-infusion and a more aggressive ramp-up to 9 bars to extract those deep, chocolatey notes. Don’t be afraid to experiment. Pull a shot that peaks at 6 bars. Try one that holds 9 bars for only a few seconds before declining. The goal is no longer just hitting a number; it’s about using pressure to craft a shot that tastes amazing to you.
Mastering the 9-bar shot is a fundamental skill, a benchmark that proves you have control over your machine and your preparation. It is the solid foundation upon which you can build your expertise and begin to truly express your creativity as a home barista.
In conclusion, achieving consistent 9-bar pressure on a manual lever machine is a rewarding challenge that is more about technique than brute force. It begins with mastering the fundamentals: dialing in your grind and dose to create the necessary resistance for pressure to build. Consistent, level tamping and a proper pre-infusion are crucial for preventing channeling and ensuring an even extraction. Using tools like a bottomless portafilter and a scale will transform your process from guesswork into a repeatable science. Once you have built this foundation, the true potential of your lever machine is unlocked. You can move beyond chasing a single number and begin to explore the creative world of pressure profiling, tailoring every shot to the unique character of the coffee bean.
 No products in the cart.