Welcome to the secret that separates good Nespresso coffee from a truly exceptional cup: calibration. While your machine is designed for ultimate convenience, its default factory settings are a one-size-fits-all solution for a world of diverse coffee capsules and personal tastes. If you’ve ever found a shot to be a little too bitter or disappointingly weak, the culprit is likely the water volume. This guide is here to change that. We will walk you through why controlling your shot volume is crucial for flavor and consistency. You’ll learn the simple, step-by-step process of reprogramming your machine, turning you from a passive user into an active home barista who can dial in the perfect extraction for every single pod.
Why shot volume is the secret to better Nespresso
At its core, brewing coffee is an act of extraction. Water flows through the ground coffee, dissolving solids and oils that create the flavor, aroma, and body of your final drink. The amount of water you use, or the shot volume, is one of the most critical variables in this process. It directly determines whether your coffee is perfectly balanced, or veers into undesirable territory.
- Under-extraction: If you use too little water, you only pull out the first, most easily dissolved compounds. These are often sour and acidic, resulting in a thin, sharp-tasting shot that lacks sweetness and complexity.
- Over-extraction: If you use too much water, you continue pulling compounds from the coffee long after the desirable ones are gone. This extracts bitter, dry, and harsh flavors, overpowering the nuanced character of the coffee and leaving an unpleasant aftertaste.
Nespresso’s default settings—typically 40 ml for an Espresso and 110 ml for a Lungo—are a general starting point. However, every capsule is different. A dark, intense roast might taste best with a shorter, more concentrated shot to minimize bitterness, while a delicate, light roast may need a bit more water to open up its floral or fruity notes. By learning to calibrate your shot volume, you gain precise control over extraction, ensuring you hit that “sweet spot” for a balanced and delicious cup every time.
Getting to know your machine’s programming feature
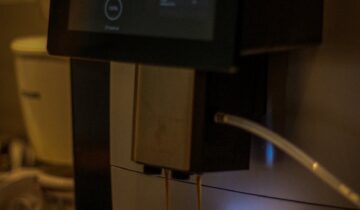
Many Nespresso users are surprised to learn that the buttons on their machine are more than just simple start-stop switches. On most Nespresso OriginalLine machines (like the Pixie, Essenza Mini, CitiZ, and others), the Espresso and Lungo buttons are fully programmable. This feature allows you to overwrite the default factory volume and save a custom amount that perfectly suits your preference.
The process is incredibly intuitive. It’s based on a simple “press-and-hold” mechanism:
- You press and hold the button you wish to program (for example, the Espresso button).
- The machine begins brewing as usual.
- Instead of stopping automatically, it continues to brew as long as you hold the button.
- When you release the button, the flow of water stops, and crucially, the machine saves this new duration as the new default for that button.
It’s important to note that this guide focuses on the OriginalLine. The Nespresso VertuoLine system operates differently, using a barcode on each capsule to automatically dictate the brewing parameters, so manual volume calibration isn’t a feature.
Your step-by-step calibration process
Ready to take control? Calibrating your machine is a quick process that requires just one key tool for accuracy: a digital coffee scale. While you can eyeball the volume, measuring by weight (in grams) is far more precise because it isn’t distorted by the foamy crema. For coffee, the conversion is simple: 1 ml of water is equal to 1 gram.
What you’ll need:
- Your Nespresso machine
- A coffee capsule (use a common one you enjoy)
- Your favorite espresso cup or mug
- A digital scale that measures in grams
The calibration steps:
- Turn on your Nespresso machine and let it warm up.
- Place your cup on top of the digital scale and place both onto the drip tray. Press the “tare” button on your scale so it reads 0 g.
- Lift the lever, insert your chosen Nespresso capsule, and close the lever.
- Press and hold down the button you want to program (Espresso or Lungo). The brew will begin.
- Watch the weight on the scale. When it reaches your desired target weight (see the table below for recommendations), release the button.
- The flow will stop, and the machine will blink a few times to confirm that the new volume has been saved.
That’s it! Your machine is now calibrated. The next time you press that button, it will dispense your custom volume automatically.
| Shot type | Recommended weight (grams) | Common tasting notes |
|---|---|---|
| Ristretto | 15 – 25 g | Intense, syrupy body, concentrated sweetness, reduced bitterness. |
| Espresso | 35 – 45 g | Balanced, well-rounded, classic espresso profile. A great all-around target. |
| Lungo | 80 – 100 g | Lighter body, more tea-like, highlights delicate notes but risks bitterness. |
Fine-tuning and what to do if things go wrong
The table above provides excellent starting points, but true mastery comes from tasting and adjusting. Think of these numbers not as rigid rules, but as a baseline for your own experimentation. After you pull a shot with your new calibrated volume, taste it. What do you notice?
- Is it sour or sharp? Your shot is likely under-extracted. Try re-calibrating with a slightly higher volume, perhaps adding 2-3 grams of water.
- Is it bitter or harsh? Your shot is over-extracted. Re-calibrate with a slightly lower volume, reducing the water by 2-3 grams.
Remember that different capsules may require different volumes. A bold, dark roast like Arpeggio might shine at 35g, while a more delicate single-origin pod could taste better at 42g. Don’t be afraid to have a slightly different “perfect” volume for each of your favorite capsules.
And what if you want to go back to the original settings? There’s no need to worry. Nearly every Nespresso OriginalLine machine has a simple factory reset function. To do this, turn the machine off, then press and hold the Lungo button for about 5 seconds. The lights will flash to confirm the machine has been restored to its default Espresso (40 ml) and Lungo (110 ml) volumes.
Conclusion
You no longer have to settle for the one-size-fits-all approach to your daily coffee. By taking a few minutes to calibrate your Nespresso machine, you unlock a new level of control and consistency that can dramatically elevate your brewing experience. We’ve seen how shot volume directly impacts extraction, turning a potentially sour or bitter cup into a perfectly balanced one. Armed with a simple digital scale and the knowledge of how to program your machine’s buttons, you can now move beyond the factory settings. You can fine-tune the output for each specific capsule, ensuring you always get the best possible flavor. This simple adjustment is the most impactful change you can make to your Nespresso routine, transforming convenience into craft.
 No products in the cart.