How to set up a slayer-style shot profile at home
The pursuit of espresso perfection at home has led many enthusiasts toward advanced extraction techniques, with the Slayer-style shot profile being one of the most discussed. Named after the commercial machines that popularized the method, this profile is characterized by a unique, extended pre-infusion phase at very low flow rates. For the experienced home barista using a manual or flow-profiling machine, understanding and replicating this technique can unlock new dimensions of flavor, particularly with light-roast, high-acidity coffees. This article provides a technical breakdown of the principles behind the Slayer-style shot and offers a practical guide to implementing it on capable home equipment. The goal is not to perfectly imitate a specific machine, but to apply the concepts to enhance your own espresso extractions.
Understanding the pre-infusion stage
The core of the Slayer-style profile is its distinctive pre-infusion. Unlike the passive pre-infusion common on E61 group heads, which relies on line pressure or static chamber pressure, this method involves actively controlling the flow of water to the coffee puck at a very low rate. The objective is to fully and gently saturate the puck before applying full extraction pressure. This is typically achieved with a flow rate so low that it can take 25 to 45 seconds before the first drops appear at the bottom of the portafilter. This slow saturation helps reduce the risk of channeling, as it minimizes the disruptive force of water hitting the dry grounds. It also allows the coffee to bloom, releasing trapped CO2 and swelling uniformly, creating a more homogenous medium for the subsequent extraction phase.
The transition to full pressure
Once the puck is fully saturated, indicated by beading across the entire bottom of the filter basket, the next step is the transition to full brewing pressure. In a Slayer-style profile, this ramp-up is often a distinct and deliberate action. After the long pre-infusion, the machine is switched to its full pressure setting, typically around 9 bars. Because the puck is already saturated and offering resistance, the pressure builds more gradually and evenly than it would with a standard shot. This controlled ramp is critical. An overly aggressive transition can disrupt the puck’s integrity, while a hesitant one can lead to an under-extracted, weak shot. The timing of this transition is a key variable for the barista to control, directly influencing the shot’s final body and flavor balance.
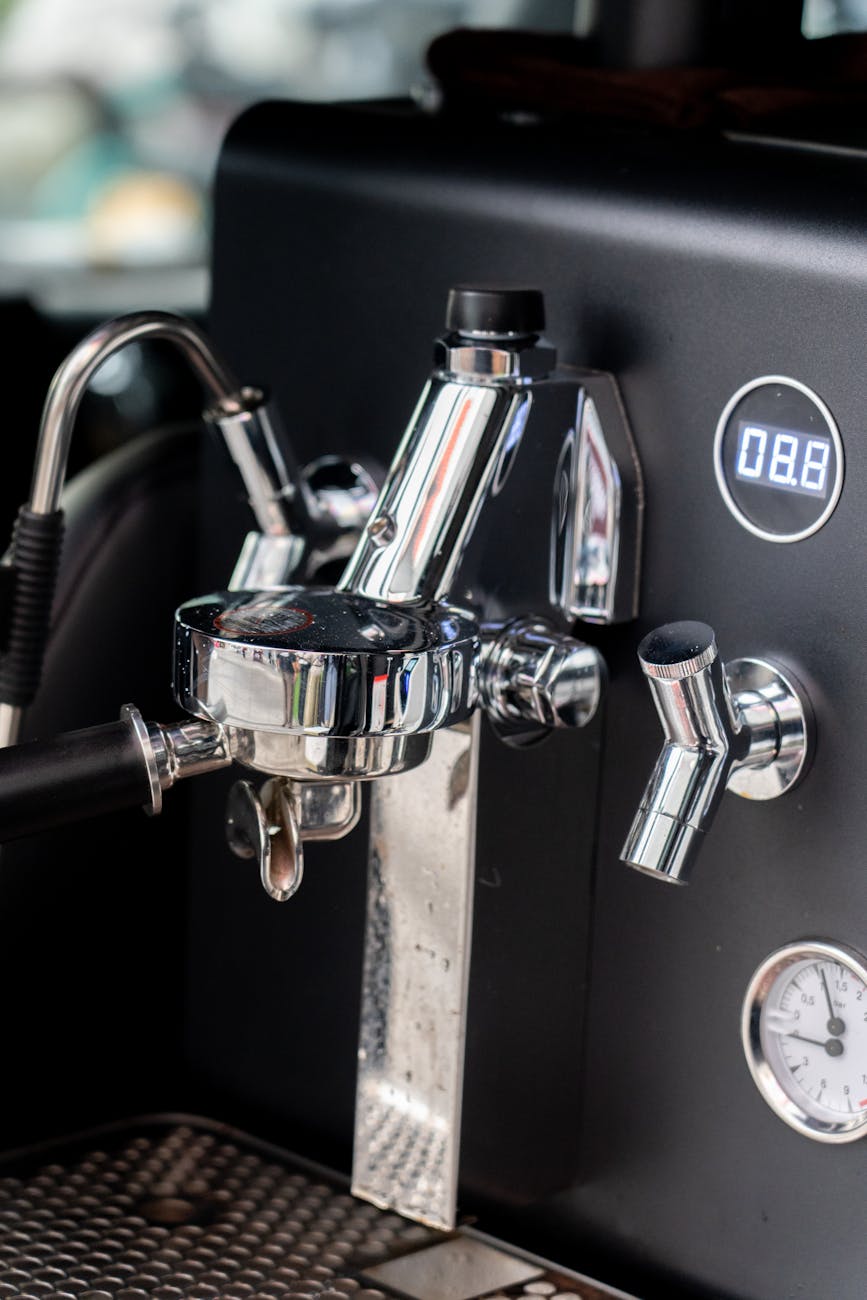
Executing the profile on a home machine
Replicating this profile requires an espresso machine with manual flow control, either through a paddle, knob, or gear-pump system. The process involves two primary phases.
- Phase 1: Pre-infusion. Begin by engaging the pump and immediately restricting the water flow to its lowest possible setting. You are aiming for a flow rate of approximately 1 to 3 milliliters per second. The goal is to see the first drops of espresso form on the basket between 25 and 45 seconds. This requires patience and a very fine grind size to provide the necessary resistance.
- Phase 2: Full extraction. Once the basket is fully saturated and espresso begins to bead evenly, smoothly transition to your target brew pressure (e.g., 9 bars). From this point, you manage the shot as you normally would, stopping it based on your desired brew ratio. The total shot time, including the extended pre-infusion, will naturally be much longer than a conventional shot, often exceeding one minute.
Success depends on your ability to manipulate flow precisely and observe the shot’s development. A bottomless portafilter is almost essential for this process, as it provides instant visual feedback on puck saturation and potential channeling.
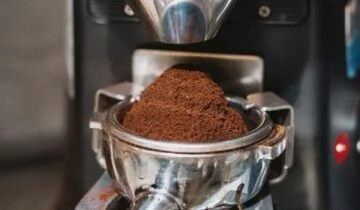
Dialing in your grind and puck preparation
A Slayer-style shot profile demands a finer grind setting than a conventional 9-bar extraction. The extended, low-pressure pre-infusion requires more puck resistance to prevent water from flowing through too quickly and creating channels before full pressure is applied. When dialing in, you will likely need to adjust your grinder significantly finer than you are used to. This fine grind also increases the importance of meticulous puck preparation. Any inconsistencies in distribution or tamping will be amplified during the slow saturation phase, creating weak points where channels can form. Using a distribution tool can help ensure a level and homogenous coffee bed, which is crucial for achieving an even and controlled extraction with this advanced profile.
Conclusion
Mastering a Slayer-style shot profile is a rewarding endeavor for the technically-minded home barista. The technique hinges on a slow, controlled pre-infusion to gently saturate the puck, followed by a deliberate ramp to full extraction pressure. This method requires a capable machine with manual flow control, a high-quality grinder that can produce a consistent fine grind, and meticulous puck preparation. By moving beyond fixed-pressure extractions, you gain a powerful tool for manipulating acidity, sweetness, and body, allowing you to tailor your brewing process to the unique characteristics of each coffee. For those looking to refine their technique, exploring specialized tools for puck preparation can further enhance consistency, and many such accessories are available at retailers like papelespresso.com.

 No products in the cart.