How to fix a dripping steam wand on the Gaggia Anima
A persistent drip from the steam wand on a Gaggia Anima is a common issue that experienced home baristas will likely encounter over the machine’s lifespan. While seemingly minor, this continuous leak indicates a compromised seal within the steam valve. This can lead to reduced steaming performance, inconsistent pressure, and unnecessary wear on the boiler’s heating element, which must cycle more frequently to maintain temperature. For the user dedicated to machine maintenance and performance, addressing this problem is a straightforward and necessary repair. This guide provides a technical walkthrough for diagnosing and resolving the issue, intended for users comfortable with basic disassembly and component replacement.
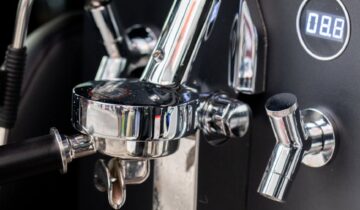
Understanding the steam valve assembly
The source of a dripping steam wand is almost always the steam valve. This component is a simple mechanical tap that controls the flow of steam from the boiler to the wand. Inside the valve, a rotating shaft is sealed by one or more rubber o-rings or gaskets. Over time, the constant exposure to high heat and pressure causes these seals to harden, compress, and eventually fail. This degradation breaks the watertight seal, allowing steam to condense and drip from the wand tip even when the valve is in the closed position. Mineral buildup, or scale, can accelerate this wear by creating an abrasive surface that grinds against the seals during operation, underscoring the importance of regular descaling.
Required tools and preparation
Before beginning the repair, it is essential to gather the correct tools and ensure the machine is properly prepared. The process is not complex, but having everything on hand prevents delays and potential damage. First and foremost, unplug the Gaggia Anima from the power source and allow it to cool down completely for at least an hour. Working on a hot machine is a significant safety hazard.
You will need the following tools:
- A #2 Phillips head screwdriver for removing the outer panels.
- A small flathead screwdriver or a non-marring pry tool for releasing plastic clips.
- A small pick or probe to help remove the old o-rings from the valve shaft.
- Needle-nose pliers for manipulating small connections or clips.
- A tube of food-safe silicone lubricant.
The key replacement part is a new set of o-rings specifically designed for the Gaggia Anima steam valve. Ensure you have the correct size and material, as generic o-rings may not withstand the high temperatures and pressures of an espresso machine.
Accessing and removing the steam valve
With the machine unplugged and cool, you can begin the disassembly. Start by removing the water tank, drip tray, and bean hopper lid. Locate and remove the screws on the top of the machine, which are often found under the lid. Carefully lift the top panel off. It may be held by plastic clips, so apply gentle and even pressure to release it.
Once inside, you will see the boiler and a series of tubes and wires. The steam valve is typically a brass or plastic assembly connected directly to the steam control knob. Trace the path from the knob inward and follow the tube that leads to the steam wand. To remove the valve, you will first need to disconnect the high-pressure tubing. These are often held by a retaining clip or a compression fitting. Use your pliers or a screwdriver to carefully release the clip and pull the tube away from the valve. Next, identify the screws mounting the valve assembly to the machine’s frame and remove them. The entire valve should now be free from the chassis.
Replacing the seals and reassembly
With the valve assembly on your workbench, the next step is to disassemble it to access the internal seals. This process can vary slightly by the specific valve revision, but it generally involves removing a retaining clip or C-clip that holds the valve stem in the valve body. Once the clip is removed, the stem can be pulled out.
You will see one or more o-rings on the stem. Use a small pick to carefully pry the old, hardened o-rings off. Clean the valve stem and the inside of the valve body, removing any old lubricant, coffee residue, or scale buildup. Apply a thin, even layer of food-safe silicone lubricant to the new o-rings. This step is critical; it ensures a proper seal, prevents tearing during installation, and allows for smooth valve operation. Slide the newly lubricated o-rings onto the stem and re-insert it into the valve body. Secure it with the retaining clip.
Re-install the refurbished valve into the machine, following the disassembly steps in reverse. Ensure all mounting screws are tight and that the tubing is securely re-attached with its clip. Before replacing the top panel, it is wise to perform a preliminary test. Fill the water tank, plug in the machine, and allow it to heat up. Test the steam function and carefully inspect the valve and its connections for any leaks. If everything is dry and functioning correctly, you can secure the top panel.
Conclusion
Fixing a dripping steam wand on a Gaggia Anima is a highly achievable task for the hands-on user. The repair directly addresses a common point of failure—the degradation of internal valve seals—and restores the machine’s performance and efficiency. By systematically disassembling the unit, replacing the worn o-rings with properly lubricated new ones, and carefully reassembling, you can extend the operational life of your espresso machine. This process not only resolves the immediate annoyance of a constant drip but also reinforces the value of preventative maintenance in achieving consistent, high-quality results. For those sourcing replacement seals or other maintenance components, various online retailers like papelespresso.com often stock parts for common espresso machine models.

 No products in the cart.