Troubleshooting water flow issues in Arduino-controlled pumps
For the dedicated manual espresso enthusiast, an Arduino-controlled pump system represents a significant step toward precision and repeatability. By automating pressure and flow profiles, these setups offer control far beyond what standard machines can provide. However, this complexity introduces new variables. When water flow becomes inconsistent, diagnosing the root cause requires a systematic approach that bridges electronics, software, and fluid dynamics. Understanding how to troubleshoot these systems is essential for maintaining shot quality and consistency. This guide provides a technical framework for identifying and resolving common water flow problems, ensuring your custom setup operates as intended.
Diagnosing the source of flow inconsistency
Inconsistent water flow often manifests as erratic pressure readings, channeling in the puck, or unpredictable shot times. The first step in troubleshooting is to isolate the problem’s origin. The issue can typically be traced to one of three areas: the electrical system providing power, the mechanical components handling water, or the software logic controlling the pump. A common mistake is to immediately suspect a complex software bug when the culprit is often a simple hardware failure. Start by observing the system’s behavior closely. Does the pump motor sound strained or does its speed fluctuate audibly? Do the pressure readings on your gauge or sensor match the target parameters in your code? A methodical process of elimination is key to an accurate diagnosis.
Electrical and power supply considerations
A stable power supply is non-negotiable for consistent pump performance. The DC motors used in these projects are sensitive to voltage fluctuations, which directly impact their speed and torque, leading to variable flow rates. A primary culprit is often an underrated power supply unit (PSU). Ensure your PSU can comfortably exceed the motor’s maximum current draw, with at least a 20-25% overhead to prevent voltage sag under load. Another area to inspect is the wiring itself. Poorly soldered connections, loose terminals, or wires of an inadequate gauge can introduce resistance and voltage drop. Use a multimeter to verify that the voltage at the motor terminals remains stable and matches the PSU output when the pump is running. If you are using a MOSFET or motor driver, confirm it is rated for the motor’s specifications and is not overheating, as thermal throttling can cause erratic behavior.
Mechanical obstructions and calibration
The physical path of the water is another critical area for inspection. Even small obstructions can have a significant impact on flow dynamics. Begin by checking for blockages in the intake line, such as a clogged filter or a kinked tube. Debris can also accumulate within the pump head itself, requiring disassembly and cleaning. Over time, seals and O-rings can wear out, introducing air leaks into the system that cause sputtering and pressure drops. On the output side, ensure that any check valves or flow meters are functioning correctly and are not stuck. Proper system calibration is also vital. If your setup includes a flow meter, its readings must be accurately translated into pump motor speed by the Arduino. Mismatches in this calibration can lead to the system constantly overshooting or undershooting its target flow rate, resulting in oscillation rather than a stable output.
Software and control logic refinement
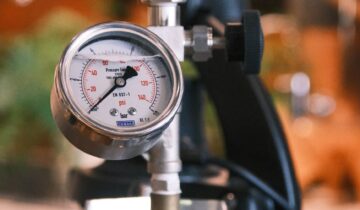
Once hardware issues have been ruled out, attention can turn to the Arduino code. For systems using feedback control, such as a PID loop to manage pressure or flow, improper tuning is a frequent source of instability. If the proportional (P), integral (I), or derivative (D) gains are not optimized, the system can oscillate or respond too slowly to changes. A “wobbling” pressure gauge is a classic sign of an untuned PID loop. Start with conservative gain values and tune them systematically. Another software consideration is sensor noise. Electrical interference can cause sensors to send erratic readings to the Arduino, which then makes incorrect adjustments to the pump speed. Implementing a simple moving average or another filtering algorithm in your code can smooth out sensor data and lead to much more stable and predictable pump behavior.
In conclusion, resolving water flow issues in an Arduino-controlled espresso pump is a process of systematic investigation. By methodically examining the electrical, mechanical, and software components, you can effectively isolate and address the root cause of instability. A stable power supply, clean and unobstructed fluid paths, and well-tuned control logic are the pillars of a reliable system. While the process can be intricate, the reward is a highly precise instrument capable of unparalleled control over the extraction process. For those seeking to build or refine their setups, various specialized components are available from retailers like papelespresso.com that can help ensure accuracy and consistency.

 No products in the cart.