How to manage brew temperature without a PID on the Gaggia Classic Pro
The Gaggia Classic Pro has earned its place in the home espresso world as a durable, capable, and repairable single-boiler machine. For experienced baristas, its manual nature offers direct control, but this simplicity also reveals its primary weakness: brew temperature instability. The machine’s basic thermostat operates within a wide temperature range, making shot-to-shot consistency a significant challenge. While installing a PID controller is a well-known solution, it is not the only one. By understanding the machine’s heating cycle, a user can implement manual techniques, often called “temperature surfing,” to achieve a high degree of precision and repeatability. This guide provides a technical breakdown of how to manage brew temperature effectively without electronic modification.
The thermostat and its limitations
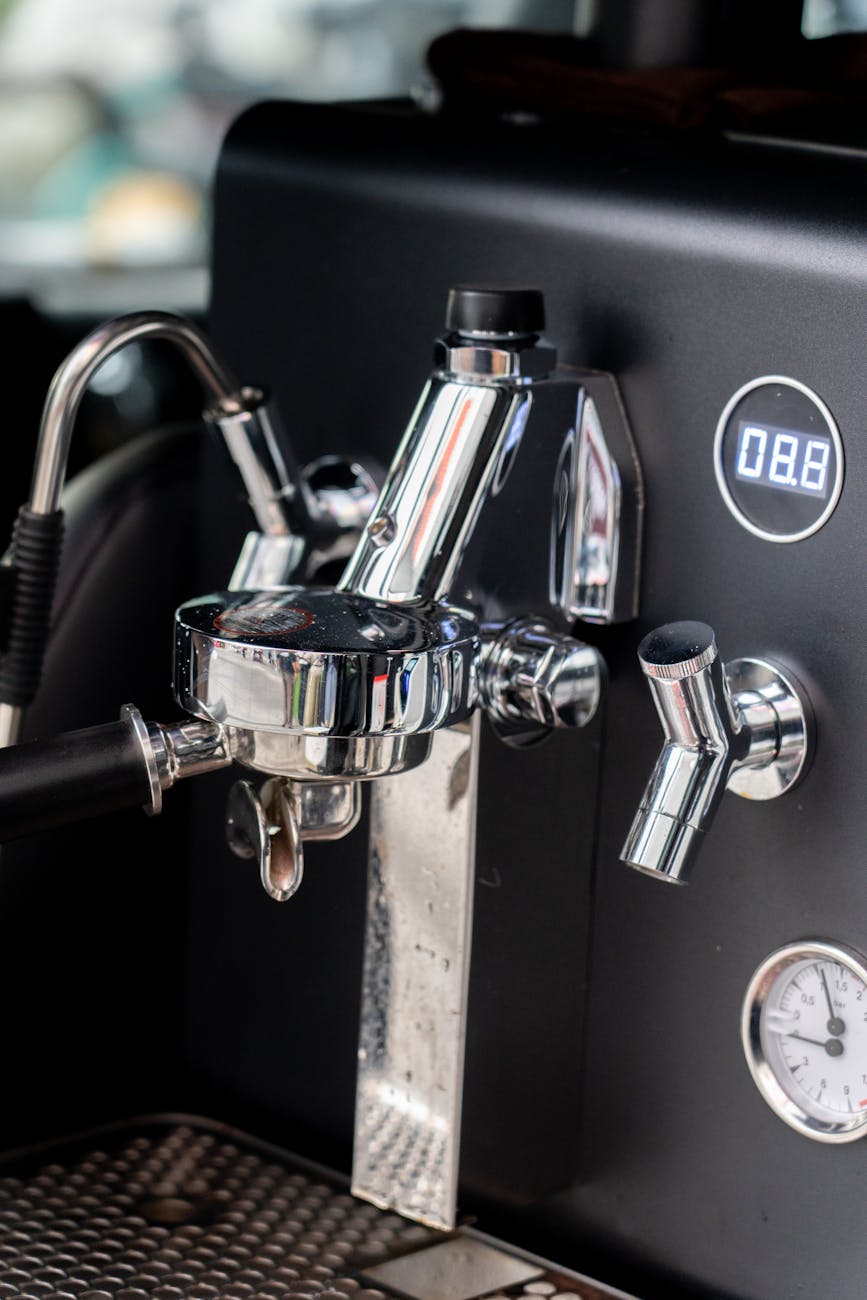
To control brew temperature, it is essential to first understand how the Gaggia Classic Pro’s heating system functions. The machine does not use a modern PID controller or even a precise thermostat. Instead, it relies on a simple bimetallic thermostat attached to the boiler. This component works like a basic on/off switch, responding to a preset temperature range. When the boiler temperature drops below its lower threshold, the thermostat closes the circuit, and the heating element engages. The “brew” indicator light on the front panel turns on. Once the boiler reaches the upper threshold, the thermostat opens the circuit, cutting power to the heating element, and the light turns off.
This design creates a significant temperature swing, often referred to as a deadband. The boiler heats well past an ideal brewing temperature and then cools significantly below it before the cycle repeats. Pulling a shot at a random point in this cycle is the primary cause of inconsistent extractions. A shot started when the heating element is on might be too hot, leading to bitterness, while one started long after it has turned off could be too cool, resulting in sourness. The goal of any manual temperature management technique is to tame this variable.
An introduction to temperature surfing
Temperature surfing is the practice of intentionally starting the brew process at a specific, repeatable point within the machine’s heating or cooling cycle. The objective is not necessarily to hit an exact temperature (which is difficult without external measurement tools) but to ensure the starting boiler temperature is the same for every shot. This consistency is the foundation of repeatable, high-quality espresso. By controlling this variable, you can more accurately diagnose and adjust other parameters, such as grind size and dose.
There are two primary approaches: surfing the heating curve (starting the brew while the temperature is rising) or surfing the cooling curve (starting after the peak temperature has been reached). For single-boiler machines like the Gaggia Classic Pro, surfing on the cooling curve generally offers a more stable and predictable temperature profile during the extraction itself. The method involves forcing a heating cycle and then starting the shot at a timed interval after the heating element has turned off.
A step-by-step method for consistency
Achieving a stable starting temperature requires a disciplined and repeatable workflow. The following method is a reliable starting point for temperature surfing on the Gaggia Classic Pro. It is designed to be adapted based on the coffee you are using, as different roast levels benefit from different brew temperatures.
- 1. Stabilize the machine. Turn the machine on at least 20 minutes before brewing. For optimal thermal stability, lock the empty portafilter into the group head during this warm-up period. This ensures all components are at a stable operating temperature.
- 2. Initiate a heating cycle. With the machine fully heated, place a cup under the group head and open the brew switch. Run water through the group until the “brew” indicator light turns on. This flush of cooler water lowers the boiler’s temperature, forcing the thermostat to trigger the heating element. As soon as the light comes on, turn the brew switch off.
- 3. Time your wait. This is the most critical step. Once the brew light turns off, the boiler has reached the peak of its heating cycle and will begin to slowly cool. Start a timer immediately. The length of this wait determines your starting brew temperature.
- 4. Pull the shot. At your predetermined time, lock in your prepared portafilter and begin the extraction.
A shorter wait (e.g., 5-10 seconds) will result in a higher brew temperature, which is often suitable for lighter roasts. A longer wait (e.g., 20-30 seconds) will provide a lower temperature, typically better for medium to dark roasts to avoid extracting bitter compounds. Start with a 15-second wait and adjust based on taste.
Dialing in your process
True consistency comes from refining your chosen method. The most important factor is to keep your workflow identical from shot to shot. This includes the volume of water you flush, the exact timing you use, and your puck preparation routine. Any deviation will introduce a new variable.
After steaming milk, the boiler’s temperature will be far too high for brewing espresso (around 140°C). It is crucial to perform a cooling flush to bring the temperature back down into the brewing range. To do this, run water through the group head until the overheated water stops sputtering and flows steadily. Continue flushing until the heating light turns on and then off again, indicating a full heating cycle has completed. From here, you can begin the temperature surfing routine described above to prepare for your next shot.
Conclusion
Managing brew temperature on a Gaggia Classic Pro without a PID is entirely achievable with a methodical approach. The machine’s simplicity is a weakness, but it also provides a predictable heating pattern that can be mastered. By understanding the function of the bimetallic thermostat and its inherent temperature swing, a barista can implement a temperature surfing routine to achieve remarkable shot-to-shot consistency. The key is not to chase a specific numerical temperature but to establish a workflow that is precise and, above all, repeatable. This manual control transforms the machine from an unpredictable appliance into a reliable tool for crafting high-quality espresso. For those looking to further refine their process, a range of precision tools are available at papelespresso.com.
 No products in the cart.