
Techniques for brewing light roast espresso on a Gaggia Classic Pro
Brewing light roast espresso can be a challenging yet deeply rewarding endeavor. These coffees offer a complex spectrum of bright, acidic, and nuanced flavors that are often lost in darker roasts. For the owner of a Gaggia Classic Pro, a famously capable and modifiable single-boiler machine, pulling a balanced shot from a light roast is a true test of skill. Unlike more forgiving dark roasts, light roasts demand precision and a deep understanding of the machine’s characteristics. This article provides a technical guide for experienced home baristas looking to master the techniques required to unlock the full potential of light roast coffee on this classic manual espresso machine.
Temperature stability and management
The single greatest challenge with the stock Gaggia Classic Pro is its temperature instability. The machine uses a simple bimetallic thermostat to control a powerful heating element, resulting in a wide temperature swing of 10–15°C (18–27°F). Light roasts are dense and less soluble, requiring both high and stable temperatures for proper extraction. An inconsistent temperature during the pull can lead to a shot that is simultaneously sour and bitter.
A common technique to mitigate this is “temperature surfing.” This involves initiating the brew at a specific point in the machine’s heating cycle to achieve a more consistent starting temperature. A reliable method is to start the shot a few seconds after the boiler light turns off. When the light is on, the element is heating; when it turns off, the boiler has just reached its maximum temperature in the cycle. By waiting a set amount of time (e.g., 10 seconds) after the light goes out, you can start your shot on the downward curve of the temperature cycle, making your process more repeatable than brewing at random.
Pressure and flow control
Out of the box, most Gaggia Classic Pro machines are set to a maximum pressure of 12 bars or more. While this high pressure can work for dark roasts, it is often too aggressive for delicate light roasts, easily causing channeling and leading to astringent, over-extracted flavors. The accepted industry standard for espresso extraction is approximately 9 bars.
Fortunately, the machine’s Over-Pressure Valve (OPV) can be adjusted. By installing a softer spring or an aftermarket kit, users can lower the peak pressure to a more suitable 9 bars. This single modification provides a gentler, more even extraction, which is critical for the dense puck of a finely ground light roast.
Additionally, manual pre-infusion can be simulated by skillfully using the steam knob. By engaging the brew button while simultaneously opening the steam valve slightly, you can divert some of the water flow, gently saturating the coffee puck at a lower pressure. After 5–8 seconds, closing the valve allows the machine to ramp up to its full (and now modified) 9-bar pressure. This technique helps settle the coffee bed and reduces the likelihood of channeling when full pressure is applied.
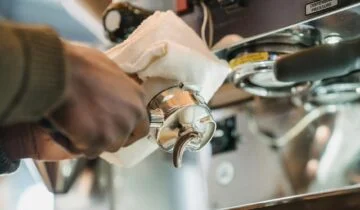
Puck preparation for optimal extraction
The physical characteristics of light roast beans—harder, denser, and more brittle—make meticulous puck preparation absolutely essential. Any inconsistencies in the coffee bed will be exploited by high-pressure water, resulting in an uneven extraction. Start by grinding finer than you would for a medium or dark roast; this increases the coffee’s surface area, aiding in extraction and providing the necessary resistance to slow the shot down.
Uniform distribution of the grounds in the portafilter is paramount. Clumps from the grinder should be broken up, and the grounds should be settled into an even, level bed before tamping. For users who need precise distribution, tools designed to de-clump and level the grounds can help maintain consistency from shot to shot. Finally, ensure a firm and perfectly level tamp. An angled tamp will create a path of least resistance on one side of the puck, leading directly to a channel and a poorly extracted shot.
Dialing in the shot
With temperature, pressure, and puck preparation addressed, the final step is to dial in your recipe. This iterative process involves adjusting grind size, dose, and yield to achieve a balanced flavor profile. Light roasts often taste best with slightly longer ratios and shot times than traditional espresso.
Below are starting parameters for a light roast on a 9-bar modified Gaggia Classic Pro.
| Parameter | Recommended Starting Point |
|---|---|
| Dose | 16–18 grams |
| Yield | 32–40 grams (1:2 to 1:2.5 ratio) |
| Time | 28–35 seconds (including pre-infusion) |
| Temperature | Start shot 10-12 seconds after brew light turns off |
Taste is the ultimate guide. If the shot is excessively sour or tastes vegetal, the extraction is too low; try grinding finer or increasing the yield. If it is astringent, harsh, or hollow, the extraction is too high; try grinding coarser. Adjust only one variable at a time to understand its effect on the final taste.
Conclusion
Successfully brewing light roast espresso on a Gaggia Classic Pro is a hands-on process that requires moving beyond the machine’s stock capabilities. By actively managing temperature through surfing, controlling pressure with an OPV modification, and executing flawless puck preparation, you can transform this simple machine into a precise tool. These techniques demand patience and attention to detail, but they allow the home barista to unlock the delicate acidity and complex aromatics that make light roasts so exceptional. For those seeking to enhance their workflow, a variety of tools to improve consistency are available from retailers such as papelespresso.com.

 No products in the cart.