Optimizing Gaggia Classic Pro warm-up time for better thermal stability
The Gaggia Classic Pro is a benchmark for entry-level manual espresso, offering a robust platform for home baristas to hone their craft. However, its compact, single-boiler design presents a significant challenge: thermal instability. While the machine can produce exceptional espresso, achieving consistent results requires a deep understanding of its thermal behavior. For the experienced user, moving beyond a simple “on” switch warm-up is the first step toward unlocking the machine’s full potential. A deliberate and optimized warm-up routine is not just about heating the water; it is about bringing the entire brew path into a state of thermal equilibrium, ensuring that every shot is pulled under predictable and repeatable temperature conditions.
Understanding the thermal system
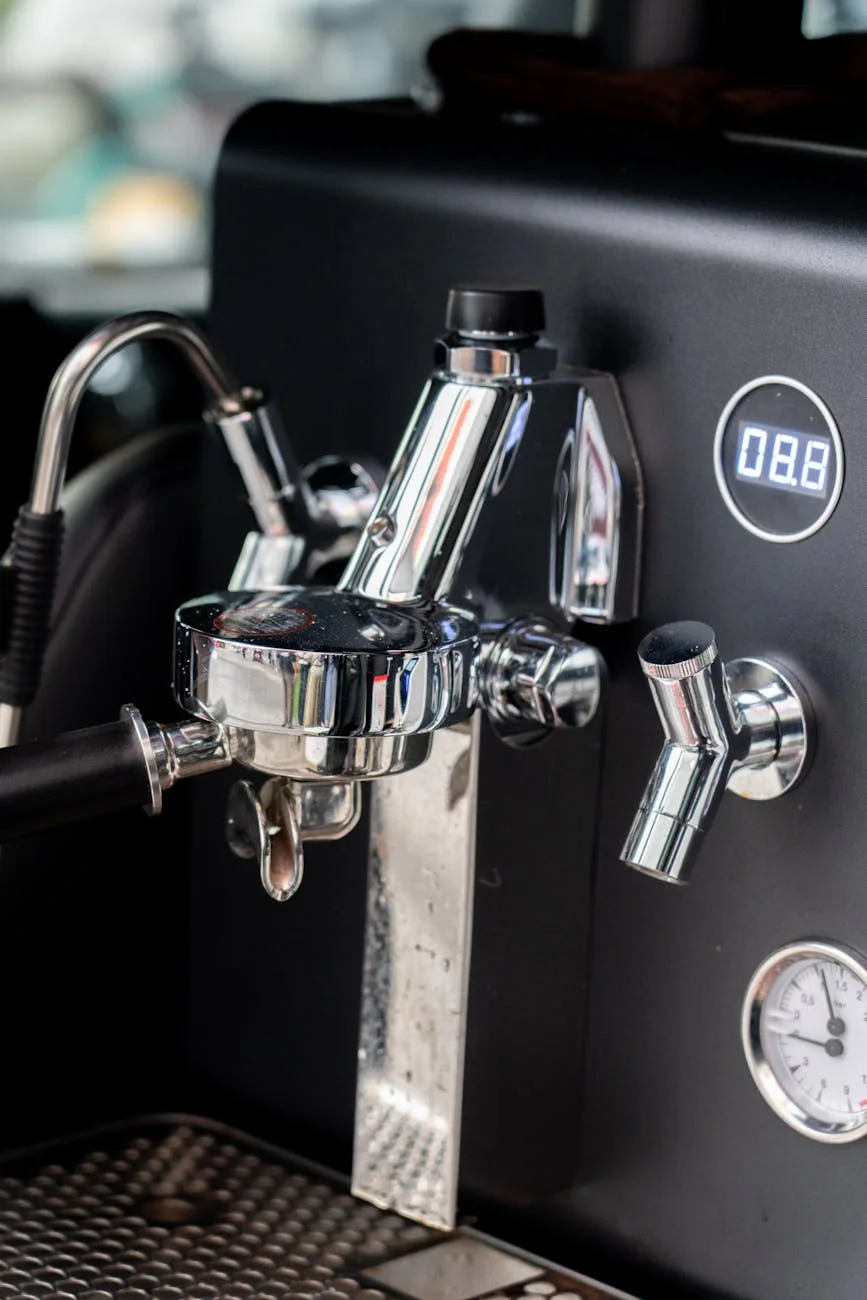
To effectively manage the Gaggia Classic Pro’s temperature, one must first understand its core components. The machine is built around a small aluminum boiler that serves a dual purpose: heating water for brewing and producing steam for milk frothing. This single-boiler design means the system’s temperature must be managed actively by the user, especially for brewing.
The primary components that require thorough heating are the boiler, the commercial-style 58mm brass group head, and the heavy brass portafilter. Brass and aluminum are used for their excellent thermal conductivity, but they also act as significant heat sinks. If the group head and portafilter are not fully heated, they will draw a substantial amount of heat from the brew water during extraction, leading to an under-extracted and sour shot. The goal of a warm-up routine is to achieve thermal equilibrium, where all these components are at a stable and consistent temperature before the shot begins.
Compounding this challenge is the stock thermostat, which operates within a wide temperature range, often called a “deadband.” It might turn the heating element on at 95°C and off at 105°C, resulting in a 10-degree swing in the boiler. This inherent fluctuation makes the timing of your shot critical to hitting a specific brew temperature.
The baseline warm-up routine
A disciplined warm-up procedure is the foundation of consistency with the Gaggia Classic Pro. Simply waiting for the indicator light to turn off is insufficient for preparing the machine for a stable extraction.
- Initial heating period: A minimum of 20 minutes is recommended. This duration allows the small boiler to fully saturate the surrounding components with heat, particularly the dense brass group head.
- Engage the portafilter: The portafilter should be locked into the group head during the entire warm-up period. This allows the portafilter to absorb heat via direct contact, ensuring it reaches the same temperature as the group head. A cold portafilter is one of the most common causes of temperature loss during brewing.
- Warming flush: After the machine is fully heated, a short flush of water through the group (without the portafilter) for 2–3 seconds is beneficial. This action purges any slightly cooler water from the path between the boiler and the shower screen and helps stabilize the group head temperature right before extraction. Following this flush, quickly dry the basket, dose your coffee, and prepare for the shot.
Advanced techniques for thermal management
For users seeking a higher degree of control with a stock machine, a technique known as “temperature surfing” can help navigate the boiler’s natural temperature cycle. This method involves timing your shot relative to the heating element’s activity, aiming to brew at a more precise and repeatable point on the temperature curve.
The process is as follows:
- Allow the machine to complete its full 20-minute warm-up.
- With the machine idle, activate the brew switch to run water through the group head. Continue until the “ready” indicator light turns off. This signifies that the boiler temperature has dropped enough to trigger the thermostat, which then activates the heating element.
- Once the light is off and the heating element is engaged, turn off the brew switch. Now, wait.
- The heating element will work to bring the boiler temperature back up. The moment the indicator light turns back on, the boiler has reached the upper limit of its thermostat’s range.
- This is the critical timing window. Start your extraction at a consistent interval—for example, 10 seconds—after the light comes back on. By using a consistent wait time, you are “surfing” the downward temperature curve and starting your brew at a more predictable temperature each time.
This technique requires practice and consistent timing but offers a no-cost method for improving shot-to-shot thermal consistency.
The role of modifications in stability
While workflow techniques can greatly improve the Gaggia Classic Pro’s performance, hardware modifications offer a more definitive solution to thermal management. The most impactful upgrade for achieving temperature stability is the installation of a PID (Proportional-Integral-Derivative) controller.
A PID controller replaces the machine’s factory thermostat. Instead of allowing the boiler temperature to swing within a wide band, a PID uses a sophisticated algorithm and a precise temperature sensor (thermocouple) to monitor the boiler’s temperature continuously. It then intelligently pulses the heating element to hold the water temperature at a user-defined setpoint, often with a precision of less than one degree.
The primary benefit of a PID is the elimination of guesswork and the need for temperature surfing. The barista can set a target brew temperature (e.g., 93°C), and the PID will maintain it. This transforms the machine’s thermal performance, putting it in a class with much more expensive equipment and allowing the user to focus solely on other variables like grind size and puck preparation. While it is an investment, a PID provides the ultimate level of control and repeatability for the Gaggia Classic Pro.
Conclusion
Mastering the Gaggia Classic Pro is a rewarding journey that hinges on managing its thermal characteristics. For any experienced home barista, a passive warm-up is simply not enough. True consistency begins with a disciplined baseline routine: a 20-minute preheat with the portafilter locked in, followed by a brief warming flush. For those desiring greater precision, temperature surfing provides a methodical approach to navigating the stock thermostat’s temperature swings. Ultimately, installing a PID controller removes thermal variability from the equation, providing unwavering stability and control. By understanding and addressing the machine’s thermal system, users can elevate their espresso preparation from a game of chance to a practice of precision. For baristas looking to refine their workflow, various supportive tools are available at papelespresso.com.

 No products in the cart.