
How to fix common steam wand leaks and performance issues at home
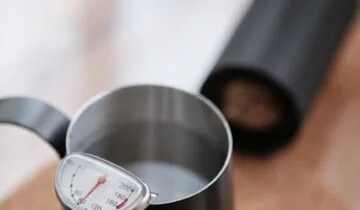
A perfectly frothed, velvety microfoam is the crowning glory of a homemade latte or cappuccino. But what happens when your trusty steam wand starts to hiss, drip, or lose its power? A leaking or underperforming steam wand can be incredibly frustrating, turning your morning coffee ritual into a disappointing mess. Fortunately, many of the most common issues are surprisingly easy to fix right in your own kitchen. This guide will walk you through diagnosing the problem, from pesky drips to weak steam pressure, and provide clear, step-by-step instructions to get your espresso machine back in top form. Forget expensive repair bills; with a little know-how, you can tackle these issues yourself and get back to steaming like a pro.
Identifying the source of the problem
Before you can fix anything, you need to play detective. The first step is to accurately diagnose whether you’re dealing with a leak, a performance issue, or both. Turn on your machine, let it come to temperature, and carefully observe the steam wand. Where is the issue happening?
For leaks, the location is your biggest clue:
- Dripping from the tip: If water or steam constantly drips from the holes in the tip, even when the valve is closed, you likely have a worn-out seal inside the steam valve. Mineral buildup, or scale, can also prevent the valve from closing completely.
- Leaking from the pivot joint: Many steam wands are articulated, allowing them to swivel. If you see water or steam escaping from this joint, especially when you move it, the internal O-rings or gaskets have likely failed. These are rubber seals that perish over time.
- Leaking from the steam knob: If steam or water is escaping from around the knob you turn to activate the steam, the problem lies deeper within the valve assembly itself, pointing to a worn main valve gasket.
For performance issues, consider the quality of the steam:
- Weak or low-pressure steam: This is one of the most common complaints. The culprit is almost always a blockage, either in the steam tip’s tiny holes or further back in the system due to limescale buildup.
- Sputtering or wet steam: If your wand is spitting more hot water than steam, it could be that your machine hasn’t fully reached steaming temperature. However, if it persists, it can also indicate a significant internal scale problem that is affecting the boiler’s performance.
By pinpointing the exact symptom, you can move on to the correct solution instead of guessing.
The first line of defense: deep cleaning
Never underestimate the power of a thorough clean. Milk residue is the primary enemy of a healthy steam wand. The proteins and fats in milk can get cooked onto and inside the wand tip, blocking the holes and reducing steam pressure to a pathetic hiss. This should always be your first troubleshooting step for performance issues.
Basic maintenance involves purging the wand (running steam for a second or two) and wiping it with a damp cloth immediately after every use. But for a deeper clean, follow these steps:
- Unplug and cool down: Always ensure your machine is off and cool to the touch before starting.
- Unscrew the steam tip: Most steam tips can be unscrewed by hand or with the help of a small wrench. Be gentle to avoid scratching the chrome.
- Soak the tip: Submerge the tip in a cup of hot water with a spoonful of a dedicated espresso machine cleaner. Avoid harsh chemicals. Let it soak for at least 20-30 minutes to dissolve hardened milk residue.
- Clear the holes: After soaking, use a paperclip or a dedicated steam wand cleaning tool to gently poke through each hole and ensure it’s completely clear of any blockages. You’d be surprised what can get stuck in there.
- Rinse and reassemble: Rinse the tip thoroughly with clean water, wipe down the wand’s threads, and screw it back on.
Once reassembled, turn the machine on and test the steam pressure. In many cases, this simple deep clean is all that’s needed to restore your steam wand’s power.
Tackling leaks by replacing seals and gaskets
If a good cleaning doesn’t fix your leak, it’s time to look at the wearable parts. The O-rings and gaskets inside your steam wand’s joints and valve are designed to create a tight seal, but they degrade over time due to constant heat and movement. Replacing them is a common and inexpensive repair.
While the exact process varies by machine model, the general steps are similar. Always consult your machine’s manual or look for a model-specific tutorial online before you begin.
A general guide to replacing a pivot joint O-ring:
- Safety first: Ensure the machine is unplugged and has completely cooled down. Any residual pressure or heat can be dangerous.
- Access the joint: You may need to remove an outer C-clip or use a wrench to carefully loosen the nut that holds the steam wand to the machine or valve body. Protect chrome finishes by wrapping the nut with a cloth before using a wrench.
- Remove the old seal: Once the wand is loose, you should be able to pull it away and expose the small rubber O-rings or flat gaskets. Use a small pick or screwdriver to carefully pry off the old, brittle seal.
- Clean and lubricate: Clean the groove where the seal sits. Apply a small amount of food-safe silicone lubricant to the new O-ring. This helps it slide into place without tearing and creates a better seal.
- Install and reassemble: Carefully fit the new O-ring into its groove and reassemble the wand, tightening the nut just until it’s snug. Over-tightening can damage the new seal.
After reassembling, turn on the machine, let it heat up, and test for leaks by running the steam and swiveling the wand.
| Symptom | Likely Cause | Primary Solution |
|---|---|---|
| Weak steam pressure | Clogged steam tip holes | Deep clean the steam tip |
| Dripping from the tip | Worn internal valve seal or scale buildup | Descale the machine; may require valve replacement if descaling fails |
| Leaking from the pivot joint | Worn or broken O-ring/gasket | Replace the O-ring/gasket in the joint |
| Sputtering or very wet steam | Internal limescale buildup | Descale the entire machine, focusing on the boiler and steam path |
Restoring steam power through descaling
If you’ve cleaned the tip and are still facing weak or sputtering steam, the blockage is likely internal. This is caused by limescale, a hard mineral deposit that builds up inside your machine’s boiler and pipes, especially if you use hard water. Descaling is the process of dissolving this buildup and is a crucial part of long-term machine maintenance.
It’s vital to use a descaling solution specifically designed for espresso machines. Common household remedies like vinegar can be too acidic for the brass and copper components in many machines and can damage internal seals. Always follow the instructions provided by your machine’s manufacturer.
The process generally involves:
- Preparing the solution: Mix the descaling powder or liquid with the specified amount of water in your machine’s water tank.
- Cycling the descaler: Run the machine to draw the solution into the boiler.
- Flushing through the steam wand: This is the critical step for your issue. Open the steam valve and run about half of the descaling solution through the steam wand in short bursts. This forces the solution through the entire steam path, dissolving the scale that’s choking off the pressure.
- Letting it sit: Turn the machine off and let the solution sit inside for the recommended time (usually about 20-30 minutes) to work its magic.
- Thoroughly rinsing: After the wait, flush the rest of the solution through the steam wand and group head. Then, empty and rinse the water tank, fill it with fresh water, and flush at least two full tanks through the system to remove any trace of the descaler.
A proper descaling can dramatically improve your steam power and overall machine health.
Most steam wand issues that plague home baristas are not a sign of a dying machine, but rather a call for routine maintenance. By following a logical troubleshooting process—diagnosing the specific symptom, performing a thorough cleaning, replacing simple wearable parts like gaskets, and periodically descaling—you can solve the vast majority of leaks and performance problems yourself. This not only saves you money on costly repairs but also deepens your understanding of how your espresso machine works. Regular care is the key to longevity and consistent performance. By investing a little time in cleaning and maintenance, you ensure your machine is always ready to deliver that perfect, cafe-quality steamed milk for your favorite coffee drinks for years to come.


 No products in the cart.