
Mastering the dragon: A guide to perfect microfoam on a La Pavoni steam wand
The La Pavoni lever machine is an icon of espresso culture, a beautiful piece of engineering that promises a direct, hands-on connection to your coffee. While celebrated for the rich shots it can pull, its steam wand often carries a reputation for being a bit of a dragon—powerful, yet tricky to tame. Many new owners find themselves creating bubbly foam instead of the silky, velvety microfoam required for beautiful latte art and a perfect mouthfeel. This guide is here to change that. We will walk you through the entire process, from understanding the unique nature of your La Pavoni to the precise techniques for stretching and texturing milk. Prepare to transform your milk steaming from a challenge into a craft.
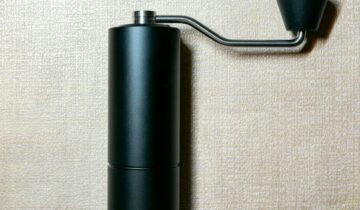
Understanding your La Pavoni’s steam power
Before you even pick up your milk pitcher, it’s crucial to understand the machine you’re working with. Unlike commercial machines with large, dedicated steam boilers, the La Pavoni operates with a single, small boiler. This design has two primary implications for steaming milk. First, your steam capacity is limited. You don’t have an endless supply, so efficiency is key. Second, La Pavonis tend to produce “wet steam,” which contains more hot water condensate compared to the “dry steam” of larger machines. This excess water can dilute your milk and hinder the creation of fine microfoam.
Boiler pressure is your most important ally. For most models, you want the pressure gauge to be hovering between 0.8 and 1.0 bar before you begin. If your machine is a pre-millennium model without a gauge, you’ll learn to listen for the hiss of the pressure release valve. Starting with low pressure is a recipe for failure, resulting in weakly heated milk with no texture. Finally, consider your steam wand tip. Many users find that switching from the stock 3-hole tip to a single-hole tip provides much greater control, concentrating the steam power into a more focused and manageable jet.
Preparation is everything: Before you steam
A successful outcome is often decided before the steam wand even touches the milk. Following a consistent preparation routine will eliminate variables and set you up for success. This preparation starts with the machine itself.
- A hot machine is a happy machine: Ensure your La Pavoni is fully up to temperature and pressure. Don’t rush this process. A properly heated machine will provide stronger, more consistent steam.
- Purge the wand, always: This is the single most important step to combat wet steam. Open the steam valve for a few seconds before placing the wand in the milk. You will see a spray of hot water exit the wand. Keep it open until the spray is replaced by a consistent, powerful jet of steam. This clears the condensed water from the wand, ensuring only drier steam textures your milk.
- Choose your tools wisely: Start with very cold milk, straight from the refrigerator. The colder the milk, the more time you have to work with it before it gets too hot. Whole milk is generally the easiest to learn on due to its fat content, which helps stabilize the foam. Your pitcher also matters. A stainless steel pitcher with a defined spout is ideal. As a rule of thumb, fill the pitcher to just below where the base of the spout begins. This gives the milk enough room to expand without overflowing.
The two-stage steaming technique
Microfoam is not created by simply blasting milk with steam. It’s a delicate process of incorporating air and then homogenizing it. We break this down into two distinct, yet seamless, phases: stretching and texturing.
Phase 1: Stretching (aeration)
The goal of this first phase is to introduce air into the milk, which creates the volume. It’s a short but critical part of the process.
- Submerge the steam wand tip just below the surface of the milk, positioning it slightly off-center to encourage a swirling motion.
- Open the steam valve fully and quickly. You are looking for a distinct “tsss-tsss-tsss” sound, like paper tearing. This is the sound of air being pulled into the milk.
- Keep the tip in this position for only a few seconds. For a latte, you need less expansion than for a traditional cappuccino. You should see the volume of milk increase by about 20-30%.
Phase 2: Texturing (the vortex)
Once you’ve introduced enough air, your job is to break those larger bubbles down into a uniform, silky microfoam. This is done by creating a vortex.
- After the initial stretch, lower the pitcher slightly to submerge the steam wand deeper into the milk. This should stop the hissing sound.
- Keep the wand off-center and angled to force the milk into a whirlpool or vortex. This motion is crucial. It folds the milk over on itself, breaking down the air bubbles and integrating them into a smooth, glossy texture.
- While the vortex is spinning, keep one hand on the side of the pitcher to monitor the temperature. When the pitcher becomes too hot to comfortably hold for more than a second (around 60-65°C or 140-150°F), immediately shut off the steam valve.
After steaming, immediately wipe the steam wand with a damp cloth and purge it again to clear any milk residue. Give the pitcher a firm tap on the counter to pop any remaining large bubbles and a gentle swirl to keep the texture uniform before pouring.
Troubleshooting common La Pavoni steaming issues
Even with perfect technique, you might run into issues. La Pavonis are temperamental, and small adjustments can make a big difference. Here are some common problems and how to fix them.
| Problem | Likely cause | Solution |
|---|---|---|
| Big, bubbly foam (like a bubble bath) | Too much air was introduced, or the wand was too close to the surface for too long. | Make the stretching phase shorter. Submerge the wand tip deeper into the milk as soon as you see the desired volume increase. |
| Hot, watery milk with no foam | Not enough air was introduced. The wand was likely buried too deep from the very beginning. | Start with the wand tip just barely submerged to create that “tearing” sound. Ensure you are stretching the milk before creating the vortex. |
| Steam pressure dies mid-way | The machine was not at full pressure, or the steaming process took too long for the small boiler. | Wait for the pressure gauge to reach its peak (0.8-1.0 bar). Work quickly and efficiently. If the problem persists, consider steaming less milk at a time. |
| Milk screams or shrieks | The wand is too deep or positioned flat against the bottom or side of the pitcher, preventing a vortex. | Adjust the angle and position of the wand to be off-center. Find the “sweet spot” that gets the milk spinning quietly. |
In conclusion, achieving beautiful microfoam with a La Pavoni is a dance between preparation, technique, and understanding your machine’s unique character. It begins with respecting its small boiler by ensuring the machine is fully heated and purging the wand to get potent, dry steam. The core of the process lies in the two-stage technique: a brief, controlled stretching phase to introduce air, followed by a longer texturing phase to create a silky, swirling vortex. Remember to use cold milk in a proper pitcher and stop before the milk gets too hot. While challenges like bubbly foam or weak steam can be frustrating, they are solvable with practice. Taming the La Pavoni steam wand is a journey, but the reward—a perfect, self-made cappuccino—is well worth the effort.

 No products in the cart.