E61 flow control: How to manage pressure profiling at home
The quest for the perfect espresso shot at home has led countless enthusiasts down a rabbit hole of grinders, tampers, and temperature-stable machines. For many, the journey leads to a machine with the iconic E61 group head, a testament to classic espresso engineering. But what happens when you’ve mastered the basics and want to unlock the next level of flavor extraction? The answer often lies in flow control. This modification transforms the traditional E61 experience, giving you the power of pressure profiling—a technique once reserved for high-end commercial machines. This article will dive into what E61 flow control is, the incredible benefits it offers your coffee, and how you can start manipulating pressure profiles to pull better, more nuanced espresso shots right in your own kitchen.
What is E61 flow control?
At its heart, an E61 group head is known for its passive pre-infusion. When you lift the lever, a small chamber fills with water at line or pump pressure, which gently wets the coffee puck before the full nine bars of pressure are applied. This is a great feature, but it’s not adjustable. E61 flow control is a modification that puts you in the driver’s seat.
Typically, a flow control device is a kit that replaces the standard “mushroom valve” at the top of the group head. It adds an external paddle or knob connected to a needle valve inside. By turning this control, you can precisely restrict or increase the rate at which water flows to your coffee. Why does this matter? Because flow rate is directly linked to pressure. A slow flow of water will cause pressure to build very gradually on the puck, while a wide-open flow will cause it to ramp up quickly.
This simple mechanism allows you to manually “profile” the pressure throughout the entire extraction. Instead of a single, fixed pressure, you can create a dynamic curve: a long, low-pressure pre-infusion, a ramp up to full pressure, and a gentle ramp down at the end. It effectively gives a classic E61 machine the capabilities of a much more advanced and expensive piece of equipment.
The benefits of pressure profiling your espresso
So, you can now control the flow and pressure. What does that actually do for the coffee in your cup? The benefits are significant and can fundamentally change how you approach different types of beans.
- Superior pre-infusion: A long, gentle pre-infusion at 2-3 bars of pressure is one of the biggest advantages. This slow saturation of the coffee puck minimizes the risk of channeling—where water finds a weak spot and gushes through, leading to uneven extraction. The result is a more balanced shot with less bitterness and astringency.
- Unlocking light roasts: Lightly roasted coffee beans are notoriously difficult to extract. They are denser and less soluble than their darker counterparts. With flow control, you can use an extended pre-infusion to fully saturate the puck and then apply pressure to extract their delicate floral and fruity notes without the sourness that often comes from under-extraction.
- Taming dark roasts: Dark roasts are more soluble and can easily become bitter if over-extracted. A declining pressure profile, similar to a classic spring-lever machine, is perfect for them. By starting at 9 bars and gradually reducing the pressure towards the end of the shot, you can extract the rich, sweet, chocolatey flavors while leaving the bitter compounds behind.
- Consistency through control: While it adds a new variable to master, once you find a profile that works for a specific coffee, you can replicate it shot after shot. This level of control allows you to fine-tune your recipe beyond just grind size and dose, opening up a new dimension of experimentation.
Getting started with flow profiling
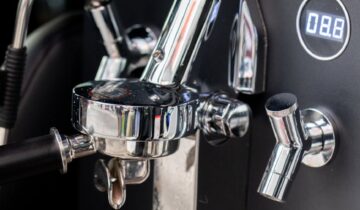
Using a flow control device is more intuitive than it sounds, especially if you have a group head pressure gauge, which is an essential companion to the flow control device itself. The gauge gives you real-time feedback on what’s happening at the puck. Here is a walkthrough of a basic, versatile profile you can try.
- Low-pressure pre-infusion: Start with the flow control paddle or knob just slightly open (e.g., a quarter turn from closed). Lift the brew lever. Watch the pressure gauge slowly climb to 2-4 bars. Hold it here for about 8-12 seconds, or until you see the first few drops of espresso fall from the portafilter. This phase is all about gently saturating the coffee.
- Ramp to full pressure: Once the puck is saturated, fully open the flow control valve. The pressure will quickly rise to your machine’s maximum (typically 9 bars). This is the main extraction phase where most of the coffee’s body and flavor are extracted.
- Tapering down: As the shot approaches your desired yield and starts to look a bit blond, begin to slowly close the valve again. Aim to reduce the pressure to around 5-6 bars for the last few seconds of the shot. This tapering-off phase helps to smooth out the flavor and reduce any end-of-shot bitterness.
This is just a starting point. The real fun is in experimentation! Below are a few sample profiles to explore.
| Profile Name | Goal | Pre-infusion Phase | Extraction Phase | Tapering Phase |
|---|---|---|---|---|
| Classic Gentle | A balanced, all-around shot for medium roasts. | 5-8 seconds at 3 bar. | Ramp up to 9 bar until shot is ~75% complete. | Gradually decrease to 6 bar for the final 5-7 seconds. |
| Light Roast “Slayer” | Maximize sweetness and acidity in light roasts. | 15-20 seconds at 2-3 bar, until first drops appear. | Full 9 bar until target yield is near. | Optional sharp cut-off or a quick taper. |
| Lever Style Decline | Rich body and reduced bitterness for dark roasts. | Quick 4-second pre-infusion at 4 bar. | Hit 9 bar for 5 seconds, then immediately begin a slow, steady decline. | End the shot at around 5 bar. |
Is E61 flow control right for you?
While flow control is a powerful tool, it’s not for everyone. It adds a layer of complexity to the espresso-making process that can be overwhelming for beginners who are still trying to master the fundamentals of grind size, distribution, and tamping. If you are constantly battling channeling or inconsistent shots, it’s best to solve those issues before adding another variable.
However, if you’re an espresso enthusiast who feels you’ve hit the ceiling with your current E61 machine, flow control could be the perfect upgrade. It’s for the home barista who loves to tinker, who wants to get the absolute best out of every bean, and who isn’t afraid to pull a few bad shots in the name of experimentation. If you find yourself drawn to specialty light roasts or simply want the ultimate control over your extraction, then investing in a flow control kit can breathe new life into your machine and your coffee ritual.
Conclusion
E61 flow control is more than just a fancy accessory; it’s a transformative upgrade that bridges the gap between classic home equipment and modern commercial technology. By giving you direct, manual control over the flow of water, it allows you to perform sophisticated pressure profiling right on your kitchen counter. This unlocks the potential to tame finicky light roasts, sweeten dark roasts, and eliminate channeling for a more balanced and delicious extraction every time. While it introduces a learning curve, the rewards are immense for the dedicated home barista. For those looking to push the boundaries of flavor and elevate their craft, mastering flow control turns the venerable E61 group head into a versatile and endlessly fascinating tool for achieving espresso perfection.


 No products in the cart.