
Preserving the perfect crema: A guide to cappuccino pouring techniques
A truly exceptional cappuccino is a feast for the senses, and its visual appeal begins with a rich, tiger-striped crema. This reddish-brown crown isn’t just for show; it holds the most intense aromas and nuanced flavors of the espresso shot. However, for many home baristas, the moment of truth, the pour, is where it all goes wrong. An aggressive or misguided pour can instantly shatter this delicate layer, resulting in a pale, homogenous drink that lacks character. This article is your definitive guide to mastering the pour. We will explore the science behind crema and microfoam, detail the essential preparation steps, and provide a step-by-step walkthrough of the pouring technique that separates amateur attempts from professional, crema-preserving results.
Understanding the foundation: Crema and microfoam
Before you can even think about pouring, you must understand the two key players in your cup: the espresso’s crema and the milk’s microfoam. They are not adversaries; they are partners in creating the perfect cappuccino. The crema is a beautiful emulsion of coffee oils, sugars, and proteins, with carbon dioxide gas trapped in tiny bubbles. A thick, stable crema is the first sign of a well-extracted espresso shot. It acts as a lid, trapping the volatile aromatic compounds that give coffee its incredible scent and contributing a bittersweet complexity to the first sip.
On the other hand, microfoam is the goal of milk steaming. It’s not the stiff, dry, bubbly foam you might find scooped from a machine. True microfoam is velvety, glossy, and liquid, like wet paint. It’s created by introducing a controlled amount of air into the milk (stretching) and then spinning it in a vortex to break down any large bubbles and integrate the air seamlessly. The quality of this foam is non-negotiable. If it’s too thin, it will mix with the crema and wash it out. If it’s too thick and stiff, it will sit on top like a blob, completely covering the beautiful coffee below. The perfect microfoam is dense enough to sit on the espresso but fluid enough to be poured with precision.
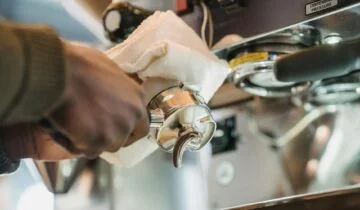
Preparing your canvas: The espresso shot and milk
The perfect pour is impossible without the perfect ingredients. Your technique can be flawless, but if your espresso or milk is subpar, the crema will be lost. It all starts with the espresso shot. Ensure you are using fresh beans and a calibrated grinder. A shot that pulls too fast will produce a thin, pale crema that dissipates in seconds. A shot that chokes the machine will be bitter with a spotty, dark crema. Aim for that classic “honey-like” flow that produces a rich, reddish-brown crema that coats the back of a spoon. Once extracted, give the espresso cup a gentle swirl to create an even canvas.
Equally important is your milk preparation. Follow these key steps for ideal microfoam:
- Use cold milk and a cold pitcher. This gives you more time to texturize the milk before it gets too hot.
- Aerate properly. Submerge the steam wand tip just below the surface of the milk. You should hear a gentle “tss-tss-tss” sound. This phase should be brief, typically only until the milk reaches body temperature (around 100°F or 37°C).
- Create a vortex. After aeration, submerge the wand deeper and position it off-center to get the milk spinning. This vortex breaks down larger bubbles and integrates the air, creating that silky, uniform texture.
- Watch the temperature. Stop steaming when the pitcher is hot to the touch, around 140-150°F (60-65°C). Overheating destroys the milk’s sweetness and texture.
Immediately after steaming, groom your milk by swirling the pitcher to polish the foam and tapping it firmly on the counter to pop any remaining surface bubbles.
The pouring technique: A step-by-step guide
With a perfect espresso shot and silky microfoam ready, it’s time for the main event. This technique is often called the “high-to-low” pour and is designed specifically to lift the crema rather than destroy it.
Step 1: The high pour. Start by tilting your cappuccino cup at a slight angle. Begin pouring the steamed milk from a height of about 4 to 5 inches above the cup. Aim for the center of the espresso. This height gives the milk enough velocity to dive beneath the layer of crema. As the milk fills the cup from below, it will gently lift the intact crema to the surface. Avoid pouring too slowly, as this can cause the foam and milk to separate in the pitcher.
Step 2: Integrate and level. Continue this high pour until the cup is about two-thirds full. As you pour, slowly begin to level the cup. At this stage, the surface of the drink should still be a rich brown, with the crema floating beautifully on top of the mixture of milk and espresso.
Step 3: The low pour. This is where you form the iconic white cap. Smoothly bring the spout of your milk pitcher down so it is very close to the surface of the drink, almost touching it. Increase your rate of pour slightly. Now, the white microfoam will begin to flow out and sit on top of the liquid. You can pour into the center to create a white dot or move the pitcher to create a simple heart or rosetta. The key is to leave a distinct ring of the original crema visible around the edge of the cup, a hallmark of a well-made cappuccino.
Common mistakes and troubleshooting
Achieving the perfect pour takes practice. It’s normal to encounter a few issues along the way. Understanding why they happen is the key to correcting them. Many beginners pour too aggressively or start too close to the cup, which shatters the delicate crema. Conversely, being too timid can result in a washed-out drink. Consistency in your espresso extraction and milk steaming will solve most problems before they even reach the pour.
Here is a table of common issues and how to fix them:
| Problem | Likely Cause | Solution |
| Crema is completely destroyed or washed out | Pouring too fast, too aggressively, or starting the pour too low. | Start your pour from a height of 4-5 inches with a steady, gentle stream to allow milk to sink under the crema. |
| Large, “soapy” bubbles on the surface | Over-aerated milk during the stretching phase; not grooming the milk before pouring. | Shorten the aeration time. Always swirl the pitcher and tap it on the counter to pop bubbles before you pour. |
| Foam separates into a thick, stiff cap | Milk sat for too long after steaming, or it was overheated and over-aerated. | Pour immediately after steaming. Swirl the milk vigorously right before you start to pour to reintegrate it. |
| The drink is pale with no crema visible | The initial pour was too slow, or the microfoam was too thin and watery. | Use a confident, steady stream for the high pour. Focus on creating a better quality microfoam with a “wet paint” consistency. |
Remember, every variable matters. From the freshness of your coffee beans to the temperature of your milk, each element plays a role in the final outcome.
Conclusion: The art and science of the pour
Mastering the cappuccino pour is a journey that blends art with science. It’s about more than just combining coffee and milk; it’s a technique dedicated to enhancing the entire sensory experience. As we’ve seen, preserving the crema begins long before the pour itself. It starts with a perfectly extracted espresso shot and relies heavily on creating silky, perfectly textured microfoam. The high-to-low pouring method is the critical final step, a deliberate motion designed to lift and display the crema, not obliterate it. By starting high and finishing low, you allow the fundamental qualities of the espresso to shine through, creating a drink that is as beautiful to look at as it is delicious to drink. Practice, patience, and attention to detail will transform your homemade cappuccinos into café-quality creations.


 No products in the cart.