
Welcome to the quest for the perfect latte art swirl, the velvety cappuccino, and the silky-smooth flat white, all made at home. Many coffee lovers invest in a fully automatic espresso machine for its convenience, dreaming of cafe-quality drinks at the push of a button. However, they often find the reality of the automatic steam wand falls short, producing bubbly, stiff foam instead of the coveted liquid-paint texture of true microfoam. This isn’t a failure of your machine; it’s a gap in knowledge. This article is your guide to bridging that gap. We will delve into the essential techniques and insider tips that will transform your automatic frother’s performance, helping you understand your tools, master your ingredients, and finally achieve that luscious, pourable microfoam you’ve been craving.
The essential starting point: Milk and temperature
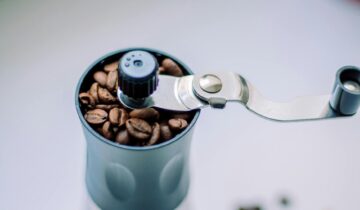
Before you even touch your machine, the battle for great microfoam is half won or lost with your ingredients. The single most important factor is your milk. For dairy, fresh, cold, whole milk is the undisputed champion. The magic lies in its protein and fat content. Proteins create the foam’s structure by forming bubbles, while fat contributes to a rich flavor and a silky, elastic texture that’s harder to over-stretch. Skim milk can create a large volume of stiff, dry foam, but it lacks the velvety mouthfeel and is unforgiving. Low-fat milk is a middle ground but still pales in comparison to whole.
For non-dairy drinkers, barista-edition oat milk is typically the best alternative, as it’s formulated with added fats and emulsifiers to mimic the steaming properties of dairy. Regardless of your choice, two rules are non-negotiable:
- It must be fresh. As milk ages, its proteins begin to break down, losing their ability to create a stable foam.
- It must be cold. Start with milk straight from the refrigerator, and use a chilled stainless steel pitcher if possible. Cold milk gives the steam wand more time to introduce air and create a vortex before the milk reaches its ideal temperature (around 140-150°F or 60-65°C). Starting with warmer milk shortens this window dramatically, often resulting in under-aerated, hot milk.
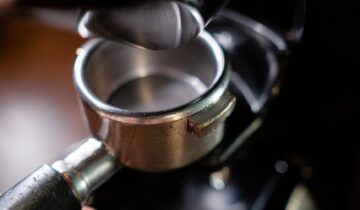
Understanding and working with your automatic wand
Unlike the manual wands used by baristas, which offer complete control over air incorporation and temperature, a fully automatic wand is designed for simplicity. It typically has one or more small holes on the side of the nozzle. One of these is an air intake hole that automatically draws in air while the machine simultaneously injects steam. The machine steams for a pre-programmed duration or until a temperature sensor is triggered. Your ability to create true microfoam depends on working with this system, not against it.
The key is positioning. Don’t just stick the wand in the middle of the pitcher and press go. For better results, start with the wand’s tip positioned just below the surface of the milk, slightly off-center. This position encourages the milk to spin, creating a whirlpool or vortex. This vortex is crucial; it breaks down larger bubbles into smaller ones and folds them evenly throughout the milk, creating that homogenous, glossy texture. If the wand is too deep, it will only heat the milk. If it’s too high, it will create large, soapy bubbles that sit on top. Finding that sweet spot is the first step to mastering your machine.
Techniques for improving texture and control
Even with an automated process, you can influence the outcome. The most effective technique is a subtle manipulation of the pitcher at the beginning of the cycle. When you press the steam button, keep the wand tip just at the surface for the first 3-5 seconds. You should hear a gentle “tsss-tsss” or ripping paper sound. This is the aeration phase, where you are actively incorporating air.
Once the milk has expanded slightly in volume (by about 20-30%), gently raise the pitcher to submerge the wand’s air hole about a centimeter deeper into the milk. This stops the introduction of new air and transitions you into the texturing phase. Now, the goal is to use the steam’s power to spin the milk in that vortex we discussed. This motion stretches the existing bubbles, breaking them down and integrating them fully. Focus on maintaining a smooth, spinning vortex for the remainder of the machine’s cycle. This two-stage approach—a short aeration phase followed by a longer texturing phase—is a simplified version of what baristas do manually, and it can dramatically improve your results.
The secret weapon: Cleaning and maintenance
You can have the best milk and the perfect technique, but if your steam wand is dirty, you will never get good microfoam. This is the most common point of failure. That tiny air intake hole on the side of the nozzle is easily clogged by dried milk residue. When it’s blocked, the wand can’t draw in air, and all it will do is heat your milk. No air means no foam, period.
Creating a strict cleaning habit is non-negotiable:
- Purge before steaming. Briefly run the steam for a second into a drip tray or cloth to clear out any condensed water.
- Wipe immediately. As soon as you finish steaming, wipe the wand thoroughly with a dedicated damp cloth. Milk proteins cook onto hot metal instantly, so do not wait.
- Purge after wiping. Run the steam again for another second to blow out any milk that may have entered the tip.
- Perform regular deep cleans. Many wands have a tip that can be unscrewed. Periodically remove it and soak it in hot water. Use a pin or a dedicated tool to ensure every hole is completely clear.
Here is a quick troubleshooting guide for common issues related to maintenance and technique:
| Problem | Likely Cause | Solution |
|---|---|---|
| Big, soapy bubbles | Too much aeration; wand tip was too high for too long. | Submerge the wand tip sooner after the initial stretch. Swirl the pitcher and tap it on the counter to pop large bubbles. |
| Hot milk with no foam | Blocked air intake hole or milk was not cold enough. | Thoroughly clean the steam wand tip, ensuring all holes are clear. Use milk directly from the fridge. |
| Foam separates quickly into liquid and stiff froth | Milk was not fresh, or the vortex was not strong enough to integrate the foam. | Use fresher milk. Adjust pitcher position to create a better vortex during the texturing phase. |
By making meticulous cleaning a part of your routine, you ensure your machine is always ready to perform at its best.
Achieving silky microfoam with a fully automatic steam wand is not a myth; it’s a skill born from understanding your equipment and ingredients. As we’ve explored, success hinges on a few core principles. It begins with the foundation of using fresh, cold, whole milk (or a quality barista alternative) to provide the necessary proteins and fats. It continues with technique—mastering the initial aeration phase and then creating a spinning vortex to texturize the milk into a uniform, glossy liquid. Finally, and perhaps most critically, it relies on unwavering commitment to cleanliness. A clogged wand is the number one enemy of good foam. By combining these elements—great ingredients, smart technique, and rigorous maintenance—you can overcome the limitations of automation and elevate your home coffee experience from merely convenient to genuinely exceptional.

 No products in the cart.