Pulling that perfect, syrupy shot of espresso from your Gaggia machine is a moment of pure bliss for any coffee lover. But what happens when that beautiful, honey-like flow turns into a frantic, watery mess that spurts all over your counter? You’ve just experienced channeling, the number one enemy of a great espresso. This frustrating issue occurs when water finds a path of least resistance through your coffee puck, leading to an uneven extraction that tastes both sour and bitter. It’s a common hurdle for Gaggia owners, but fear not. This guide will walk you through the most common causes of channeling and provide you with the concrete steps needed to fix them, transforming your inconsistent shots into consistently delicious espresso.
Understanding the enemy: What is channeling?
At its core, espresso extraction is the process of forcing hot, pressurized water through a tightly packed bed of finely ground coffee. The goal is to have this water flow through the entire puck evenly, extracting all the delicious flavors uniformly. Channeling is what happens when this process goes wrong. Instead of an even flow, the water finds or creates small channels—cracks or areas of lower density—and rushes through them.
You can spot channeling in a few ways:
- Visual cues: If you use a bottomless portafilter, you’ll see jets or “spritzers” of espresso shooting out from the basket. After extraction, you might find tiny holes or cracks on the surface of your spent puck.
- Taste: The resulting shot will be a mess of flavors. The parts of the puck that the water bypassed will be under-extracted, lending a sharp, sour taste. The areas around the channels, which were hit with too much water, will be over-extracted, creating bitterness and astringency.
Gaggia machines, particularly stock models like the Classic Pro, are often set to a high brew pressure (sometimes over 12 bars). This high pressure can easily exploit any small flaw in your puck preparation, making the fight against channeling even more critical for Gaggia users.
The foundation: Dialing in your grind and dose
Before you can even think about tamping, you must start with the right raw materials: your coffee grounds. A perfect puck can’t be made from an inconsistent grind or an incorrect dose. This is the first and most fundamental area to troubleshoot.
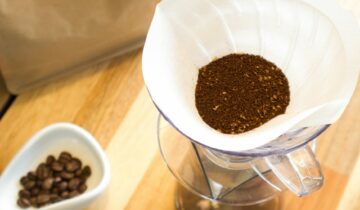
First, consider your grind size. If your grind is too coarse, there will be large gaps between the coffee particles, creating superhighways for water to flow through. This results in a very fast, under-extracted, and sour shot. Conversely, if your grind is too fine, it can lead to two problems. It might choke the machine entirely, or, more commonly, it can create dense clumps that are difficult to break up. These clumps become hard spots in the puck that resist water, forcing it to find a channel around them. Your target is a consistent, fine grind, often compared to the texture of table salt, that allows for a steady extraction over 25-30 seconds.
Equally important is a consistent dose. Use a coffee scale to weigh your beans every single time. The standard double basket in a Gaggia portafilter typically performs best with a dose between 16 and 18 grams. If you under-dose, you leave too much headspace between the puck and the shower screen. When the pump engages, the water will hit the puck with force, disrupting the surface before it’s fully saturated, creating weak spots. Over-dosing can be just as bad, as the puck might touch the shower screen, causing it to fracture when you lock in the portafilter.
Puck prep perfection: Distribution and tamping
This is where the magic happens. Once you have the correct dose of properly ground coffee, your next job is to arrange it into a perfectly uniform and level bed. This stage, known as puck prep, is the most crucial battleground in the war against channeling.
Distribution is the process of evening out the coffee grounds in the basket to eliminate any variations in density. Simply grinding into the portafilter creates a mound, leaving the center dense and the edges sparse. The single most effective technique to combat this is the Weiss Distribution Technique (WDT). This involves using a tool with very fine needles (like acupuncture needles) to stir the grounds in a circular and crisscross pattern. This action breaks up any clumps and evenly distributes the coffee particles, creating a fluffy, uniform bed. For Gaggia users, adopting WDT is often the turning point from frustrating shots to fantastic ones.
After distributing, you need a good tamp. The goal of tamping isn’t to press as hard as you can, but to apply firm, even pressure to create a level and compact surface. A crooked or tilted tamp is a guaranteed invitation for channeling, as water will naturally flow to the lower, less compressed side. Ensure your elbow is at a 90-degree angle to the counter and press straight down. Avoid the temptation to “polish” or spin the tamper on the puck, as this can disturb the surface. A calibrated, self-leveling tamper can be a great investment for ensuring consistency.
Troubleshooting your Gaggia puck
Even with great technique, you may still run into issues. Puck diagnosis is a key skill. By looking at the symptoms of your shot and the state of your spent puck, you can identify the root cause of your channeling and make targeted adjustments. Think of it as being a detective for your espresso. A bottomless portafilter is your best tool here, as it gives you a direct window into the extraction process. The table below outlines some common problems and their most likely causes and solutions.
| Symptom | Potential Cause | Solution |
|---|---|---|
| Spurting from one side of the basket | Uneven tamp or poor distribution | Focus on a level tamp; Use a WDT tool to distribute grounds more evenly. |
| Shot runs very fast and tastes sour | Grind is too coarse, causing general channeling | Grind finer until your shot time is in the 25-30 second range. |
| A small, visible hole in the spent puck | A major channel formed due to a clump or void | Improve WDT to break up all clumps before tamping. |
| A “donut extraction” (flows from edges first) | Center of the puck is too dense compared to the edges | Ensure your WDT and distribution technique spreads grounds evenly across the entire basket. |
| The entire shot blondes very early | Grind is too coarse, dose is too low, or widespread micro-channeling | Grind finer, check your dose with a scale, and perfect your puck prep. |
For those looking to go even further, consider upgrading your machine. A popular modification for Gaggia machines is the OPV (Over-Pressure Valve) spring mod, which lowers the brew pressure to the industry-standard 9 bars. This makes the machine much more forgiving of slight imperfections in puck prep. Additionally, upgrading to a precision basket from a brand like IMS can promote more even water flow thanks to its more precisely drilled holes.
In conclusion, eliminating channeling in your Gaggia espresso is an achievable goal that revolves around one central concept: consistency. From the very beginning of the process, every step must be done with intention to create a uniform coffee puck. This starts with a consistent dose weighed on a scale and a suitable grind size from a quality grinder. The most critical intervention, however, lies in meticulous puck prep. Mastering distribution, especially with a WDT tool, to remove clumps and even out density, followed by a firm and perfectly level tamp, will solve the vast majority of channeling issues. By treating your puck preparation as a deliberate craft rather than a rushed routine, you will take control of your extraction and unlock the true potential of your Gaggia machine.

 No products in the cart.