The pursuit of the perfect espresso shot is a journey familiar to every Gaggia owner. These capable machines offer a gateway to cafe-quality coffee at home, but they demand a certain level of skill and understanding from the barista. When your shots are sour, bitter, or pull too quickly, it’s easy to get frustrated. This is where a fundamental, yet transformative, tool comes into play: the bottomless portafilter. More than just a stylish accessory, it is the single most effective diagnostic tool for understanding what’s happening inside your basket during extraction. This article will guide you through using a bottomless portafilter to diagnose and fix common extraction issues with your Gaggia machine, turning guesswork into a clear, actionable process for improving your espresso.
Unveiling your extraction: The power of going bottomless
A standard portafilter, with its spouts, hides the entire extraction process. The espresso streams combine and exit, masking any underlying problems. You might taste that a shot is bad, but you won’t know why. A bottomless portafilter, also known as a naked portafilter, removes the spouts and bottom section, exposing the entire surface of the filter basket. This provides a raw, unfiltered view of how water is passing through your coffee puck.
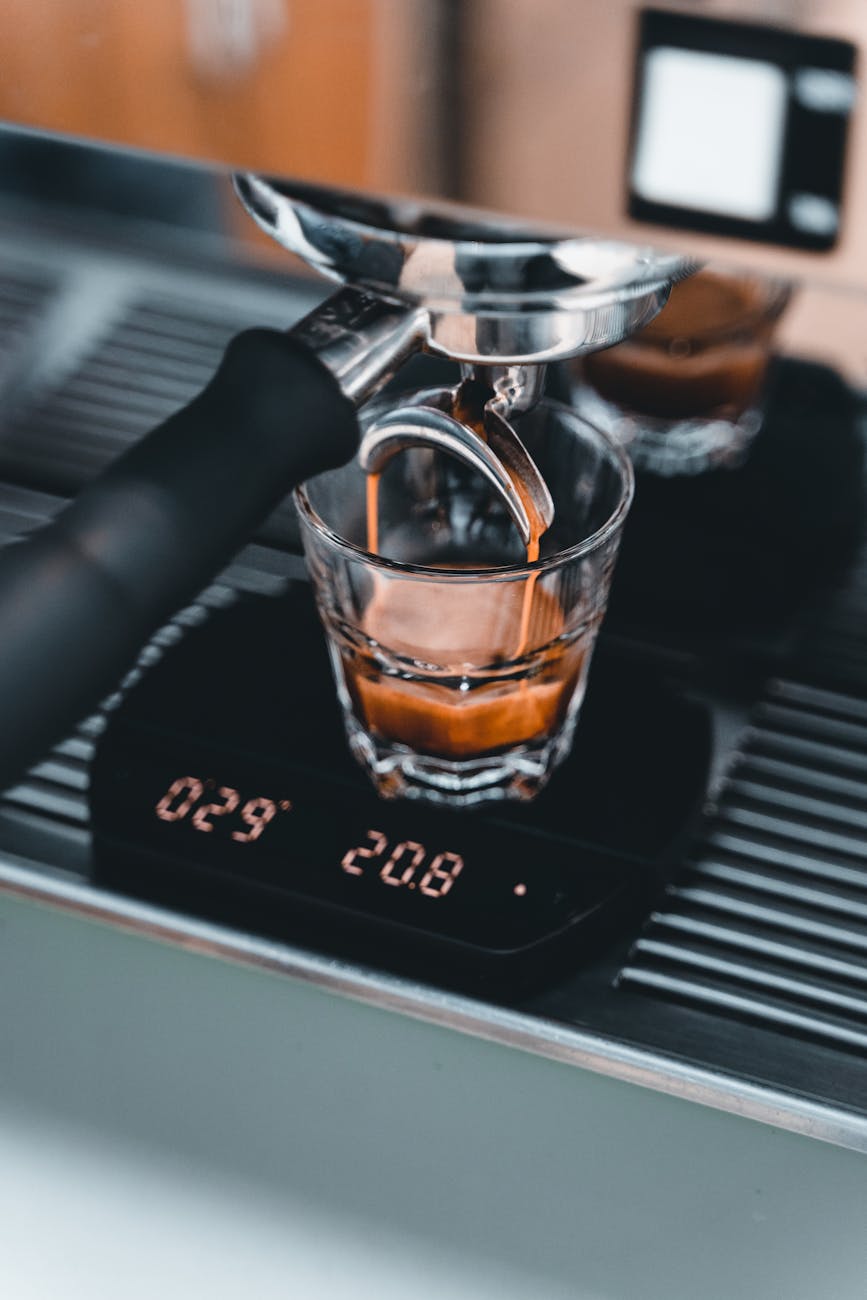
For a Gaggia user, this visual feedback is invaluable. You can see the very first drops of espresso form, watch them coalesce into a single, syrupy stream, and observe the color changes throughout the shot. This window into the extraction allows you to instantly identify issues that would otherwise be invisible. Is the flow starting from one side? Are there tiny jets of water spraying out? Is the stream blonding too early? Seeing these problems in real-time is the first and most critical step toward brewing consistently delicious espresso.
Reading the signs: Common espresso faults revealed
Once you pull your first shot with a bottomless portafilter, you’ll be looking for a beautiful, even extraction. Ideally, you’ll see small beads of espresso form across the entire basket, which then come together into a single, stable stream in the center. The flow should look viscous, like warm honey, and be a rich, dark brown or reddish-brown color (crema). Any deviation from this ideal points to a specific problem. The most common issue you’ll encounter is channeling. This occurs when water finds a path of least resistance through the coffee puck, leading to localized over-extraction (creating bitterness) and under-extraction elsewhere (creating sourness). This often manifests as aggressive, watery spurts from the basket.
Another issue is an uneven extraction, where one side of the basket starts flowing long before the other. This indicates an unlevel bed of coffee. Observing “dead spots,” or areas where no coffee flows, shows that the coffee is too compacted or fine in that area, preventing water from passing through. Here’s a quick guide to what you might see:
| Visual symptom | What it means | Primary cause |
|---|---|---|
| Violent, watery jets (channeling) | Water is bypassing the puck instead of extracting evenly. | Clumpy grounds, an uneven tamp, or a cracked puck. |
| Flow starts heavily on one side | The coffee bed is not level. | An unlevel tamp or uneven distribution of grounds. |
| Multiple streams that don’t combine | Multiple channels or an inconsistent grind. | Poor distribution, grind quality, or dosing issues. |
| Shot turns pale blonde very quickly | The puck has been fully extracted too soon. | Grind is too coarse, dose is too low, or severe channeling. |
Mastering your puck prep: The root of the solution
The vast majority of issues revealed by a bottomless portafilter are not problems with your Gaggia machine, but rather with your “puck prep” – the process of preparing the ground coffee in the basket. Achieving a flawless extraction starts here. The goal is to create a coffee bed of uniform density, so water flows through it evenly.
Here are the key steps to perfect your puck prep:
- Grind consistency: Use a quality burr grinder. An inconsistent grind with both boulders and fines will always encourage channeling. For your Gaggia, you’ll need to dial in a fine, espresso-range grind.
- Dose accurately: Use a coffee scale to weigh your dose. A consistent dose is a critical variable to control. An 18-gram dose in a matching 18-gram basket is a great starting point.
- Distribute the grounds: This is arguably the most important step. When you grind into your portafilter, the coffee forms a mound. Simply tamping this will create a denser section in the middle. Use a Weiss Distribution Technique (WDT) tool—a small tool with fine needles—to break up clumps and evenly distribute the grounds.
- Level and tamp: After distributing, gently tap the portafilter on the counter to settle the grounds into a flat bed. Then, use a calibrated tamper to apply firm, level pressure. The goal is not to tamp as hard as you can, but to tamp consistently and ensure the tamper is perfectly parallel to the basket rim.
By focusing on these four steps, you will eliminate the causes of channeling and uneven flow, transforming those messy shots into the beautiful, unified streams you’re looking for.
Beyond the puck: Advanced Gaggia diagnostics
What if you’ve perfected your puck prep but still face issues? While less common, the bottomless portafilter can help hint at machine-related variables, particularly with a machine like the Gaggia Classic. One major factor is brew temperature. Gaggia machines have a wide temperature swing. If your extraction starts with sputtering or is excessively foamy, your water might be too hot (close to boiling). This is a sign you need to learn to “temperature surf” your machine to pull the shot at a more stable and appropriate temperature.
Another factor can be brew pressure. Stock Gaggia machines often run at a very high pressure (12-15 bars), which can be unforgiving and promote channeling. If even your best puck prep results in small channels, it might be a sign that the pressure is too high. This is why many Gaggia enthusiasts perform an “OPV mod” to lower the pressure to the industry-standard 9 bars, which makes for a softer, more manageable extraction that is easier to dial in and less prone to channeling.
In conclusion, the bottomless portafilter is not merely an accessory but an essential diagnostic instrument for any serious Gaggia user. It transforms the abstract process of dialing in a shot into a tangible, visual exercise. By exposing the bottom of the basket, it provides immediate feedback on the quality of your puck preparation and the evenness of your extraction. It allows you to identify problems like channeling, uneven flow, and dead spots at a glance. By understanding what these visual cues mean, you can systematically address the root causes, which almost always lie in your grinding, dosing, distributing, and tamping technique. Mastering this tool empowers you to move beyond frustrating guesswork and begin a journey of intentional, consistent improvement toward exceptional espresso.
 No products in the cart.