The art of making great espresso at home or in a small cafe is a rewarding pursuit. However, the true test of a barista’s skill comes when the demand shifts from a single, perfectly crafted cappuccino to a round of drinks for guests or customers. Suddenly, the serene ritual can become a frantic race against time, leading to inconsistent shots and lukewarm milk. This is where a streamlined workflow becomes your most valuable tool. Mastering the sequence of preparation, extraction, and cleaning for back-to-back drinks is not about rushing; it’s about creating a smooth, efficient, and repeatable process. This article will guide you through optimizing your workflow, transforming chaos into a calm, controlled, and impressive coffee-making performance.
The mise en place of espresso: Setting up your station for success
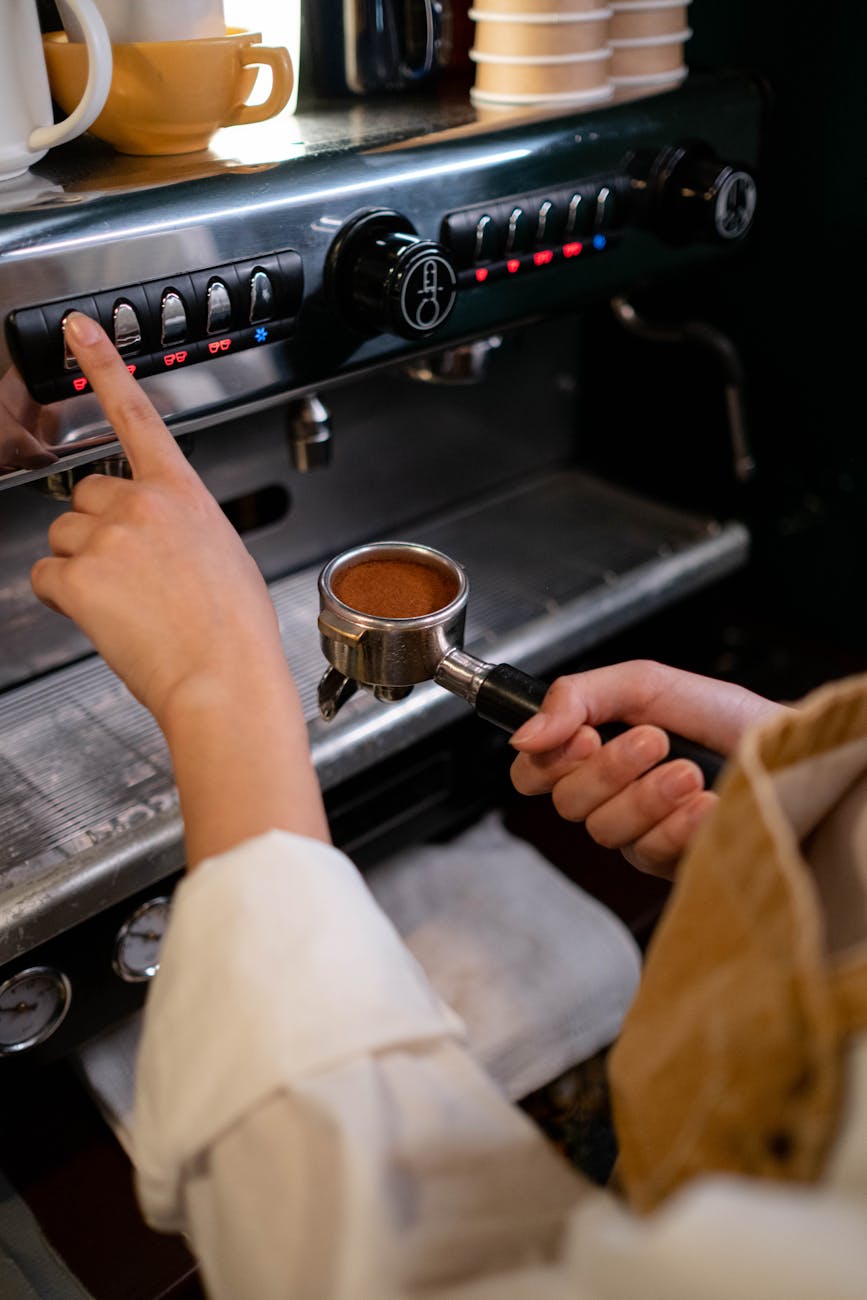
Before the first gram of coffee is ground, the battle for efficiency is won or lost in your setup. The French culinary term mise en place, meaning “everything in its place,” is the foundation of a smooth espresso workflow. A disorganized station forces you to stop and search for tools, breaking your rhythm and adding precious seconds to each drink. The goal is to create an ergonomic layout where every necessary item is within an arm’s reach, minimizing movement and decision-making.
Start by arranging your core equipment in a logical “espresso triangle”: your grinder, espresso machine, and knock box. Ideally, you should be able to move from one to the next with a simple pivot. Keep your essential tools organized and ready for action:
- Portafilter: Always keep it locked into the pre-heated group head.
- Tamper and distribution tool (WDT): Place them on a tamping mat right next to your grinder.
- Scale: Position it where you can easily weigh your portafilter after grinding and your cup during extraction.
- Milk pitchers: Have clean, cold pitchers ready. If making multiple milk drinks, have one for each.
- Cloths: Designate at least two—one damp cloth for wiping the portafilter basket and a separate, dry cloth exclusively for the steam wand.
Finally, prepare your ingredients. Ensure your bean hopper is full, and your milk is easily accessible in the fridge. Pre-heating your serving cups with hot water from the machine not only keeps the drink hot but can also be integrated into the initial machine warm-up routine.
The rhythm of extraction: Mastering the shot-to-shot cycle
With your station prepared, the next step is to develop a consistent rhythm for pulling consecutive shots. This is about building muscle memory through a repeatable sequence of actions, which reduces mental load and ensures each shot is as good as the last. The core cycle is grind, prep, pull, and clean. The key to speed is to “dovetail” these tasks, initiating the next step before the previous one is fully complete.
As your first shot is extracting, you should not be standing idle. This 25-35 second window is your opportunity to prepare for the next drink. You can use this time to get your milk pitcher from the fridge and pour the correct amount of milk. If you’re making two espressos back-to-back, you could even grind the dose for the second shot into a dosing cup, so it’s ready to go the moment the first portafilter is free. The moment a shot is finished, your next action should be immediate: stop the shot, remove the portafilter, and knock out the spent puck. A quick wipe of the basket and a purge of the group head to rinse away old grounds should take no more than a few seconds before you’re ready to prep your next puck.
The art of simultaneous milk steaming
For lattes, cappuccinos, and flat whites, integrating milk steaming is the most complex part of the workflow. The goal is to have perfectly textured, hot milk ready the instant your espresso shot finishes extracting. Milk foam is delicate and begins to separate quickly, so steaming it too early will result in a poor-quality drink. Steaming it too late leaves your espresso shot to die, losing its crema and delicate aromatics.
The optimal moment to begin steaming is a few seconds after you start your espresso shot. This allows you to focus on the initial seconds of extraction to ensure it’s flowing correctly before turning your attention to the milk. As the shot continues to pull, you can texture your milk. With practice, you’ll learn the timing of your machine and be able to finish steaming just as you stop the shot. Immediately after you’re done, and before pouring your latte art, give the steam wand a forceful purge and a thorough wipe with its dedicated cloth. This prevents milk from being baked on, which is much harder to clean later and can harbor bacteria.
Here is a sample workflow for making two cappuccinos, demonstrating how tasks can be dovetailed:
| Step | Drink 1 Action | Drink 2 Action (Overlapping) |
|---|---|---|
| 1 | Lock in clean portafilter. Grind dose for Drink 1. | (Waiting) |
| 2 | Distribute and tamp puck for Drink 1. | Pour milk into pitcher for Drink 1. |
| 3 | Start pulling espresso shot 1. | Start steaming milk for Drink 1. |
| 4 | Shot 1 finishes. | Milk 1 finishes. Purge and wipe steam wand. |
| 5 | Pour Drink 1. Knock out spent puck and wipe portafilter. | Grind dose for Drink 2 into portafilter. |
| 6 | Serve Drink 1. Purge group head. | Distribute and tamp puck for Drink 2. Pour milk into pitcher for Drink 2. |
| 7 | (Ready for next shot) | Start pulling espresso shot 2 and repeat process. |
The clean-as-you-go philosophy
An efficient workflow is a clean workflow. Treating cleaning as a separate final step is a recipe for a slow, messy process. Instead, you must integrate cleaning into every cycle. A clean station prevents cross-contamination of flavors, improves the performance and longevity of your equipment, and, most importantly, keeps you moving without interruption. Each drink cycle should include micro-cleaning tasks.
We’ve already mentioned the three non-negotiable cleaning actions within the cycle:
- Wiping the portafilter basket: After knocking out the puck, a quick wipe with a damp cloth removes residual oils and fine grounds, ensuring a clean slate for your next shot.
- Purging the group head: Before locking in the next portafilter, a short flush of water clears the shower screen of any grounds left from the previous extraction.
- Purging and wiping the steam wand: This must be done immediately after steaming to prevent milk residue from hardening.
This “clean-as-you-go” mentality extends to your entire counter. Spilled grounds should be wiped up during any small pause. This prevents them from being tracked around and makes the final, end-of-session cleanup significantly faster, setting you up for success the next time you approach your machine.
In summary, transforming your ability to make back-to-back espresso drinks hinges on four key principles: a meticulously prepared station, a consistent and rhythmic extraction cycle, the seamless integration of milk steaming, and a “clean-as-you-go” mentality. By adopting the concept of mise en place, you eliminate friction before you even begin. Developing a dovetailed rhythm for grinding, prepping, and pulling shots turns a series of disjointed actions into a fluid process. Mastering the timing of milk steaming ensures every component of your drink is at its peak quality simultaneously. Finally, embedding small cleaning actions into your workflow maintains order and efficiency. This is more than just a method for speed; it’s a holistic approach that reduces stress, boosts consistency, and elevates the quality of every single cup you serve.


 No products in the cart.