Is your espresso machine leaking from the group head every time you pull a shot? Does the portafilter handle feel loose or turn much further than it used to? These are classic signs that your brew group o-ring, also known as a group head gasket, is worn out and needs replacing. This essential seal ensures a high-pressure, leak-proof connection between the portafilter and the machine. Neglecting it can lead to messy countertops, improper espresso extraction, and potential damage. Fortunately, this is a simple and inexpensive maintenance task you can easily perform at home. This guide will walk you through every step of the process, from identifying the problem to installing a fresh new seal for a perfect, leak-free brew.
Recognizing the signs of a failing o-ring
Before you start disassembling parts, it’s crucial to correctly diagnose the problem. A failing group head o-ring isn’t just an inconvenience; it directly impacts the quality of your espresso by preventing the machine from building adequate pressure. The most obvious symptom is water leaking over the sides of the portafilter during the brewing cycle. Instead of all the water being forced through the coffee grounds, it escapes through the failing seal. You might also notice that your portafilter handle locks in much further to the right than it did when the machine was new. A fresh, thick gasket provides resistance, typically stopping the handle around the 6 o’clock position. As it wears down and compresses, the handle will travel further, sometimes to 4 or 5 o’clock. Lastly, inspect the o-ring itself. An old one will feel hard, brittle, and may even have visible cracks, a clear signal that it’s lost its sealing ability.
Gathering the right tools and replacement parts
Once you’ve confirmed the o-ring is the culprit, the next step is preparation. Performing this task correctly requires having the right parts and a few simple tools on hand. Most importantly, you need the correct replacement o-ring for your specific espresso machine model. Gaskets are not one-size-fits-all; a gasket for a Gaggia Classic is different from one for an E61 group head. Check your machine’s manual or look up the part online to be certain. You’ll often have a choice between traditional rubber and modern silicone gaskets. While rubber is cheaper, silicone offers superior longevity and heat resistance, making it a worthwhile upgrade.
For tools, you will need:
- A flathead screwdriver or a specialized gasket pick tool
- A stiff-bristled group head cleaning brush
- A flashlight for better visibility into the group head
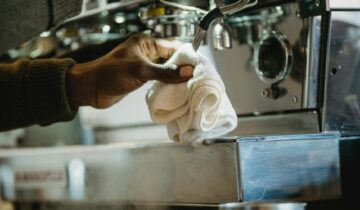
- A clean, damp cloth
Safety is paramount. Always unplug your machine from the wall and allow it to cool down completely before you begin working on it.
| Feature | Rubber Gaskets | Silicone Gaskets |
|---|---|---|
| Lifespan | 6-12 months | 2+ years |
| Flexibility | Becomes hard/brittle with heat | Stays soft and pliable |
| Installation | Can be stiff and harder to install | Easier to install due to flexibility |
| Cost | Generally less expensive | Often slightly more expensive |
| Seal Quality | Good when new, degrades over time | Excellent and consistent seal |
The step-by-step removal and cleaning process
With your tools and new gasket ready, it’s time to remove the old, worn-out part. First, remove the portafilter and the water dispersion screen, which is typically held in place by a central screw. Keep the screw in a safe place. Now comes the most challenging part: prying out the old o-ring. Using your gasket pick or the tip of a flathead screwdriver, carefully wedge the tool between the gasket and the metal housing of the group head. Be gentle to avoid scratching the metal. Pry downwards, working your way around the o-ring to slowly loosen it until it comes out. Old, brittle gaskets may come out in several pieces.
Once the old gasket is removed, thorough cleaning is essential for a proper seal. The channel where the gasket sits will be full of old coffee oils and grounds. Use your group head brush and damp cloth to scrub this groove completely clean. Use a flashlight to inspect your work and ensure no residue remains.
Installing the new o-ring and reassembly
Installing the new o-ring is much easier than removing the old one. Take your new gasket and press it into the clean groove, ensuring it’s seated evenly all the way around. Some gaskets have a beveled or angled side; this side should almost always face downwards, towards the portafilter, but check the part’s instructions if you are unsure. Once it’s in place by hand, insert your empty portafilter (without the coffee basket) into the group head and lock it in. This action will apply even pressure and help fully seat the gasket into the channel. Don’t be surprised if it feels very tight—that’s a sign of a good seal. Finally, reinstall the dispersion screen and its screw, tightening it until it’s snug. With everything reassembled, it’s time to test your work. Plug the machine in, let it warm up, and run a shot of just water. You should have a tight, snug fit and, most importantly, no more leaks.
In conclusion, replacing your brew group o-ring is a fundamental maintenance task that every home barista should master. We’ve walked through how to identify a failing seal by spotting leaks and a loose portafilter, how to gather the correct parts and tools, and the detailed steps for removal, cleaning, and installation. By carefully prying out the old gasket, meticulously cleaning the group head channel, and properly seating the new o-ring, you restore your machine’s ability to create a perfect seal. This not only stops frustrating leaks but also ensures correct brewing pressure, leading to a significant improvement in your espresso’s quality and consistency. Taking 15 minutes for this simple repair every 6-12 months will prolong the life of your machine and elevate your coffee experience.
 No products in the cart.