Imagine starting your day not by fumbling with a kettle or a measuring cup, but by simply pressing a button that dispenses the exact amount of water for your favorite mug of coffee. This isn’t science fiction; it’s the practical magic of programming custom drink volumes. Automating this small task is a perfect entry point into home automation, offering a blend of convenience, consistency, and personalization. This article will guide you through the why and how of creating a system that tailors your beverage preparation to your specific needs. We will explore the core hardware components, the basic programming logic behind calibration, and how to integrate your custom dispenser into a larger smart home workflow for ultimate efficiency.
Why automate your drink volumes?
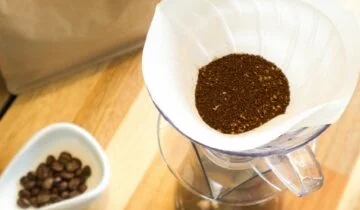
At first glance, automating how much water goes into your cup might seem like an over-engineered solution to a minor problem. However, the benefits are rooted in the principles of workflow optimization and consistency. For the coffee or tea aficionado, precision is key. The water-to-grounds ratio is critical for the perfect brew, and automating the volume eliminates guesswork, ensuring a consistently great taste every single day. This is the difference between a good cup and your perfect cup.
Beyond consistency, there’s a significant gain in efficiency. Think about the cumulative time spent each morning measuring water, waiting for the right amount, and avoiding spills. An automated system streamlines this process into a single action. This reclaimed time, even if just a minute or two, reduces mental friction and contributes to a smoother, less stressful morning routine. It’s a small automation that has a ripple effect on your productivity and mindset for the rest of the day.
The essential hardware components
Building your own automated drink dispenser is more accessible than you might think. The project hinges on a few key electronic components that work together to control the flow of liquid. The core of the system is a microcontroller, like an Arduino Uno or an ESP32. This acts as the brain, running the code that tells the other parts what to do. The ESP32 is a particularly good choice if you want to add Wi-Fi connectivity for smart home integration later on.
Next, you need a way to move the liquid. This is handled by a pump and a control module. A food-safe peristaltic pump is ideal for its precision and because the liquid never touches the pump’s mechanical parts. To turn the pump on and off, the microcontroller sends a signal to a relay module or a motor driver. Finally, you need a method for measurement. You can use a flow meter to measure the volume of liquid passing through it directly, or you can opt for a simpler, time-based approach where you calibrate how much liquid the pump dispenses over a set period.
| Component | Function | Common Options |
|---|---|---|
| Microcontroller | The “brain” that runs the code. | Arduino Uno, ESP32, Raspberry Pi Pico |
| Pump | Moves the liquid from the source to the cup. | Peristaltic Pump (precise), 12V Diaphragm Pump (powerful) |
| Control Module | Allows the microcontroller to switch the pump on/off. | Relay Module, Motor Driver (e.g., L298N) |
| Measurement Method | Determines when to stop the pump. | Time-based calibration, Hall Effect Flow Meter |
The programming logic: from calibration to execution
Once your hardware is assembled, the magic happens in the code. The logic can be broken down into a few simple, sequential steps. The most crucial step is calibration. Since every pump and tube setup is slightly different, you can’t just guess how long to run the pump. Calibration involves writing a simple test program that runs the pump for a fixed duration, for example, 10 seconds. You then measure the amount of water it dispensed with a measuring cup. By doing this, you can calculate a flow rate, such as milliliters per second (ml/s). Let’s say it dispensed 150ml in 10 seconds; your flow rate is 15 ml/s.
With this rate established, you can define your presets. In your code, you create variables for each desired volume.
- Small Cup: 200ml
- Large Mug: 350ml
- Espresso Shot: 45ml
The program then calculates the required run time for each preset by dividing the target volume by your calibrated flow rate (e.g., 200ml / 15 ml/s = 13.3 seconds). The main part of your program, the “loop,” simply waits for an input, like a button press corresponding to the “Large Mug” preset. When pressed, it runs the pump for the calculated 13.3 seconds and then stops, delivering a perfect pour every time.
Integrating with your smart workflow
A standalone dispenser is useful, but its true power is unlocked when integrated into your wider smart home ecosystem. This transforms it from a simple gadget into a seamless part of your daily routine. If you used an ESP32 microcontroller with its built-in Wi-Fi, the possibilities expand dramatically. You can connect it to services like IFTTT (If This Then That), allowing you to trigger your dispenser with countless other apps and devices. For instance, you could create an applet where “If my first alarm of the day is dismissed, then start dispensing water for my morning tea.”
For more advanced users, integrating the device with a central smart home hub like Home Assistant offers the ultimate control. Your custom drink dispenser can appear as a switch or sensor within your dashboard. This allows you to include it in complex automations. Imagine a “Good Morning” scene that not only raises your smart blinds and reads you the weather but also starts dispensing the precise 250ml of water for your oatmeal. This level of integration is where you move beyond simple convenience and into a truly intelligent and responsive living space tailored to your workflow.
In summary, programming custom drink volumes is a practical and rewarding project that enhances daily life through precision and efficiency. We’ve seen how it brings consistency to your favorite beverages and saves valuable time, especially during a busy morning routine. By starting with basic hardware like a microcontroller and a pump, you can build a functional system. The key is the calibration process, which allows you to translate desired volumes into specific pump run times. From there, integrating the device into a smart home hub like Home Assistant elevates it from a standalone gadget to a key player in your automated daily workflow. This project is more than just a novelty; it’s an accessible introduction to creating personalized solutions that make your day smoother and more enjoyable.
 No products in the cart.