
Master your Gaggia Anima Prestige: A guide to grinder settings
Owning a Gaggia Anima Prestige means you have a powerful, super-automatic espresso machine capable of crafting exceptional coffee right in your kitchen. While the machine automates many steps, one crucial element remains in your control: the coffee grind. The built-in ceramic burr grinder is the heart of the machine, and understanding how to adjust its settings is the key to unlocking the full flavor potential of your coffee beans. This simple adjustment can transform a good cup of coffee into a truly great one. This guide will walk you through why grinder settings are so important, how to safely adjust them on your Anima Prestige, and how to troubleshoot your brew to achieve that perfect, café-quality espresso shot every single time.
Why the grind size matters for your coffee
Before touching the dial, it’s important to understand the role grind size plays in creating your perfect cup. Coffee brewing is, at its core, a process of extraction. Hot water flows through the ground coffee, dissolving oils, acids, and sugars that create the flavor and aroma we love. The size of the coffee grounds directly controls the speed and efficiency of this extraction.
- Coarse grind: If the grounds are too coarse, water passes through them too quickly. It doesn’t have enough contact time to pull out all the desirable flavor compounds. The result is an under-extracted shot that often tastes weak, sour, or acidic.
- Fine grind: Conversely, if the grounds are too fine, they create too much resistance. Water struggles to push through the tightly packed coffee bed. This prolonged contact time results in over-extraction, pulling out unwanted bitter and harsh compounds. The final shot will taste burnt and unpleasantly bitter, and it can even choke the machine.
The perfect grind finds the sweet spot between these two extremes, allowing for a balanced extraction that highlights the unique character of your beans, producing a rich body and a beautiful, persistent crema.
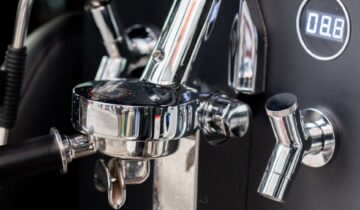
Getting to know your Anima Prestige grinder
The Gaggia Anima Prestige is equipped with a high-quality, 100% ceramic burr grinder. Unlike metal grinders, ceramic burrs don’t overheat the beans during the grinding process, preserving their delicate aromatic oils. This grinder offers five distinct settings, which are easily accessible inside the bean hopper.
You’ll find a small knob with dots ranging from small to large. The smallest dot represents the finest grind setting (level 1), while the largest dot represents the coarsest setting (level 5). The factory setting is usually in the middle, which is a great starting point.
Here’s the most critical piece of information for any Anima Prestige owner: You must only adjust the grinder settings while the grinder is in operation. Attempting to change the setting when the grinder is idle can cause the burrs to lock up or even break, as coffee beans or fragments can get wedged between them. Always start brewing a coffee before you make any adjustments.
How to adjust the grinder: A step-by-step guide
Adjusting the grind is simple once you know the correct procedure. Follow these steps carefully to protect your machine and fine-tune your coffee.
- Start the brewing process. Select your desired coffee on the machine’s interface and press the start button.
- Wait for the grinder to start. You will hear the distinct sound of the burr grinder beginning to grind the beans for your shot.
- Locate the adjustment knob. While the grinder is running, open the lid of the bean hopper. The adjustment knob is the small, round dial located in the center.
- Press and turn. You need to use the provided multi-tool key or a similar object to press down on the knob and turn it simultaneously. Turn it one click, or “notch,” at a time. Turn it towards the smaller dot for a finer grind or towards the larger dot for a coarser grind.
- Be patient. It’s important to know that the machine needs to “season” to the new setting. The change is not immediate, as some grounds from the previous setting will remain in the chute. It will take approximately 2-3 brewing cycles for you to taste the full effect of your adjustment.
Remember to only move one notch at a time. Small changes can have a big impact on the final taste of your espresso.
Dialing in the perfect shot: Troubleshooting guide
Now that you know how to adjust the grinder, you can start “dialing in” your beans. This is the process of making small adjustments to find the ideal grind size for your specific coffee. Use the taste and appearance of your espresso as your guide. A well-extracted shot should take about 20-30 seconds to brew and have a rich, hazelnut-colored crema.
Here is a simple table to help you troubleshoot common issues:
| Observed problem | Likely cause | Solution |
|---|---|---|
| Coffee is watery, weak, and tastes sour. Brews very quickly (<15 seconds). | Under-extraction (grind is too coarse). | Adjust the grinder one notch finer (e.g., from 4 to 3). |
| Coffee is bitter, burnt, and harsh. Drips out slowly or chokes the machine. | Over-extraction (grind is too fine). | Adjust the grinder one notch coarser (e.g., from 2 to 3). |
| The used coffee puck is wet and soupy. | Grind may be too coarse, preventing proper compression. | Try a slightly finer setting. |
| You’re using a new type of coffee bean (e.g., switching to a darker roast). | Different beans require different settings. Oily, dark roasts often need a coarser grind. | Start from the middle setting (3) and adjust based on taste. |
Start with the middle setting and brew a coffee. Taste it, observe it, and then decide if you need to go finer or coarser. This process of experimentation is part of the fun of being a home barista.
Conclusion
Mastering the grinder settings on your Gaggia Anima Prestige is the single most effective way to elevate your home coffee experience. As we’ve discussed, the grind size is the foundation of coffee extraction, directly influencing whether your shot is balanced and flavorful or disappointingly sour or bitter. By understanding the relationship between grind size and taste, and by following the correct, safe procedure for making adjustments—always while the grinder is running—you can take full control of your brew. Remember to be patient, allowing two to three shots for any changes to take effect, and use the taste of your coffee as your ultimate guide. With a little practice and experimentation, you’ll be dialing in the perfect shot for any bean, transforming your kitchen into your favorite café.


 No products in the cart.