
Managing grind static and clumping in your Gaggia Classic Pro workflow
There is nothing more frustrating than investing in a great machine like the Gaggia Classic Pro and a quality grinder, only to be met with a frustratingly messy and inconsistent coffee mound. Coffee grounds flying everywhere, sticking to the counter, and forming dense clumps in your portafilter are common issues for home baristas. This phenomenon is caused by static and clumping, two related problems that can seriously undermine your quest for the perfect espresso shot. These issues are not just about neatness; they directly impact puck preparation, leading to channeling and uneven extractions. In this article, we will explore why static and clumping happen and provide a complete guide with actionable techniques to manage them effectively within your Gaggia Classic Pro workflow.
Understanding the enemy: What causes static and clumping?
Before you can solve a problem, you need to understand its source. The static electricity that makes your coffee grounds misbehave is primarily generated by the triboelectric effect. In simple terms, this is a type of contact electrification that occurs when two materials touch and then separate. As individual coffee beans are fractured and ground by the burrs in your grinder, the friction and separation of particles create an electrical charge. This static charge causes grounds to repel each other, sending them flying, or to cling to the grinder chute and your portafilter.
Several factors can make this problem worse:
- Humidity: This is the biggest factor. Dry air is a poor electrical conductor, so static charges build up easily. You will likely notice that static is much worse in the winter or in climates with low ambient humidity.
- Bean characteristics: Lighter roasts tend to be harder and less oily, making them more prone to generating static than darker, oilier roasts. The natural oils on darker roasts help dissipate static charge more readily.
- Grinder speed: High-speed grinders can generate more friction and therefore more static than their lower-RPM counterparts.
Clumping is a direct result of static, combined with the presence of oils and fine particles. Static charges can cause fine coffee particles to bind together, forming small boulders in your dose. These clumps create pockets of high and low density in your coffee puck, making them a primary cause of channeling during extraction.
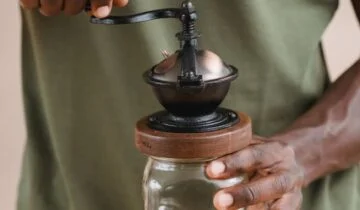
The grinder’s role in your workflow
While static is a force of nature, your choice of grinder plays a significant role in how much you have to battle it. Not all grinders are created equal when it comes to static and clump management. When pairing a grinder with your Gaggia Classic Pro, it’s worth considering how it handles these issues.
Some grinders, particularly those with a long or complex exit chute, can be more prone to retaining grounds and building up static. Single-dosing grinders, where you weigh your beans for each shot, often have a more direct grind path, which can help. However, the bellow systems used on many single-dosers to push out retained grounds can also send a puff of static-charged coffee everywhere if you’re not careful.
Regular maintenance is also key. Coffee oils and fine particles can build up on your grinder’s burrs and in the chute over time. This buildup can worsen clumping and static issues. A regular cleaning schedule, involving brushing out the chute and periodically disassembling the grinder to deep-clean the burrs, will ensure a cleaner exit path for the grounds and reduce retention. A clean grinder is a happy, and less static-prone, grinder.
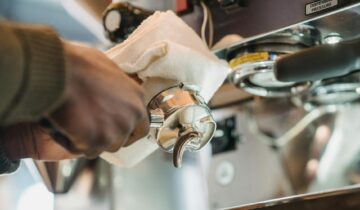
Essential puck prep techniques to combat clumps
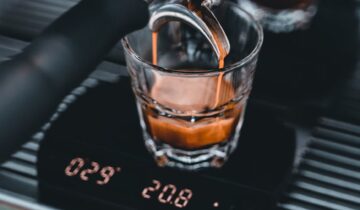
Once the grounds are in your portafilter, the battle shifts from managing static to breaking up clumps and ensuring an even distribution. This is arguably the most critical stage for shot quality on a machine like the Gaggia Classic Pro. A poorly prepared puck will lead to channeling, where water punches holes through the coffee bed, resulting in a shot that is simultaneously sour and bitter.
Your two best friends in this fight are a dosing funnel and a WDT tool.
- Start with a dosing funnel. This simple ring sits on top of your portafilter basket and acts as a collar, preventing grounds from spilling over the sides. This is especially useful when dealing with a fluffy, static-charged dose. It gives you the space you need to work without making a mess.
- Employ the Weiss Distribution Technique (WDT). This is a non-negotiable technique for breaking up clumps. A WDT tool consists of several very thin needles (typically 0.4mm or less). After grinding into your portafilter with the funnel on, you use the tool to stir the grounds in a circular or raking motion, working from the bottom of the basket up to the top. This action breaks apart every single clump, homogenizes the density of the coffee bed, and ensures there are no hidden air pockets.
After a thorough WDT, you can gently tap the portafilter on the counter to settle the grounds, remove the funnel, and then proceed to a firm, level tamp. This combination of techniques turns a clumpy, uneven mess into a perfectly uniform puck ready for extraction.
Advanced methods and tools for ultimate control
If you’ve implemented good puck prep and are still struggling, especially in a very dry environment, there is one more powerful technique to add to your arsenal: the Ross Droplet Technique (RDT).
RDT is the simple act of adding a minuscule amount of moisture to your beans right before grinding. You can achieve this by misting the beans with a tiny spray bottle or by wetting the handle of a spoon and stirring it through your dose of whole beans. This tiny bit of water dramatically increases the electrical conductivity on the surface of the beans, which prevents static charge from building up during the grinding process. The result is a much fluffier, static-free grind that falls neatly into your portafilter with significantly less clumping.
A word of caution: Use RDT sparingly. You only need a single, fine mist or a tiny drop of water. Using too much water can cause grounds to cake onto your grinder’s burrs over time, potentially leading to rust on certain types of burrs. Always start with less than you think you need.
Here is a comparison of the key techniques:
| Technique | Primary function | Ease of use | Cost |
|---|---|---|---|
| Dosing funnel | Contain grounds and reduce mess | Very easy | Low |
| WDT | Break up clumps and distribute grounds | Easy (requires practice) | Low (can be DIY) to moderate |
| RDT | Prevent static generation during grinding | Easy (requires care) | Very low (a small spray bottle) |
By combining these techniques, you create a comprehensive workflow. Use RDT before grinding to stop static at the source, and use a dosing funnel and WDT after grinding to perfect the distribution. This two-pronged attack virtually eliminates issues from static and clumps.
Conclusion
Taming grind static and clumping is a critical step in unlocking the full potential of your Gaggia Classic Pro. As we’ve seen, this is not just an issue of cleanliness but a fundamental aspect of espresso quality. The problem originates from friction during grinding, exacerbated by dry air and bean characteristics. By understanding the cause, you can implement a targeted strategy. A systematic workflow that incorporates techniques like the Ross Droplet Technique (RDT) before grinding and the Weiss Distribution Technique (WDT) after grinding will transform your puck preparation. These methods, combined with a dosing funnel and regular grinder maintenance, will give you a fluffy, evenly distributed bed of coffee, ready for a perfect, channel-free extraction. Master these steps, and you will be rewarded with consistently delicious and repeatable espresso shots from your Gaggia.
 No products in the cart.