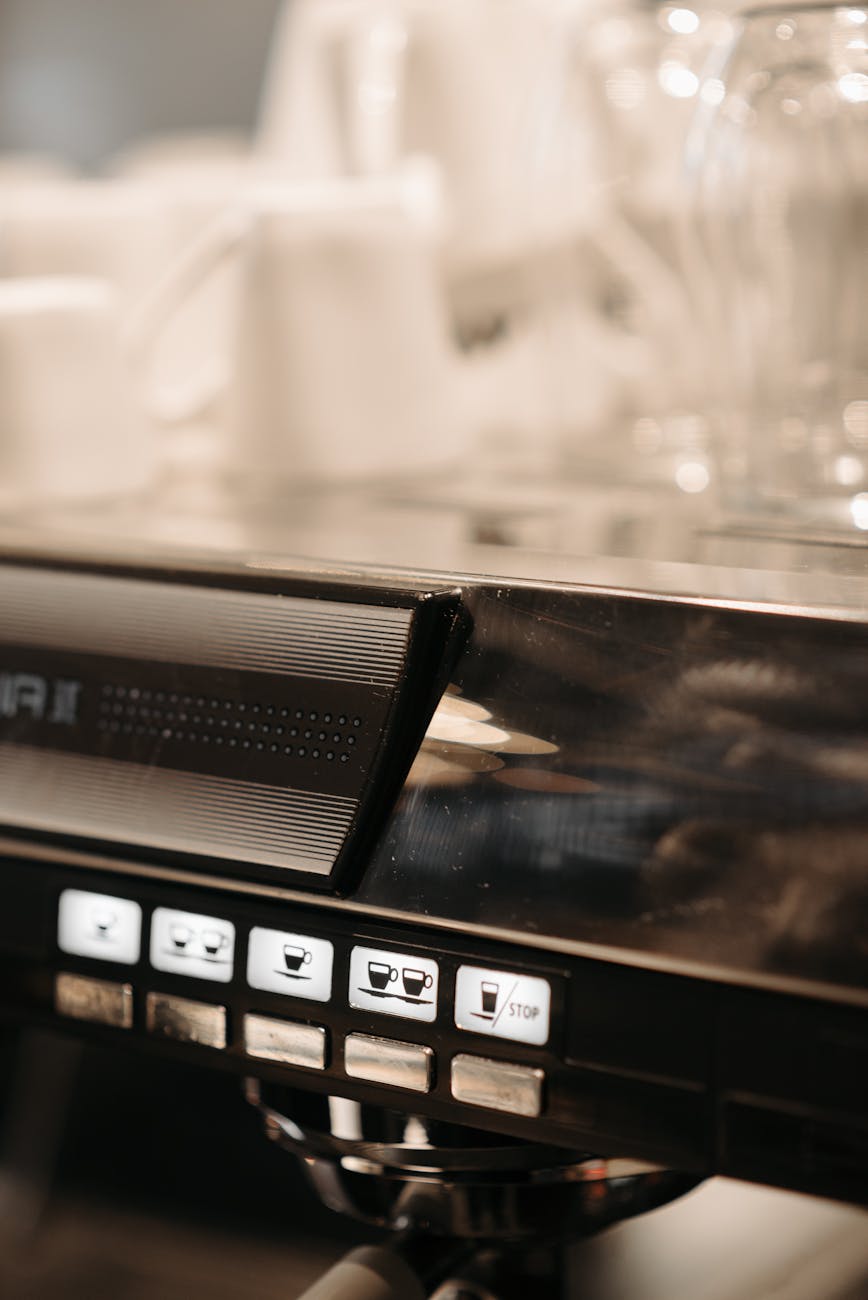
Taming the Gaggia Classic Pro: Your guide to perfect puck prep and no more channeling
The Gaggia Classic Pro is a legend in the world of home espresso. It’s a robust, capable machine that can produce truly exceptional coffee. However, many new owners quickly encounter a frustrating problem: channeling. That beautiful, syrupy shot you dream of is ruined by spurts and uneven flow, resulting in a cup that’s both sour and bitter. The good news is that the machine is rarely to blame. Channeling is almost always a symptom of an uneven coffee puck. This article is your comprehensive guide to mastering puck preparation for the Gaggia Classic Pro. We will dive into the essential steps, from grinding and dosing to distribution and tamping, giving you the knowledge to eliminate channeling for good and unlock your machine’s true potential.
What is channeling and why does it happen?
Before we can fix the problem, we need to understand it. In espresso brewing, we force hot water through a tightly compacted puck of coffee grounds under high pressure. Ideally, this water flows through the entire puck evenly, extracting all the delicious flavors uniformly. Channeling is what happens when the water finds a path of least resistance—a crack, a fissure, or a less dense area in the puck—and rushes through it.
Think of it like a river finding the easiest way down a mountain. Instead of spreading out, it carves a channel. This has two negative effects:
- The grounds along the channel get over-extracted, releasing bitter compounds.
- The grounds everywhere else get under-extracted, leaving behind sour, undeveloped flavors.
The Gaggia Classic Pro, especially in its stock form, can be particularly unforgiving. It hits the puck with high pressure (often well above the ideal 9 bars) almost instantly. This powerful blast of water will exploit any weakness in your puck preparation, making a good technique absolutely critical for success.
The foundation: Grinding and dosing with precision
Your journey to a perfect shot begins long before you tamp. The first and most crucial step is creating a uniform foundation with your coffee grounds. This stage is all about consistency.
First, let’s talk about the grinder. If you are using a blade grinder, you are fighting a losing battle. A quality burr grinder is non-negotiable for espresso. Burr grinders produce a much more consistent particle size, which is essential for creating a puck with uniform density. Inconsistent grounds create a mix of boulders and dust, leaving natural gaps for water to channel through.
Next is dosing. You must use a coffee scale with at least 0.1g precision. A consistent dose is key to repeatable results. For the stock double basket on the Gaggia Classic Pro, a good starting point is usually between 17 and 18 grams of coffee. Dosing too much can cause the puck to press against the shower screen when you lock in the portafilter, fracturing it before the shot even begins. Dosing too little leaves too much headspace, which can lead to a soupy, unstable puck that easily channels.
The art of distribution: Creating an even bed
Once you have your precisely ground and dosed coffee in the portafilter, you’ll notice it’s probably clumpy and unevenly piled. If you tamp this, you will lock in those density differences, guaranteeing channeling. The goal of distribution is to create a homogenous, fluffy, and level bed of coffee grounds.
The single most effective method for this is the Weiss Distribution Technique (WDT). This involves using a tool with very fine needles (like acupuncture needles) to stir the grounds in the basket. You simply rake through the coffee, breaking up every single clump and distributing the particles evenly from bottom to top. This eliminates any hidden pockets of air or dense spots that water would otherwise exploit.
After WDT, you can gently tap the side of the portafilter to settle the grounds or use a wedge-style distribution tool to level the surface. However, be cautious with spinner-style distributors. While they create a perfectly flat top layer, they don’t fix underlying density issues and can sometimes create a compacted layer just below the surface if used too aggressively.
The final step is tamping. The goal here is twofold: compress the grounds into a solid puck and ensure it is perfectly level. You don’t need superhuman strength; firm, consistent pressure is what matters. Focus on keeping your wrist straight and the tamper perfectly parallel to the countertop. An uneven tamp will leave one side less dense, creating a superhighway for water to channel through. A calibrated tamper, which clicks at a set pressure, can be a great tool for building consistency.
Troubleshooting and advanced tools
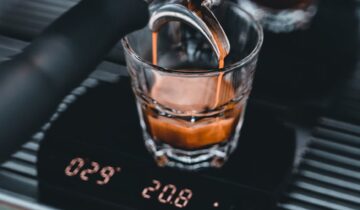
Even with perfect technique, you may still need to fine-tune your process. A bottomless portafilter is your best friend here. It’s a diagnostic tool that gives you a clear view of the extraction. If you see jets of coffee spurting out or the extraction favoring one side, you have visual confirmation of channeling and know your puck prep needs work.
Another popular upgrade for the Gaggia Classic Pro is the 9-bar Over-Pressure Valve (OPV) spring mod. Stock machines can run at pressures up to 15 bars, which is far too high and makes channeling more likely. Swapping the spring to lower the pressure to the industry-standard 9 bars makes the machine much more forgiving and often improves the taste of your espresso.
Here is a quick table to help diagnose common issues:
| Symptom | Potential cause & solution |
|---|---|
| Shot runs too fast and tastes sour. | Your grind is too coarse, or your dose is too low. Solution: Grind finer in small increments. |
| Machine chokes and little to no coffee comes out. | Your grind is too fine, or your dose is too high. Solution: Grind coarser. |
| Spurting from a bottomless portafilter. | Classic channeling. Solution: Focus on your distribution (WDT) and ensure a level tamp. |
| One stream starts much earlier than others. | Uneven puck density or an unlevel tamp. Solution: Ensure your WDT is thorough and your tamp is perfectly level. |
Conclusion
Channeling on the Gaggia Classic Pro isn’t a sign of a bad machine; it’s a sign that the machine is demanding a higher level of precision from you, the barista. Overcoming it is a rewarding process that forces you to perfect your technique. By focusing on a consistent workflow, you can tame this powerful machine and produce incredible espresso. Remember the key pillars: use a quality burr grinder, weigh your dose accurately, distribute the grounds meticulously with a WDT tool to eliminate clumps and create an even density, and finish with a firm, perfectly level tamp. Each step builds upon the last. Master these fundamentals, and you’ll be rewarded with balanced, delicious, and visually stunning shots every single time.

 No products in the cart.