How to optimize Aeropress brew time for a cleaner, clearer cup
The Aeropress is a titan in the world of home coffee brewing, celebrated for its speed, versatility, and ability to produce a rich, full-bodied cup. However, many users find themselves struggling with a common issue: a lack of clarity. This doesn’t just mean a visually cloudy brew; it refers to the presence of fine sediment, or “fines,” that can create a silty mouthfeel and introduce muddy, bitter flavors. While many variables are at play, the key to unlocking a truly clean and vibrant cup lies in mastering one of the most fundamental factors: brew time. This article will guide you through the process of optimizing your Aeropress immersion time to significantly enhance the clarity and overall quality of your coffee.
Understanding clarity and the role of coffee fines
Before we can manipulate brew time, it’s essential to understand what we’re trying to achieve. In coffee tasting, clarity refers to the distinctness and purity of the flavors. A cup with high clarity will have well-defined notes, a clean finish, and a pleasant, smooth texture. A cup with low clarity might taste muddled, and its defining characteristic is often a gritty or chalky sensation left on the tongue.
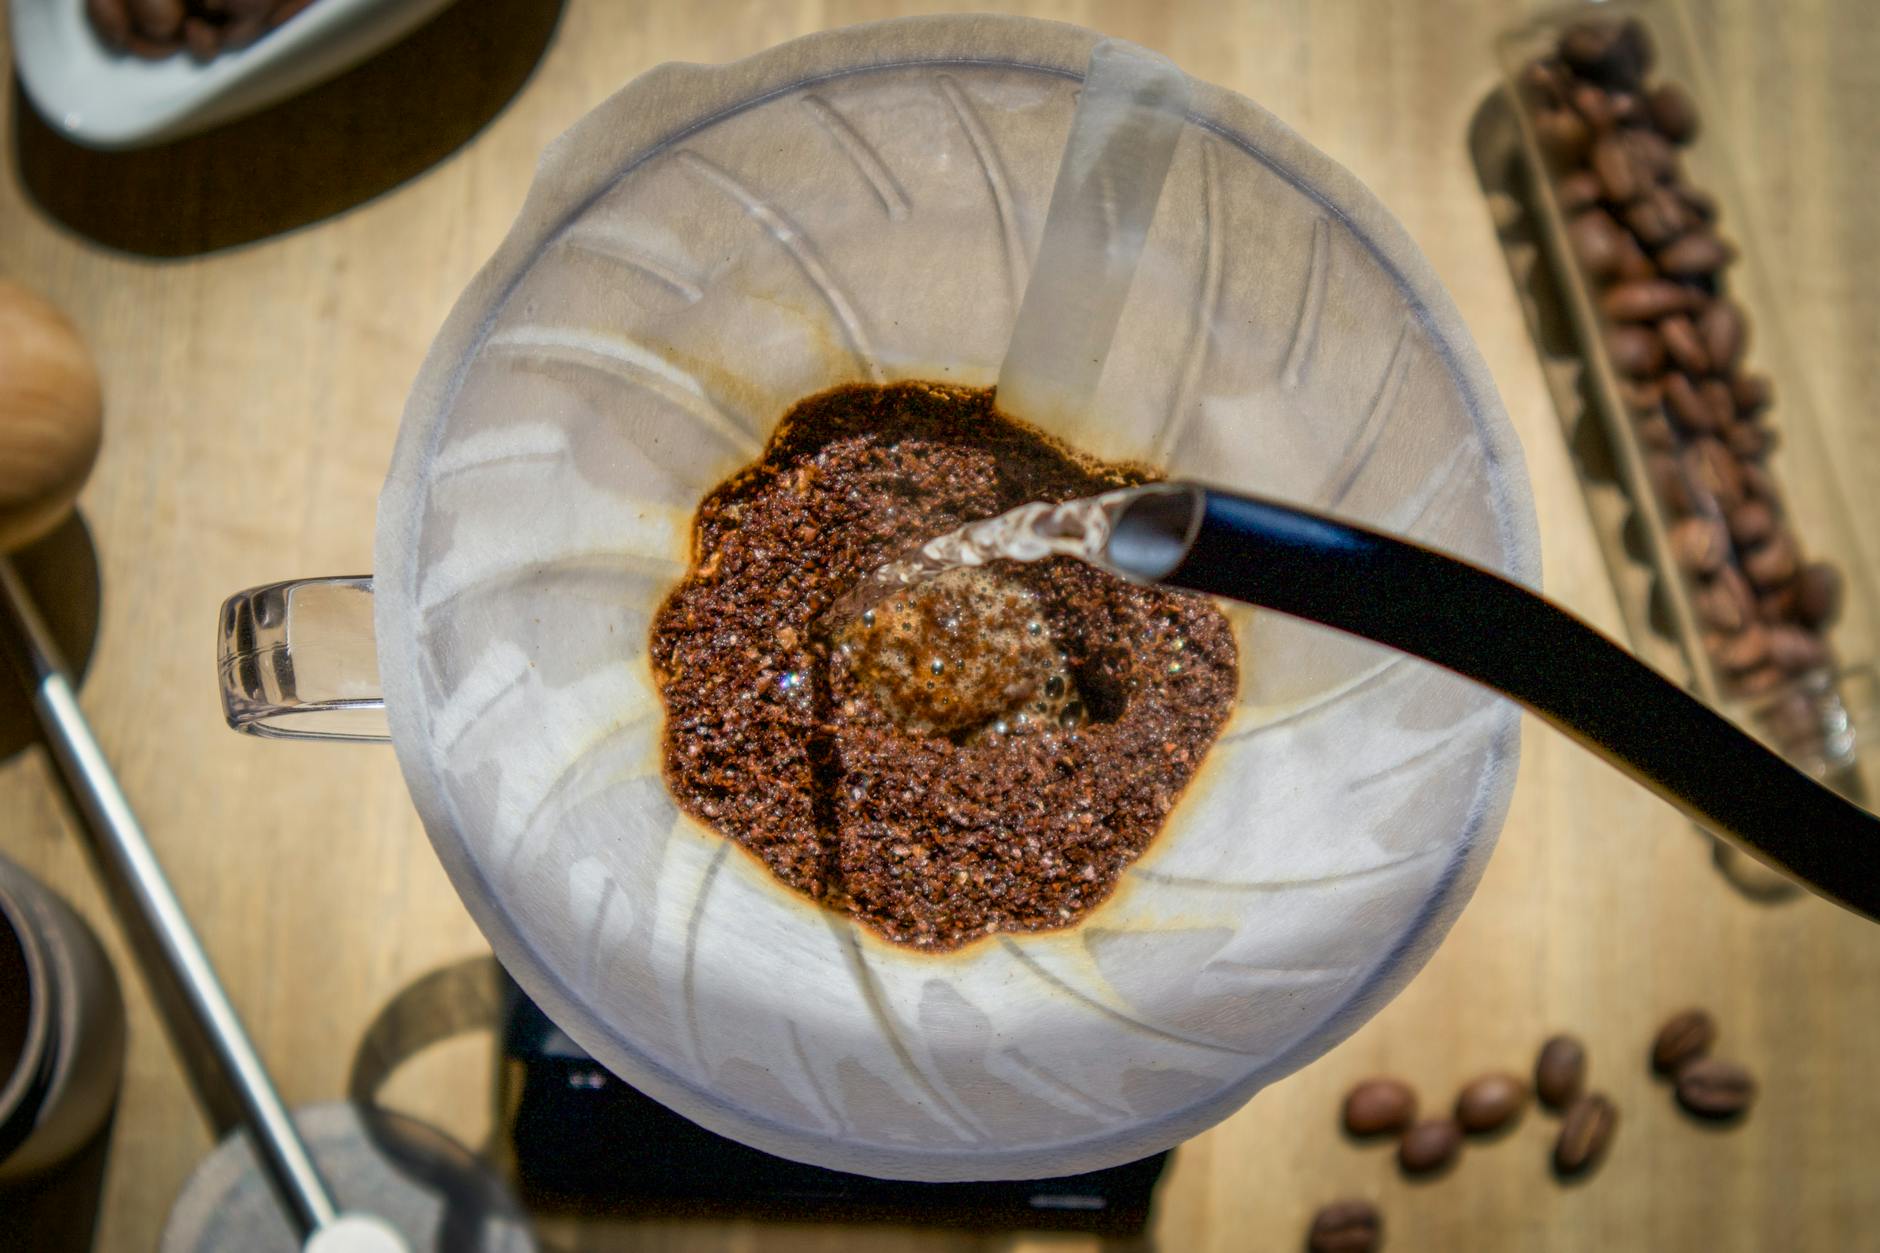
The primary culprit for low clarity is the presence of coffee fines. These are microscopic coffee particles produced during the grinding process, regardless of how good your grinder is. Because of their tiny size, they have a massive amount of surface area, causing them to extract much faster than larger grounds. This leads to two problems:
- Over-extraction: Fines quickly release bitter and astringent compounds, which can overwhelm the sweeter, more desirable flavors in your coffee.
- Sediment: These tiny particles can easily pass through or around the filter, especially if you press the plunger too hard, ending up as sediment in your final cup.
Brew time directly influences how these fines behave. A longer immersion gives them more time to over-extract and stay suspended in the slurry, while a shorter brew might not allow for enough extraction from the larger grounds. The goal is to find a balance that extracts the good stuff while minimizing the negative impact of fines.
The core relationship: brew time, grind size, and extraction
You cannot adjust brew time in isolation. It is part of a trifecta of variables that includes grind size and overall extraction. Think of them as three interconnected levers; pulling one inevitably affects the others. Understanding this relationship is the foundation of mastering your Aeropress for clarity.
The fundamental principle is simple: the finer you grind your coffee, the more surface area is exposed to water, and the faster it extracts. Therefore, a finer grind requires a shorter brew time. Conversely, a coarser grind requires a longer brew time to achieve a similar level of extraction.
How does this impact clarity? A very fine grind might seem ideal for a quick, punchy brew, but it also generates a higher percentage of fines. If you pair a fine grind with a short brew and a fast plunge, you’re essentially creating a high-pressure system that forces those fines straight through the filter. On the other hand, using a coarser grind allows you to extend the brew time. This longer, gentler immersion can actually improve clarity, as it gives the fines more time to get saturated and settle at the bottom of the chamber, making them less likely to end up in your mug.
Practical brewing strategies for better clarity
Armed with this knowledge, you can now apply specific strategies. There isn’t a single “best” brew time, but rather different approaches that prioritize different outcomes. Here are two popular methods focused on achieving a clean cup.
1. The short and fine method (controlled)
This technique aims for a brew time of around 60 to 90 seconds. It uses a relatively fine grind, similar to table salt, to get a full extraction quickly. The key to maintaining clarity here is controlling the other variables. To make this work, you must use a slow, steady plunge—aim for at least 30 seconds. Pressing too hard will ruin your efforts. For an extra layer of protection against fines, try using two paper filters instead of one. This significantly increases filtration power without noticeably slowing your plunge.
2. The long and coarse method (settling)
This is often the more foolproof method for achieving high clarity. By using a medium-coarse grind (like coarse sand), you can extend the brew time to 2, 3, or even 4 minutes. This longer immersion time is more forgiving and gives the coffee grounds, including the fines, ample time to settle at the bottom of the brewer. After your initial stir, avoid agitating the coffee further. When it’s time to press, do so very gently, and be sure to stop before you hear the hissing sound, which is the sound of air forcing the last dregs of silty water through the coffee puck.
Here is a table to give you a starting point for your experiments:
| Brew Style | Target Brew Time | Suggested Grind Size | Key Tip for Clarity |
|---|---|---|---|
| Short & Quick | 1:00 – 1:30 minutes | Fine (like table salt) | Use two paper filters and plunge slowly (30+ seconds). |
| Long & Smooth | 2:00 – 4:00 minutes | Medium-Coarse (like coarse sand) | Do not agitate after the initial stir. Let grounds settle. |
Beyond brew time: supporting factors for a crystal-clear cup
While adjusting your brew time and grind size is crucial, other elements play a vital supporting role in your quest for clarity. Paying attention to these details can take your brew from good to exceptional.
First and foremost is your filter choice. A standard Aeropress paper filter is excellent for trapping fines and oils, leading to a very clean cup. If you’re using a reusable metal filter, you’re trading clarity for body; metal filters inherently let more fines and oils pass through. For maximum clarity, the simple trick of using two paper filters is unmatched.
Next is agitation. How much you stir or swirl the coffee matters. Vigorous and continuous agitation keeps fines suspended throughout the slurry, making them more likely to pass through the filter. A better approach for clarity is to stir gently for about 10 seconds right after adding water and then let it rest. This ensures all grounds are saturated without creating a chaotic slurry.
Finally, perfect your plunge. This is where many clean brews are ruined. A fast, hard plunge creates immense pressure that forces water through the coffee bed, taking the smallest fines with it. Instead, apply gentle, consistent pressure. It should feel almost effortless. As mentioned before, always stop plunging when you hear a hiss. That last bit of liquid is highly concentrated and full of sediment.
Conclusion: your path to the perfect cup
Achieving a wonderfully clear and clean cup of Aeropress coffee is not about finding a single magic recipe, but about understanding the interplay between key variables. We’ve seen that brew time is not an independent factor but is deeply connected to your grind size and desired extraction level. By either shortening your brew with a fine grind and controlled plunge or extending it with a coarse grind to let sediment settle, you can drastically reduce the number of fines in your final cup. Remember to support your technique with smart choices in filtration, agitation, and plunging speed. The true path to your perfect brew is through experimentation. Use the principles discussed here as your guide, take notes, and taste the results. Soon you’ll be able to consistently produce an Aeropress brew with stunning clarity and flavor.


 No products in the cart.