How to use a bottomless portafilter to improve your espresso technique
For any home barista passionate about crafting the perfect cup, the journey is one of continuous learning and refinement. You’ve got the fresh beans, the capable grinder, and a quality espresso machine, yet something is missing. If you’re looking to elevate your espresso from good to truly exceptional, the bottomless portafilter is the single most impactful tool you can add to your arsenal. Also known as a “naked” portafilter, this device removes the spouts and floor, exposing the bottom of the filter basket. This provides an unfiltered, real-time window into your extraction process. This article will guide you through understanding this essential tool, diagnosing common problems, and mastering the puck preparation techniques required to pull a flawless, delicious shot of espresso every time.
What is a bottomless portafilter and why you need one
At its core, a bottomless portafilter is a deceptively simple modification of the standard spouted portafilter that comes with most espresso machines. By removing the bottom and the spouts, the entire filter basket is visible from below. While a spouted portafilter conveniently funnels two streams of espresso into cups, it also hides a multitude of sins. Any flaws in your preparation are masked as the espresso is mixed together before it ever reaches your cup. The bottomless portafilter, however, hides nothing. It is a tool of truth, revealing precisely how water is passing through your coffee grounds.
The primary benefit is diagnostic feedback. It allows you to see issues like channeling, where water violently punches through a weak spot in the coffee puck, leading to a shot that is simultaneously sour and bitter. It also reveals uneven flow, which points to an unlevel tamp or poor distribution. Beyond diagnostics, many baristas believe bottomless portafilters contribute to a better-tasting shot and improved crema, as the espresso doesn’t have to travel across extra metal surfaces before hitting the cup. Ultimately, it transforms the abstract concept of “extraction” into a clear visual process you can analyze and improve upon.
Diagnosing common extraction problems
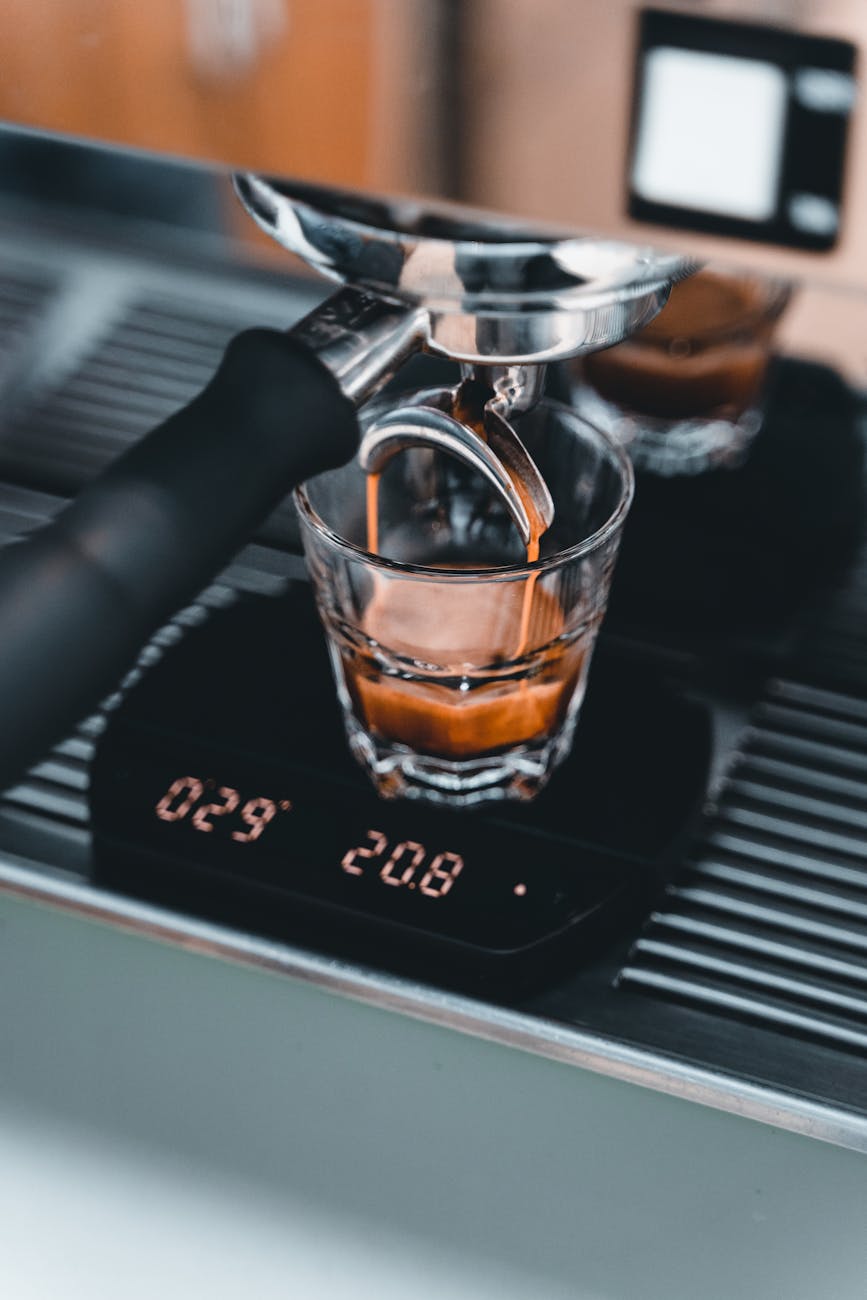
Watching your first shot through a bottomless portafilter can be both mesmerizing and humbling. The goal is to see dark, viscous drops of espresso form across the entire basket, which then coalesce into a single, steady, and centered stream. This beautiful flow, often featuring “tiger striping” of light and dark crema, is the sign of a well-prepared puck and an even extraction.
More often than not, beginners will see something else entirely. Learning to read these visual cues is the key to improvement. The most common issue is channeling. This appears as tiny, fast-moving jets or spurts of watery, blonde-colored espresso shooting out from the basket. This tells you the water has found a path of least resistance and is not extracting flavor evenly from the entire puck. You might also observe an uneven extraction, where one side of the basket begins to flow long before the other, a clear indicator of a tilted tamp. By observing these flaws, you can begin to correct them.
| Observation | What it looks like | Potential causes |
|---|---|---|
| The ideal shot | Dark drips form evenly, then merge into a single, centered stream. Rich “tiger striping” is visible. | Great puck prep! Even grind, distribution, and a level tamp. |
| Channeling | Thin, watery jets or spurts shooting from the basket. The shot looks messy and sprays. | – Clumps in the coffee grounds – Uneven distribution (WDT needed) – Inconsistent grind size |
| Uneven extraction | Espresso starts flowing from one side of the basket much sooner than the other. | – Unlevel tamping – Uneven distribution of grounds in the basket |
| Donut extraction | Flow begins around the outer edges while the center remains dry, only starting to extract later. | – Tamping technique that pushes grounds to the side – Center of the puck is too dense |
| Bald spots | Areas on the basket that never show any flow, remaining dry throughout the shot. | – Severe clumps creating dense, impenetrable spots – Insufficient dose for the basket size |
Puck preparation: The key to a perfect shot
Once you’ve diagnosed the problems with your extraction, the next step is to fix them. Nearly every issue revealed by a bottomless portafilter can be traced back to what happens before you lock it into the machine. This is known as “puck prep,” and mastering it is non-negotiable for achieving a clean, even flow.
Your puck preparation workflow should focus on three key areas:
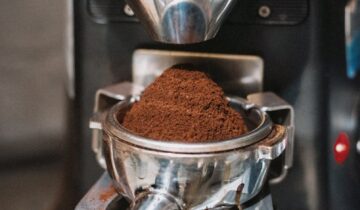
- Grind and dose: Start with a consistent grind from a quality burr grinder. Inconsistent particle sizes are a primary cause of channeling. Ensure you are using the correct dose, or amount of coffee, for your specific filter basket. Weigh your beans for consistency.
- Distribution: This is arguably the most critical step. After grinding into your portafilter, the grounds will be clumpy and unevenly distributed. Use a technique like the Weiss Distribution Technique (WDT), where you stir the grounds with a fine needle tool to break up clumps and create a fluffy, homogenous bed of coffee. This ensures water flows through all grounds at the same rate.
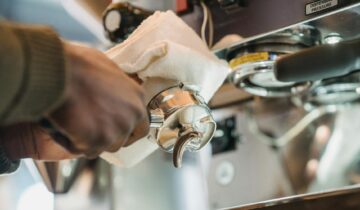
- Tamping: The goal of tamping is not to press as hard as you can, but to create a level and uniformly compacted puck of coffee. Apply firm, consistent pressure and ensure your tamper is perfectly parallel to the rim of the basket. A crooked tamp will create a dense side and a loose side, leading to a lopsided extraction.
By focusing on these three elements, you systematically eliminate the variables that cause channeling and other extraction flaws, paving the way for that perfect, syrupy shot.
From theory to practice: Pulling your first shot
With an understanding of diagnostics and puck preparation, it’s time to put it all together. Be prepared for a bit of a mess at first; those channeling spurts can spray espresso everywhere. But don’t be discouraged—this is part of the learning curve.
Start by preparing your coffee puck with meticulous care. Grind your beans, dose them into the basket, and use your WDT tool to break up every last clump. Settle the grounds with a gentle tap and then perform a firm, level tamp. Lock the bottomless portafilter into your machine, place your cup and scale underneath, and begin the extraction. Watch closely. Do you see the dark drops forming? Do they merge into one stream? Or do you see jets and spurts? Don’t worry if it’s not perfect. The key is to make only one adjustment at a time. If the shot flowed too quickly and channeled, try grinding a step finer on your next attempt while keeping your prep the same. If it was lopsided, focus entirely on a more level tamp. This iterative process of observing, analyzing, and adjusting is how you will dial in your technique.
Conclusion
The bottomless portafilter is far more than an aesthetic upgrade for your espresso setup; it is an essential teacher. It strips away the mystery of extraction and provides direct, honest feedback on your technique. By exposing issues like channeling and uneven flow, it forces you to perfect the foundational skills of puck preparation, from distribution to tamping. The initial learning curve can be messy and even frustrating, but the visual information it provides is the fastest path to understanding what is happening inside the basket. Embracing this tool and the lessons it teaches will fundamentally change your approach to making coffee, empowering you to diagnose problems, make targeted adjustments, and consistently pull delicious, cafe-quality espresso in your own home.
 No products in the cart.