
How to calibrate your eureka mignon stepless adjustment dial
The Eureka Mignon series of grinders is a favorite among home baristas for its exceptional grind quality and precision. At the heart of this precision is its stepless micrometric adjustment system, which offers infinite settings to perfectly dial in your espresso. However, after a deep cleaning, burr replacement, or simply over time, the reference numbers on the dial may no longer correspond to the actual grind size. Your “zero point” can drift. Calibrating the dial is a simple but crucial maintenance task that re-establishes this zero point, ensuring you have a reliable baseline for all your grinding. This guide will walk you through the entire process, from preparation to finding the true zero point, so you can regain full control and consistency over your grind.
Understanding the eureka stepless system
Before we start turning the dial, it’s important to understand what makes the Eureka Mignon’s adjustment system unique. Unlike many grinders that use “stepped” adjustments with a limited number of clicks, the Mignon is stepless. This means you have a virtually infinite range of grind sizes, allowing for tiny, precise changes that can make all the difference in an espresso shot. Furthermore, most Mignon models utilize a bottom-burr adjustment mechanism. This means when you adjust the grind size, the lower burr moves up or down, while the top burr remains stationary. This is a significant advantage because it means you can disassemble and clean the grinder’s upper burr and chamber without losing your grind setting. Calibration becomes necessary when you want to establish a true, absolute baseline—the point where the burrs are just touching—so that the numbers on your dial have a meaningful and repeatable reference point.
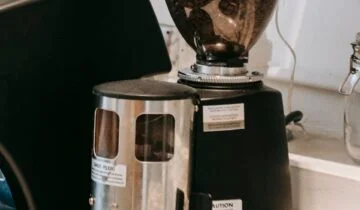
Preparing your grinder for calibration
Proper preparation is key to a safe and accurate calibration. Rushing this step can lead to an incorrect zero point or even damage to your grinder. Follow these steps carefully to get your grinder ready.
- Unplug the grinder: Safety is paramount. Before you do anything else, make sure the grinder is completely disconnected from the power source.
- Empty the hopper: Remove all coffee beans from the hopper. If your hopper has a closing gate, use it to make this process cleaner. Once the hopper is empty, remove it from the grinder.
- Purge the grinding chamber: Plug the grinder back in and run it for 5-10 seconds. This will purge any remaining beans and partial grounds caught between the burrs. Use a grinder bellows if you have one to blow out any stubborn retention.
- Perform a quick clean: With the grinder unplugged again, use a brush to clean out the grinding chamber and the exit chute as thoroughly as possible. Any old coffee grounds left inside can interfere with the calibration process and prevent the burrs from touching evenly. A clean chamber ensures you find the true zero point.
Once your grinder is empty and clean, you’re ready to find where the burrs meet.
Finding the true zero point
This is the most critical part of the calibration process. The goal is to find the exact point where the burrs first make contact. This is your “true zero.” You will need to use your sense of hearing for this step.
With the hopper off and the grinder empty, plug it in and turn it on. The burrs will be spinning freely. Now, very slowly and carefully, begin to turn the adjustment dial towards the finer setting (typically clockwise). As you turn the knob, listen intently. You are listening for a faint, high-pitched metallic sound, often described as a “chirp” or a “whir.” This is the sound of the tips of the burr teeth just beginning to touch each other.
As soon as you hear this first chirp, stop adjusting immediately. This is your true zero point. If you continue to turn the dial finer, the sound will become a loud, grinding metallic screech. Avoid this at all costs, as running the grinder with the burrs fully engaged can cause significant and unnecessary wear. Finding the very first, subtle point of contact is all that is needed. Turn the grinder off once you have found this point.
Setting your new reference point and dialing in
Now that you’ve located the true zero, it’s time to make it official on your dial. Look at the number the indicator on your dial is pointing to. This is your new zero. At this point, you have two options: either remember this number as your new baseline or physically reset the dial itself to read “0”.
Many Mignon models allow you to reset the dial’s position. You might need to loosen a small set screw on the side of the knob, or the numbered dial plate may simply be held on by friction. Carefully adjust the numbered part of the dial so that the “0” aligns with the indicator mark, without moving the actual adjustment mechanism itself. Once aligned, tighten the screw or press the plate back into place.
Important: Before you add beans or start grinding, you must back the dial off towards a coarser setting. Never start the grinder with beans in it at the zero point. A good starting point for espresso is typically one full rotation or number away from your new zero point. From there, you can begin the process of dialing in your first shot. The table below offers some very general starting points, but you will need to adjust based on your specific machine, coffee, and basket.
| Grind Type | Approximate Setting (from zero) | Notes |
|---|---|---|
| Espresso | 0.5 – 1.5 | This is a highly sensitive range. Small adjustments make a big difference. |
| Pour Over / Drip | 3 – 5 | A good starting point for methods like V60 or automatic drip machines. |
| French Press | 6 – 8 | Aim for a coarse, consistent grind to minimize sediment. |
Calibrating your Eureka Mignon grinder is a straightforward task that empowers you with a deeper understanding of your equipment. By re-establishing a true zero point, you create a reliable and repeatable foundation for all future adjustments. This process ensures that the numbers on your dial are not arbitrary but are directly tied to the physical position of the burrs, giving you unparalleled precision. Summarizing the steps, you simply need to prepare the grinder by cleaning it, carefully listen for the burr chirp to find the true zero, and then set your dial as a reference. This simple piece of maintenance will remove guesswork, streamline your dialing-in process, and ultimately lead to more consistent and delicious coffee every single day.


 No products in the cart.