Master your Gaggia Classic: Using a bottomless portafilter for perfect espresso
The Gaggia Classic is a legend in the world of home espresso, renowned for its power and potential to produce cafe-quality shots. However, for many new owners, unlocking that potential can be a frustrating journey of sour, bitter, or inconsistent results. The standard spouted portafilter hides the extraction process, leaving you guessing what went wrong. This is where the bottomless portafilter comes in. Far from being just an aesthetic upgrade, it is the single most important diagnostic tool for any Gaggia Classic user. This article will guide you through how to use this essential accessory to see inside your extraction, identify common problems, and systematically fix them to pull consistently delicious espresso every time.
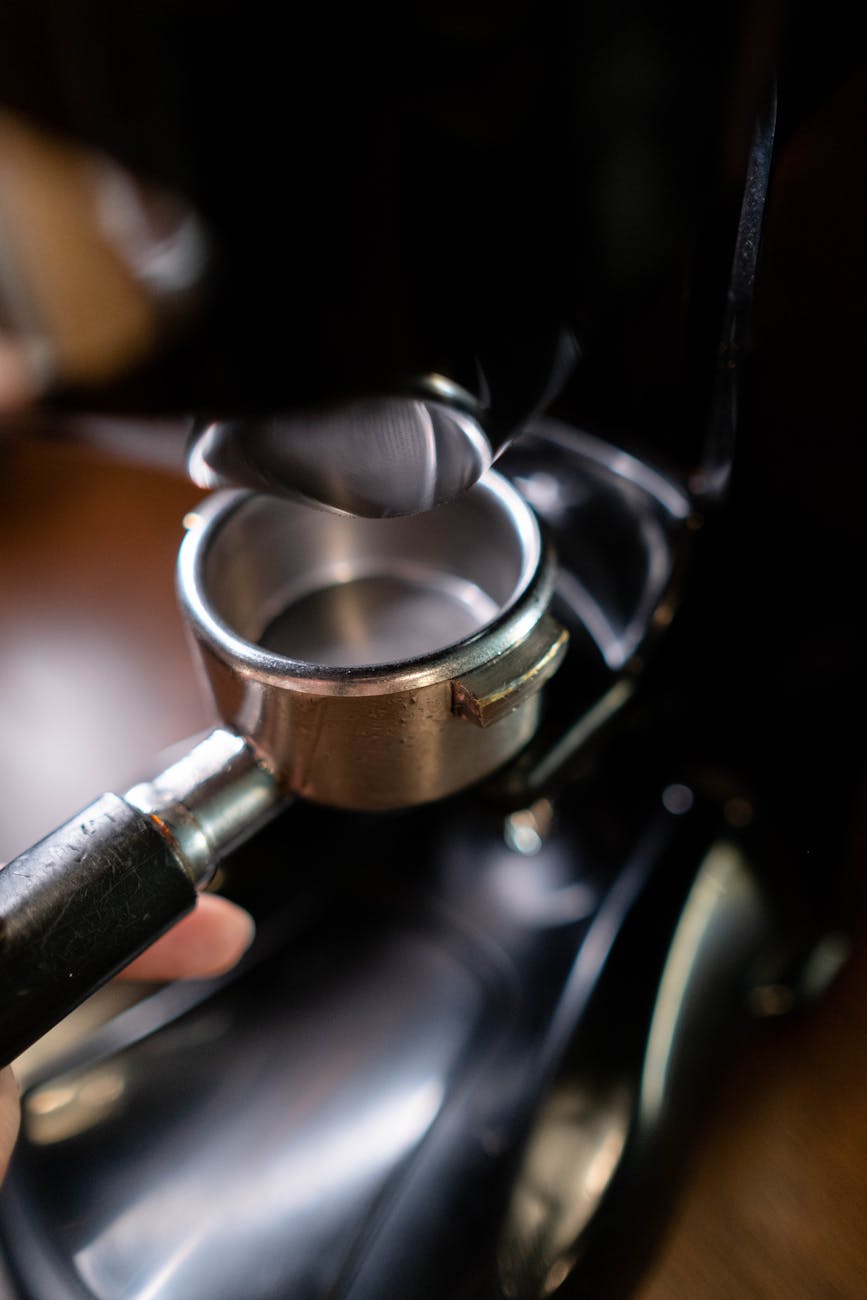
What is a bottomless portafilter and why you need one
A standard portafilter has a solid metal base with one or two spouts that guide the espresso into your cup. A bottomless portafilter, often called a naked portafilter, has this bottom section completely removed, exposing the underside of the filter basket. This simple modification provides an unfiltered, real-time view of how water is passing through your coffee puck.
For a Gaggia Classic owner, this visual feedback is invaluable. The Gaggia is a powerful machine with no pre-infusion and a high-pressure pump, which can be unforgiving of any flaws in your preparation. A bottomless portafilter doesn’t hide these flaws; it exposes them. Instead of a messy shot being contained and funneled through spouts, you’ll see it spray across your counter. While messy, this is crucial information. It immediately tells you that your puck preparation needs work. By observing the flow, you transform guesswork into a clear, actionable process for improvement.
The benefits extend beyond diagnostics:
- Improved puck prep: It forces you to perfect your distribution and tamping techniques to achieve an even, centered flow.
- Better crema: The espresso falls directly into the cup, preserving the delicate crema that can be disturbed by flowing down spouts.
- Increased clearance: It provides more vertical space, making it easier to fit a scale and a larger mug under the group head.
–
Identifying common extraction problems
Once you’ve switched to a bottomless portafilter, the first few shots might be surprising, and probably messy. Don’t be discouraged. This is the learning phase. The goal is to understand what you’re seeing and what it means for your coffee’s taste.
A perfect extraction should look beautiful. After a few seconds, you’ll see beads of dark espresso form across the entire bottom of the basket. These beads will quickly coalesce into a single, steady stream in the center. The flow should look viscous and syrupy, like warm honey, and feature rich, deep brown and reddish-brown colors, often called tiger striping. This indicates an even and well-paced extraction.
More often, you will see one of these common issues:
- Channeling: This is the most common problem. You’ll see one or more tiny, high-pressure jets of watery espresso spraying out from the basket. This happens when water finds a path of least resistance—a “channel”—through the coffee puck. This results in a shot that is simultaneously under-extracted (sour) and over-extracted (bitter) because some grounds are bypassed while others are blasted with water.
- Side channeling: You’ll notice the extraction begins heavily on one side of the basket while the other side remains dry or starts much later. This is a clear sign that the coffee grounds are not level in the basket or that you applied uneven pressure when tamping.
- Early blonding: A good shot starts dark and gradually lightens in color. If your stream turns a pale, watery blonde color very early in the shot (e.g., within 10-15 seconds), it means the water is flowing through the puck too quickly. Your grind is likely too coarse, your dose is too low, or channeling has destroyed the puck’s integrity.
How to fix your puck prep and dial in your shot
Seeing the problem is the first half of the battle; the second is knowing how to fix it. The visual cues from your bottomless portafilter point directly to specific adjustments in your routine. This is the process of “dialing in.” It all comes down to creating a coffee puck that provides uniform resistance to the Gaggia’s powerful water pressure.
The most critical step is distribution. Coffee grinders often produce clumps and an uneven mound of grounds in the basket. If you tamp this directly, you create dense and less-dense spots, which are perfect pathways for channeling. The best way to solve this is with the Weiss Distribution Technique (WDT). This involves using a tool with very fine needles to stir the grounds in the portafilter, breaking up all clumps and creating a fluffy, level bed of coffee.
Next is tamping. The goal of tamping is not to press as hard as you can, but to press evenly. Ensure your tamper is perfectly level with the rim of the basket. Any tilt will create uneven density and lead to side channeling. A self-leveling tamper can be a great investment to ensure consistency.
Finally, you must adjust your grind size. If your shot flows too fast and blondes early, you need to grind finer. This creates more surface area and less space between particles, slowing down the water flow and allowing for proper extraction. Make small, incremental adjustments to your grinder until you achieve your desired shot time (typically 25-30 seconds for a standard 1:2 ratio).
Here is a quick reference table to connect the problem to the solution:
| Problem (Visual Cue) | Likely Cause | Primary Solution |
|---|---|---|
| Jets of coffee spraying (channeling) | Clumps in coffee grounds; uneven density | Improve distribution with a WDT tool |
| Extraction starts on one side | Uneven distribution or a tilted tamp | Ensure a level coffee bed and apply even tamping pressure |
| Shot runs very fast and is pale | Grind is too coarse or dose is too low | Grind your coffee finer to increase resistance |
| “Doughnut” extraction (starts at edges) | Grounds pushed to the side during distribution/tamping | Use WDT and tap the portafilter gently to settle grounds evenly |
Conclusion
Mastering espresso on a powerful machine like the Gaggia Classic is a skill that requires practice and the right tools. While a quality grinder is non-negotiable, the bottomless portafilter is arguably the most important learning accessory you can buy. It lifts the veil on the extraction process, turning abstract concepts like “channeling” and “uneven flow” into tangible, visible problems you can directly address. By observing how your shots pull, you can stop guessing and start making targeted adjustments to your distribution, tamping, and grind size. It may be messy at first, but embracing the feedback a bottomless portafilter provides is the fastest and most effective way to progress from inconsistent, frustrating shots to consistently delicious, syrupy espresso.


 No products in the cart.