How to transition from a semi-automatic to a manual espresso lever
Making the leap from a semi-automatic to a manual lever espresso machine is an exciting step for any home barista. You’ve already mastered the basics of grinding, dosing, and tamping. Now, you’re seeking a more tactile, intimate, and rewarding coffee experience. This transition, however, involves more than just swapping one machine for another; it’s a fundamental shift in philosophy from pushing a button to becoming an integral part of the extraction process. This guide is designed to walk you through that transition, demystifying the art of the pull. We’ll explore the key mechanical differences, delve into the new skills you’ll need to master like pressure profiling, and refine your workflow to help you pull exceptional, nuanced shots with your new lever machine.
From push-button to pull-down: Understanding the key differences
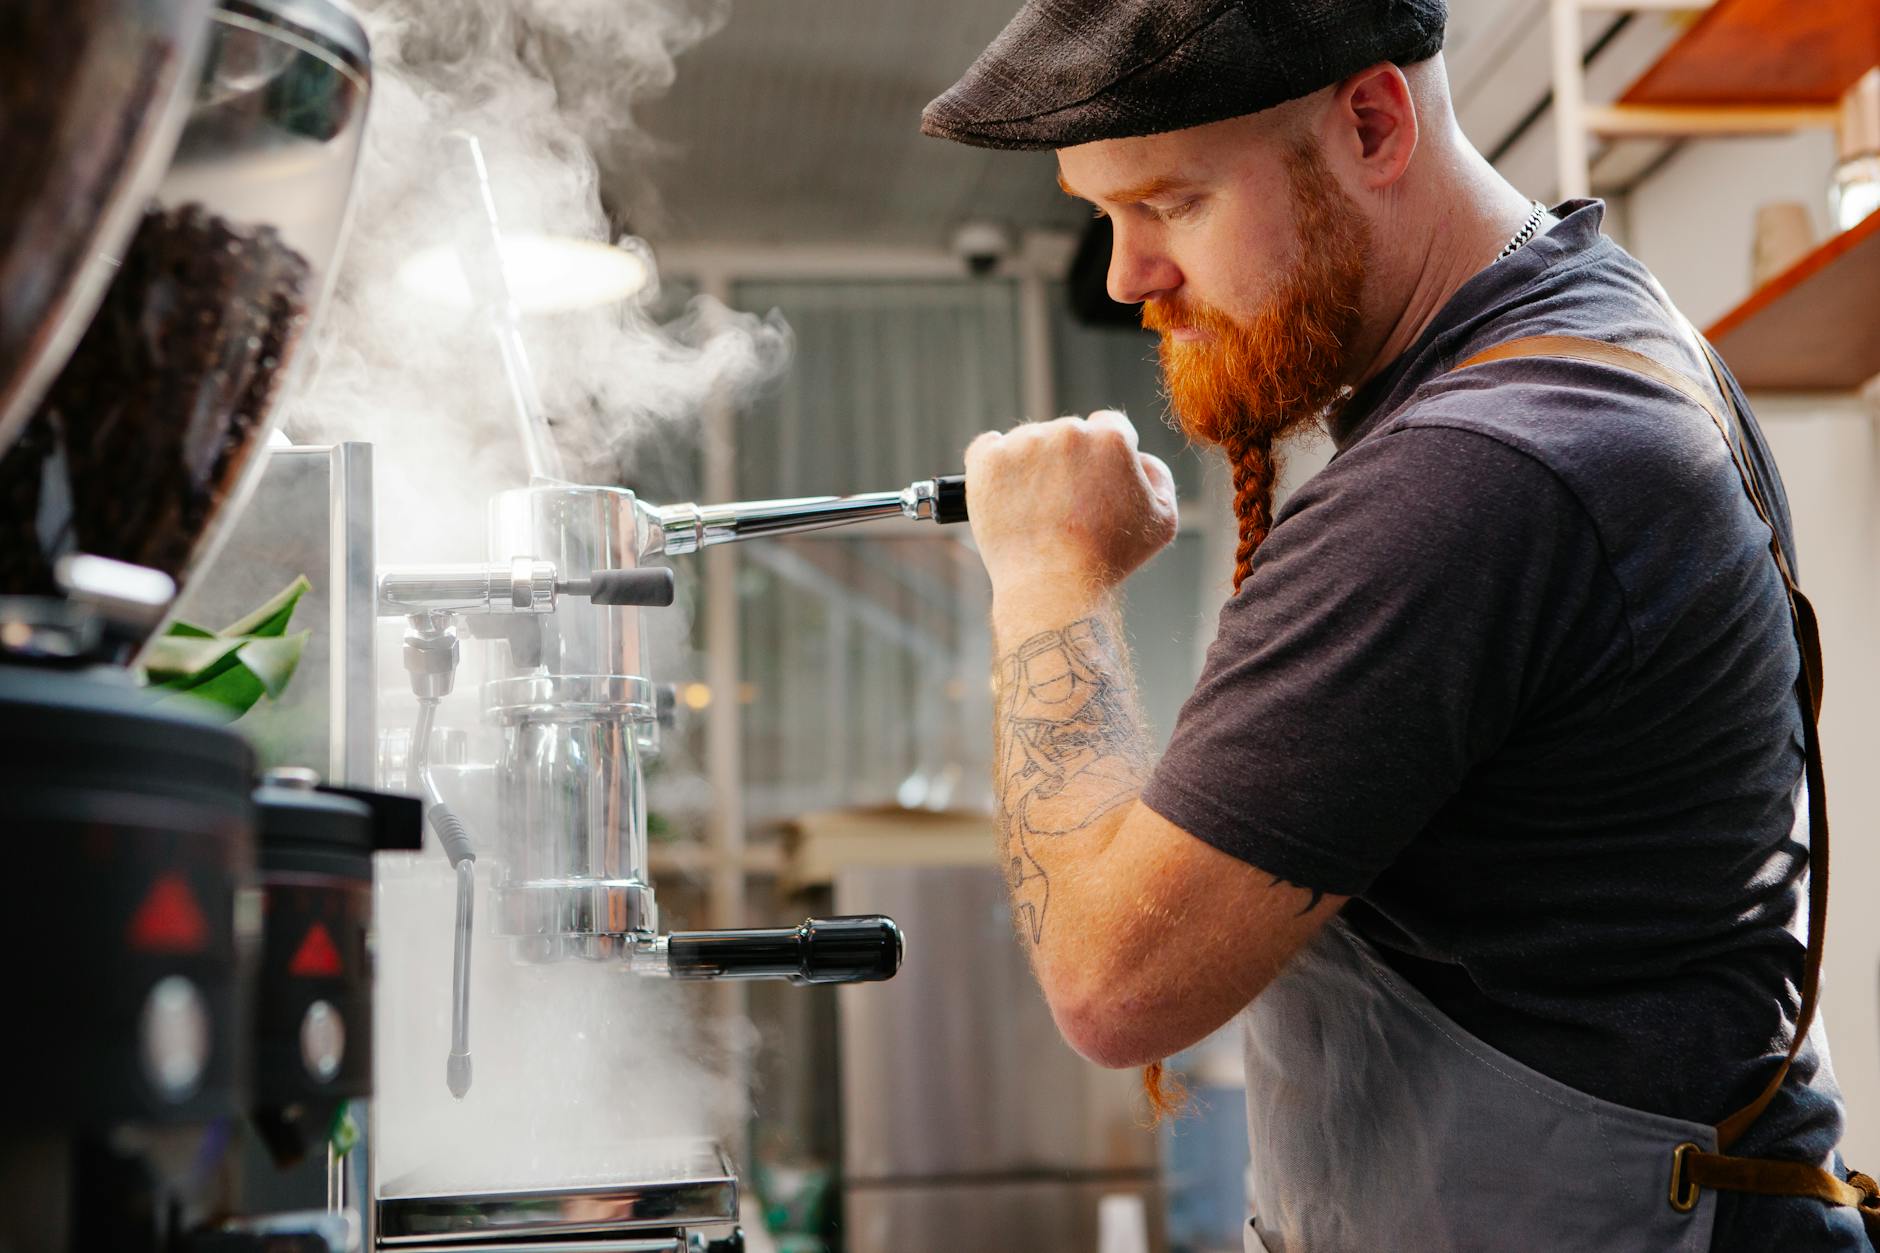
The most significant change when moving to a lever machine is the source of pressure. Your semi-automatic machine uses an electric pump to force water through the coffee puck at a constant, regulated pressure, typically around 9 bars. A manual lever machine, on the other hand, relies entirely on you. This shift from automated consistency to manual control is where the magic, and the challenge, lies.
There are two primary types of manual lever machines you’ll encounter:
- Direct lever: With these machines, you are the pump. The pressure applied to the coffee is a direct result of the force you exert on the lever. This offers the ultimate control over every second of the extraction but requires significant practice to develop consistency and feel.
- Spring-piston lever: This is a more common and forgiving design. You pull the lever down to compress a powerful spring and fill the brew chamber with water. When you release the lever, the spring expands, pushing the piston up and forcing water through the coffee. This mechanism naturally creates a declining pressure profile, which many enthusiasts believe extracts a sweeter, more balanced shot.
Beyond the pressure source, the experience is profoundly different. A lever machine provides immense sensory feedback. You can feel the resistance of the puck as you pre-infuse and pull the shot. If the grind is too coarse, the lever will offer little resistance. If it’s too fine, it will feel choked. This tactile connection is something a semi-automatic machine simply cannot offer, transforming your routine from a procedure into a craft.
The art of the pull: Mastering pre-infusion and pressure profiling
With the pump gone, two new variables enter your workflow: manual pre-infusion and pressure profiling. Mastering these is the key to unlocking the full potential of your lever machine. Pre-infusion is the act of gently saturating the coffee puck with low-pressure water before applying full extraction pressure. This helps settle the coffee bed, reduce the risk of channeling, and promote a more even extraction.
On a direct lever, you control this by lifting the lever just enough to let water into the group head, holding it there for several seconds before beginning the pull. On a spring lever, this happens as you hold the lever in the down position. The duration of your pre-infusion is now a critical variable you control, often lasting anywhere from 5 to 15 seconds depending on the coffee.
Pressure profiling is the deliberate manipulation of pressure throughout the shot. While your semi-automatic aimed for a flat 9 bars, a lever machine excels at creating a dynamic profile. A classic spring lever profile might look like this:
- Pre-infusion: 2-3 bars of pressure to saturate the puck.
- Ramp-up: A quick rise to a peak pressure of 8-9 bars as you release the lever.
- Decline: A gradual, gentle decrease in pressure down to 5-6 bars as the spring expands and the puck’s resistance lessens.
This declining profile is much gentler on the coffee, often reducing bitterness and highlighting delicate, sweet flavors that a flat pressure profile can mask. With a direct lever, you have complete freedom to invent your own profiles, experimenting with different pressures to see how they affect the taste in the cup.
Adapting your workflow: Grinding, tamping, and timing
While the fundamentals of puck preparation remain the same, their importance is amplified with a lever machine. Your existing skills in grinding and tamping are a fantastic foundation, but you’ll need to adapt them to the new feedback you’re receiving from the machine. Channeling, where water finds a path of least resistance through the puck, is the primary enemy. With a lever, you can often feel a sudden drop in resistance, a clear sign that channeling has occurred.
Because of this, your puck preparation must be impeccable. Using a Weiss Distribution Technique (WDT) tool to break up clumps and ensure an even density becomes almost non-negotiable. Your tamp must be perfectly level to promote an even flow of water. The grind size is also more nuanced. You are no longer just dialing in for a specific shot time; you are dialing in to achieve a certain feel and resistance in the lever that allows you to execute your desired pressure profile.
The old rule of a “25-30 second shot” becomes less relevant. Your total time, including a 10-second pre-infusion, might be closer to 40-45 seconds. It’s far more useful to focus on your brew ratio (the ratio of dry coffee grounds to liquid espresso) and the visual cues of the extraction, using time and a scale as data points rather than strict targets.
| Workflow Variable | Semi-Automatic Approach | Manual Lever Approach |
|---|---|---|
| Pressure | Constant 9 bars set by the pump. | Variable, controlled by the user. Declining profile is common. |
| Pre-infusion | Often automated, short, or non-existent. | Manually controlled and a critical variable for shot quality. |
| Grind Setting | Dialed in to achieve a target time (e.g., 28 seconds). | Dialed in to provide the correct resistance for a pressure profile. |
| Key Feedback | Shot timer, pressure gauge, visual flow. | Tactile feel of the lever, shot timer, scale, visual flow. |
Reading the signs: Troubleshooting your first lever shots
Your first few weeks with a lever machine will be a learning experience, and it’s normal to pull some less-than-perfect shots. The key is to learn how to interpret the feedback the machine gives you. If a shot goes wrong, don’t just dump it—taste it and think about what happened.
- Problem: The lever pulls down too quickly with no resistance.
Diagnosis: This is a classic sign of channeling or a grind that is far too coarse. The water is gushing through the puck without extracting properly. The shot will taste sour and weak.
Solution: Grind finer. If the grind seems appropriate, focus heavily on your puck prep. Use a WDT tool and ensure a firm, level tamp. - Problem: The lever is impossible to push down (“choked”).
Diagnosis: Your grind is too fine, or you have dosed too much coffee in the basket, leaving no headroom.
Solution: Grind coarser. If you’re sure the grind is in the right ballpark, try reducing your dose by a gram. - Problem: The shot tastes sour and underdeveloped.
Diagnosis: Under-extraction. This can be caused by a shot that ran too fast, water temperature that was too low, or insufficient pre-infusion.
Solution: Try grinding a step finer to increase resistance and slow the shot down. Extend your pre-infusion time to 10-12 seconds to better saturate the puck. Also, ensure your machine is fully warmed up.
Conclusion
Transitioning from a semi-automatic to a manual lever machine is a journey from automation to artistry. It requires patience and a willingness to unlearn some old habits, but the rewards are immense. You leave behind the world of simple button-pushing and enter a domain of tactile feedback and complete control. By understanding the core differences in how pressure is generated, mastering the nuances of manual pre-infusion and pressure profiling, and adapting your workflow to focus on feel and puck integrity, you begin to build an intuitive connection with your coffee. The learning curve is real, but embracing it is part of the joy. The ultimate result is not just better-tasting espresso, but a deeper, more satisfying relationship with the entire craft of coffee making.

 No products in the cart.