
Taming the bright, vibrant, and often elusive flavors of a light roast coffee on a manual espresso machine can feel like a daunting task. While these beans promise a world of complex acidity, delicate florals, and sweet fruit notes, they often deliver a sharp, sour, and disappointing shot in the hands of the unprepared. This is because light roasts are denser and less soluble than their darker counterparts, demanding a different approach to extraction. They require more energy—in the form of heat, time, and precise pressure—to unlock their potential. This guide is your roadmap to mastering that challenge. We will walk through the essential theory, the right parameters, and the hands-on techniques needed to dial in light roasts and pull consistently delicious, balanced espresso shots from your manual machine.
Understanding why light roasts are different
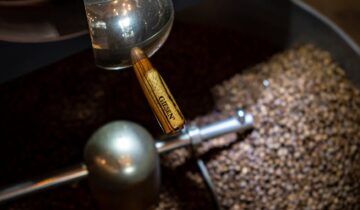
Before you can successfully pull a light roast shot, it’s crucial to understand why it behaves so differently from a medium or dark roast. The roasting process fundamentally changes the coffee bean’s structure. Darker roasts are more brittle and porous, making them easier to extract. Light roasts, having spent less time in the roaster, are significantly denser and less soluble.
This density presents a few key challenges:
- Resistance to water: Water struggles to penetrate a dense coffee puck, increasing the risk of channeling, where water finds a path of least resistance and bypasses most of the coffee grounds. This leads to a shot that is simultaneously sour (under-extracted) and bitter (from the small part that was over-extracted).
- Higher energy requirement: To break down the cellular structure and extract the desirable flavor compounds, light roasts need more energy. This translates to higher water temperatures and often longer contact time.
- Inherent acidity: Light roasts have a higher concentration of organic acids. When properly extracted, these acids taste like bright fruitiness—think citrus or stone fruit. When under-extracted, they taste unpleasantly sour and vegetal. The goal is to transform this sourness into sweetness and complexity.
A manual espresso machine gives you direct control over the variables needed to overcome these challenges, particularly pressure. This makes it a powerful tool, but it also means there’s a steeper learning curve.
Your starting point: Gear and recipe
Consistency is your greatest ally when dialing in a fussy coffee. To achieve it, you need the right tools and a solid starting recipe. Simply guessing your parameters will lead to frustration. Your non-negotiable toolkit should include a high-quality espresso grinder, a scale accurate to 0.1 grams with a built-in timer, and a WDT (Weiss Distribution Technique) tool for breaking up clumps.
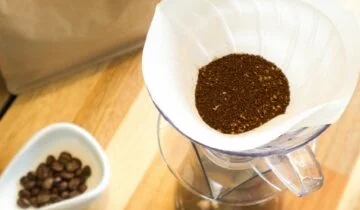
A good grinder is especially critical for light roasts. Because you need to grind finer to increase surface area and aid extraction, a lesser grinder will produce too many fines, choking the machine and creating astringency. Once your gear is ready, use the following parameters as a baseline. Remember, this is a starting point, not a final destination.
| Variable | Starting recommendation | Reasoning |
|---|---|---|
| Dose | 18 grams | A standard starting dose that fits most double baskets. |
| Grind size | Finer than for a medium roast | Increases the surface area of the coffee, helping water extract flavors from the dense beans. |
| Yield (output) | 45 grams (a 1:2.5 ratio) | A longer ratio gives the water more contact time to extract sugars and balance the acidity. |
| Water temperature | 94-96°C (201-205°F) | Higher temperatures provide the thermal energy needed for proper extraction of less soluble compounds. |
| Total shot time | 30-40 seconds (including pre-infusion) | Longer shots are typical for light roasts to achieve a balanced extraction. |
Mastering puck prep and pressure profiling
With a manual lever machine, how you build pressure is just as important as the recipe itself. This is where you leverage your control to overcome the challenges of a light roast. It all starts with flawless puck preparation to prevent channeling.
First, after grinding, use your WDT tool thoroughly to break up any clumps and evenly distribute the grounds in your portafilter. This creates a homogenous bed for water to flow through. Next, give the portafilter a gentle tap on the counter to settle the grounds and then tamp firmly and, most importantly, perfectly level. An uneven tamp is a primary cause of channeling.
Now for the shot itself. The key technique for light roasts is a long, low-pressure pre-infusion.
- Slowly raise the lever to let water into the chamber and apply a small amount of pressure, aiming for around 2-3 bars. You should see the first few drops of espresso begin to form at the bottom of the basket.
- Hold this low pressure for 10-15 seconds. This step is critical. It gently saturates the entire coffee puck, swelling the grounds and reducing the chance of water blasting through a weak spot when you apply full pressure.
- After a long pre-infusion, smoothly ramp up to your peak pressure, typically around 8-9 bars.
- As the shot progresses, the puck’s resistance will decrease. To maintain a steady flow and avoid a gushing, astringent end to your shot, you should begin to taper the pressure. Gently ease off the lever for the final third of the shot, perhaps finishing around 5-6 bars as you approach your target yield.
This pressure profile—a long, slow pre-infusion followed by a gentle taper—gives the water time to work its magic without fracturing the delicate puck structure.
Tasting, troubleshooting, and making adjustments
You’ve pulled your first shot using the new recipe and technique. Now it’s time to taste and diagnose. Your palate is the ultimate tool for dialing in. Don’t be discouraged if the first shot isn’t perfect; it’s a data point for your next adjustment. Focus on making one change at a time so you can clearly see its effect.
Here’s how to interpret what you taste:
- If it tastes sour, sharp, or like unripe fruit: Your shot is under-extracted. The acids are present, but the sugars that provide balance have not been pulled from the coffee.
Solution: Grind finer. This is the most effective change. A finer grind increases resistance and surface area, boosting extraction. Alternatively, you can increase your yield (e.g., from 45g to 50g) to push more water through the puck. - If it tastes bitter, dry, or hollow: Your shot is either over-extracted or, more likely, channeled. Bitterness comes from extracting undesirable compounds, while a dry, chalky sensation (astringency) is a classic sign of channeling.
Solution: First, check your puck prep. Are you using WDT effectively? Is your tamp level? If your prep is solid, try grinding slightly coarser to reduce resistance. You could also try decreasing the peak pressure to 8 bars instead of 9. - If it tastes great but a little weak: The balance is good, but the body is thin.
Solution: Try a slightly shorter ratio (e.g., from 1:2.5 to 1:2.3) by reducing your yield. This can increase the textural richness of the shot.
Keep a small notebook to track your parameters (dose, yield, time, grind setting) and taste notes for each shot. This will help you see patterns and dial in new beans much faster in the future.
Pulling a spectacular shot of light roast espresso on a manual machine is one of home barista’s most rewarding experiences. It represents a true connection between you, your equipment, and the coffee. The journey requires patience and a methodical approach, but it is far from impossible. By understanding the inherent challenges of dense, less soluble beans, you can adjust your technique accordingly. Remember the core principles: use a higher temperature, a finer grind, and a longer brew ratio as your starting point. Master your puck preparation to prevent channeling, and most importantly, leverage the unique control of your manual machine. A long, low-pressure pre-infusion followed by a tapering pressure profile is your key to unlocking the sweet, complex, and vibrant flavors hidden within that light roast bean.
 No products in the cart.