The Flair Espresso Maker has revolutionized the world of manual espresso, offering enthusiasts the ability to pull cafe-quality shots from the comfort of their own homes. Its brilliant, minimalist design is a key part of its appeal, but that simplicity also means that every component plays a crucial role. To ensure your Flair continues to produce rich, flavorful espresso shot after shot, a consistent cleaning and maintenance routine is not just recommended—it’s essential. This guide will walk you through everything you need to know, from the quick daily rinse to deeper, periodic maintenance. By investing just a few minutes in proper care, you’ll protect your investment, prevent bitter flavors from creeping into your coffee, and guarantee a long and happy life for your beloved espresso maker.
Daily cleaning rituals for consistent flavor
The most important step in maintaining your Flair Espresso Maker happens right after you’ve enjoyed your shot. Procrastination is the enemy of good espresso, as coffee oils and microscopic grounds can quickly dry and adhere to the components, leading to buildup that imparts a bitter, rancid taste over time. Creating a simple, immediate post-shot ritual is the secret to consistent flavor.
As soon as you’ve pulled your shot, follow these steps:
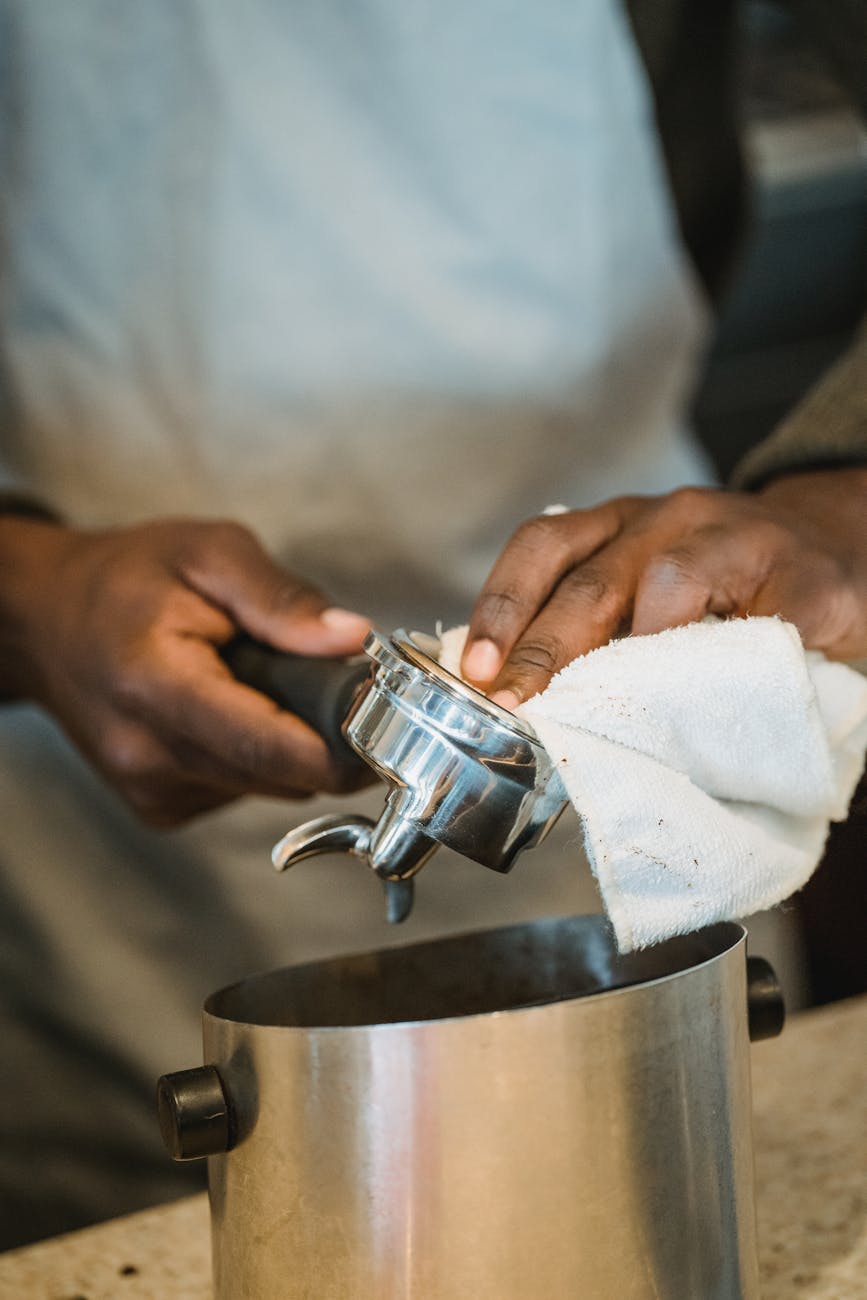
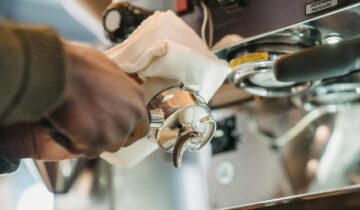
- Dispose and rinse immediately: Knock the spent coffee puck out of the portafilter into your compost or knock box. Immediately take the brew head, portafilter, and dispersion screen to the sink and rinse them thoroughly under hot running water. The hot water helps to dissolve and wash away the fresh coffee oils before they have a chance to set.
- Gentle scrubbing: Use a soft brush—a dedicated coffee-group-head brush or a simple bottle brush works perfectly—to gently scrub the inside of the brewing cylinder and both sides of the dispersion screen. This dislodges any fine coffee particles that water alone might miss.
- Wipe down the frame: Take a damp microfiber cloth and wipe down the main stand and lever mechanism. This cleans up any stray drips of coffee or water, keeping your entire setup looking pristine.
- Dry completely: This is a critical step. Use a dry, soft towel to thoroughly dry all the components you just washed. Air drying can leave mineral deposits (water spots) and trapped moisture can degrade the o-rings over time. Storing your Flair completely dry is key to its longevity.
This entire process takes less than two minutes but makes a world of difference in the performance of your machine and the taste of your next espresso.
Weekly and monthly deep cleaning procedures
While daily rinsing handles the immediate residue, a more thorough cleaning is necessary to tackle the stubborn oils and potential mineral buildup that can occur over time. This deeper maintenance keeps your Flair operating at peak efficiency. For your weekly routine, it’s time to give the brew head a more intensive treatment. Disassemble the brewing cylinder and piston. Create a soaking solution in a bowl using hot water and a specialized coffee equipment cleaner like Cafiza. These cleaners are specifically formulated to break down coffee oils and residue that soap and water can’t effectively remove.
Soak the metal components—not the o-rings if you can help it—for about 15-20 minutes. After soaking, use your soft brush to scrub them once more and then rinse them meticulously with clean water to ensure no cleaner residue remains. On a monthly basis, you should inspect for and address scale buildup. While the Flair has no boiler, the water you use still contains minerals that can deposit on the stainless steel parts. To descale, run a “shot” using a solution of descaler or citric acid and hot water. Let the solution sit in the brew head for about 20 minutes before ejecting it. Afterwards, you must run at least two or three full cycles with fresh, clean water to flush the system completely.
Maintaining your o-rings and pressure gauge
The heart of the Flair’s pressure system lies in its silicone o-rings. These small but mighty components create the airtight seal necessary to generate the 6-9 bars of pressure for true espresso. Proper care is non-negotiable for performance. Regularly inspect the o-rings on the piston and, on models like the PRO 2, on the plunger stem. Look for any signs of cracking, brittleness, or flattening. A healthy o-ring is pliable and round.
To extend their life, periodically apply a very thin layer of a food-safe silicone lubricant. This keeps them from drying out and helps maintain a perfect seal. If you notice any leaks or a sudden inability to hold pressure, a worn-out o-ring is the most likely culprit, and it’s time for a replacement. For users with a pressure gauge, ensuring its accuracy is key. Over time, the small opening on the gauge stem can become clogged with coffee fines, leading to faulty readings. Carefully unscrew the gauge from the brew head. Use the tip of a paperclip to gently clear any debris from the stem’s opening. Wipe the threads clean before carefully screwing it back into place until it’s snug, but do not overtighten.
Long-term care and quick reference guide
Beyond the regular cleaning schedule, a few best practices will ensure your Flair Espresso Maker serves you well for years to come. The single most impactful choice you can make is the water you use. Always use filtered or softened water. Tap water, especially in hard water areas, is the primary cause of scale buildup, which can affect performance and is difficult to remove. Secondly, never use abrasive sponges or harsh chemical cleaners on any part of your Flair. The precision-machined parts and finishes can be easily scratched or damaged. A soft cloth and a gentle brush are all you need.
If you plan on storing your Flair for an extended period, make sure it is impeccably clean and, most importantly, bone dry before packing it away in its case. This prevents any trapped moisture from causing issues down the line. Below is a simple table to help you keep track of your maintenance schedule.
| Frequency | Task | Purpose |
|---|---|---|
| After Every Shot | Rinse brew head, portafilter, screen. Wipe frame. Dry all parts. | Prevents coffee oil buildup and bitter flavors. |
| Weekly | Soak metal brew parts in a coffee-specific cleaner. | Removes stubborn, deep-set coffee oils. |
| Monthly | Descale with citric acid/descaler. Inspect o-rings. | Removes mineral buildup and ensures pressure seal integrity. |
| As Needed | Clean pressure gauge stem. Lubricate or replace o-rings. | Maintains accurate pressure readings and prevents leaks. |
By following this simple framework, you’re not just cleaning a coffee maker; you’re preserving the quality of your daily ritual.
In conclusion, treating your Flair Espresso Maker with care is a straightforward process that pays enormous dividends. It’s a beautifully designed tool, and its manual nature creates a deep connection between the user and the final cup. Honoring that connection with a consistent maintenance routine is the key to unlocking its full potential for years. From the simple two-minute rinse after every shot to the more thorough weekly soaks and monthly inspections, each step plays a vital role. This regimen ensures every pull is as clean, sweet, and delicious as the last, free from the bitterness of old coffee oils. By following this guide, you guarantee that your Flair will remain a reliable and cherished part of your coffee journey, consistently rewarding your efforts with exceptional espresso.

 No products in the cart.