
The Cafelat Robot is a masterpiece of minimalist design, offering complete manual control over every aspect of your espresso extraction. This level of control is a double-edged sword; it provides the potential for incredible shots but also exposes any flaws in your preparation technique. If you’ve struggled with inconsistent shot times, spurting from your bottomless portafilter, or sour, under-extracted flavors, the problem likely lies in your puck prep. This article will explore the single most effective technique to elevate your Robot espresso: the Weiss Distribution Technique, or WDT. We will delve into why this simple act of stirring your grounds with a needle tool is not just a fussy extra step, but a fundamental key to unlocking consistent, delicious, and repeatable espresso from your Cafelat Robot.
What is the Weiss distribution technique?
Before we can apply it to the Robot, it’s crucial to understand what the Weiss Distribution Technique actually is. Developed in the early 2000s by home barista John Weiss, WDT is a distribution method used to de-clump and evenly distribute coffee grounds in an espresso portafilter basket before tamping. At its core, the process involves using a tool with very fine needles—often acupuncture needles or 3D printer nozzle cleaning needles—to gently stir the coffee grounds. The primary goal is to break up any clumps that form during grinding and eliminate density variations across the coffee bed. When grounds are not evenly distributed, water will find the path of least resistance, leading to a phenomenon known as channeling. This results in some parts of the coffee puck being over-extracted while others are under-extracted, creating a final shot that is both bitter and sour.
Why WDT is essential for the Cafelat robot
While WDT is beneficial for any espresso machine, it is arguably more critical for a fully manual lever machine like the Cafelat Robot. Unlike semi-automatic machines with electric pumps that provide a steady, often forgiving pre-infusion, the Robot’s pressure is delivered entirely by you. This direct feedback system is fantastic, but it means any imperfections in your coffee puck are immediately exploited. Here’s why WDT is so impactful for the Robot:
- No Pump Forgiveness: An electric pump can sometimes mask minor puck prep flaws by saturating the puck evenly at a low, consistent pressure. With the Robot, your manual pre-infusion and pressure ramp-up will immediately find any weak spots or channels, causing water to gush through them. Proper WDT creates a homogenous puck that can withstand this manual pressure.
- The Straight-Walled Basket: The Robot features a high-quality, 58mm professional-style basket with straight walls. This design is excellent for even extractions but is less forgiving of poor distribution compared to some tapered baskets. WDT ensures the entire coffee bed is uniform from edge to edge.
- Clumping from Modern Grinders: Many popular and high-performing grinders, especially those with low retention, can produce clumpy or statically charged grounds. Grinding directly into the Robot’s basket can create dense and sparse areas. WDT is the perfect antidote, breaking up these clumps and creating a fluffy, uniform bed of coffee ready for tamping.
Without WDT, you are essentially gambling with each shot. By implementing it, you take control of a major variable, paving the way for the consistency you’re looking for.
A step-by-step guide to perfect robot WDT
Integrating WDT into your Cafelat Robot workflow is simple and adds less than 30 seconds to your routine. The improvement in your espresso will be well worth the minimal effort. Follow these steps for a perfect puck every time.
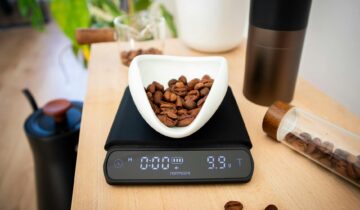
- Grind with a Dosing Funnel: Place a dosing funnel on top of your Robot’s portafilter basket. This prevents grounds from spilling and allows you to stir vigorously without making a mess. Grind your coffee dose directly into the basket.
- Perform the WDT: Insert your WDT tool’s needles deep into the coffee grounds, ensuring you reach the bottom of the basket. Begin stirring in small, overlapping circular motions, or by raking back and forth across the entire basket. The goal is to break up all visible clumps. Gradually bring your stirring motion up towards the surface of the grounds to create an even, fluffy top layer.
- Settle the Grounds: After distribution, the coffee bed will be very loose. Give the portafilter a few firm vertical taps on your counter or tamping mat. This will collapse any air pockets and settle the grounds into a more level bed. Some users prefer a gentle shake or a “stockfleth” maneuver, but a simple tap is highly effective.
- Tamp Evenly and Firmly: Now that you have a perfectly distributed and level bed of coffee, the final step is tamping. Place your tamper on the grounds and apply firm, level pressure. The goal is not to press as hard as you can, but to fully compress the grounds into a solid, level puck. Give the tamper a gentle spin without pressure as you remove it to polish the surface. You are now ready to pull a consistent, channel-free shot.
Choosing your tool and troubleshooting
Not all WDT tools are created equal, and the right tool can make the process more effective. The key factor is needle diameter. Needles that are too thick (like a paperclip) will simply push grounds around, creating new channels. You need needles that are thin enough to break up clumps without overly disturbing the bed.
Here’s a quick guide to needle selection:
| Needle Diameter | Effect on Coffee Bed | Best For |
|---|---|---|
| Under 0.4mm | Excellent for fine de-clumping with minimal agitation. Creates a very fluffy bed. | Ideal for most applications, especially for light roasts or grinders that produce fine, clumpy grounds. |
| 0.4mm – 0.6mm | A good balance of de-clumping and distribution. More forgiving technique. | Great for all-purpose use and a solid starting point. |
| Over 0.6mm | Can be too aggressive, pushing grounds around rather than separating them. | Generally not recommended as it can create more problems with distribution. |
If you are still experiencing issues like “donut extractions” (where water flows around the edge but not the center), it means you may be distributing grounds towards the edge of the basket. Focus your WDT movements more towards the center. If you see spritzing from a bottomless portafilter, it’s a clear sign of channeling. Ensure your WDT technique is thorough, reaching the bottom of the basket, and that your tamp is perfectly level.
In conclusion, mastering the Cafelat Robot is a journey of understanding and controlling variables. Of all the techniques you can learn, the Weiss Distribution Technique offers the most significant return on investment for improving shot quality and, most importantly, consistency. By taking a few moments to de-clump and evenly distribute your coffee grounds, you eliminate the primary cause of channeling and create a uniform puck capable of withstanding the manual pressure you apply. This simple, inexpensive practice transforms your espresso-making from a game of chance into a repeatable craft. It allows the true flavors of your coffee beans to shine through, free from the defects of a poor extraction, truly unlocking the amazing potential held within your Cafelat Robot.
 No products in the cart.