Maximizing steam pressure on the Gaggia Classic Pro
The Gaggia Classic Pro is revered for its robust construction and its capacity to produce exceptional espresso. For the experienced home barista, mastering its every function is a rewarding journey. One of the most common challenges, however, is achieving consistent and powerful steam for milk texturing. While the machine is highly capable, its single-boiler design and compact form factor require specific techniques to maximize steam output. This article explores the technical principles and practical steps necessary to move beyond lackluster foam and produce high-quality, microfoam-rich milk suitable for latte art, focusing on method rather than modification.
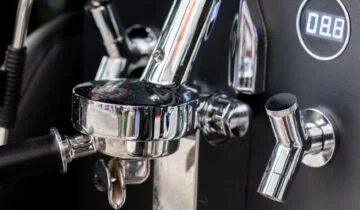
Understanding the Gaggia’s steam system
At the heart of the Gaggia Classic Pro is a small, single-boiler system responsible for both brewing and steaming. When you flip the steam switch, the machine engages a dedicated thermostat and begins heating the water in the boiler well past brewing temperature, typically to around 145°C (293°F). This superheated water flashes into steam when the steam valve is opened, releasing pressure through the wand. The primary limiting factors are the boiler’s small volume and the simple on/off nature of its thermostat. Unlike more advanced dual-boiler machines, the Classic Pro cannot brew espresso and steam milk simultaneously, and its steam pressure naturally declines as the steam is used and the water temperature drops.
The critical role of temperature surfing for steam
The key to unlocking the Gaggia’s full steam potential lies in a technique often called temperature surfing. The machine’s steam-ready light indicates that the thermostat has reached its target temperature and turned the heating element off. If you begin steaming at this moment, you are starting at the peak of the temperature cycle, but with no active heating to sustain it. The pressure will drop off rapidly. To achieve maximum sustained pressure, you must begin steaming just before the heating element turns off.
The process is as follows:
- Engage the steam switch and wait for the ready light to illuminate.
- Purge the steam wand of any residual water for a few seconds. This action also serves to drop the boiler temperature slightly, causing the heating element to kick back on.
- Wait for the ready light to turn off, which signals that the heating element is actively heating again.
- Insert the steam wand into your milk pitcher and open the steam valve just a second or two before the ready light comes back on.
By starting while the element is engaged, you are working with the machine’s heating cycle, not against it. This provides a more powerful and sustained burst of steam, which is crucial for properly texturing milk before the boiler’s pressure inevitably begins to wane.
Optimizing water level and purging technique
The amount of water in the boiler directly influences the volume and quality of steam produced. A boiler that is too full will produce wet, sputtering steam because there is insufficient headspace for a volume of dry steam to accumulate. Conversely, too little water can risk exposing the heating element. Before activating the steam function, it is good practice to briefly open the steam valve while the brew switch is on to expel a small amount of water from the wand. This ensures adequate headspace is created inside the boiler for steam generation. Following this, a proper purge right before steaming is essential. A short, aggressive blast clears condensed water from the wand, preventing it from being injected into your milk and compromising the texture.
Effective steaming workflow for small boilers
Given the limited steam capacity, technique is paramount. A rushed or inefficient workflow will not yield good results. Begin with very cold milk in a chilled pitcher, as this provides a longer window for texturing before the milk overheats. When you begin steaming, focus on stretching the milk (aeration) in the first few seconds when pressure is at its peak. Submerge the wand tip just below the surface to introduce air, listening for a gentle “tearing” sound. Once you have achieved the desired volume increase, plunge the wand deeper into the milk to create a vortex. This vortex is critical for breaking down larger bubbles and integrating the air into a uniform, silky microfoam. Keep the vortex going until the pitcher is just too hot to comfortably hold. This disciplined approach ensures you use the machine’s peak pressure for the most critical phase of steaming.
Conclusion
Mastering the Gaggia Classic Pro’s steam function is less about seeking overwhelming power and more about understanding its operational principles. The machine’s single-boiler design is not a flaw but a characteristic that requires a deliberate and informed approach. By leveraging temperature surfing to work in tandem with the heating cycle, managing the boiler’s water level, and adopting an efficient workflow, any user can produce consistently excellent microfoam. These techniques transform the steaming process from a point of frustration into a predictable and rewarding skill. For those looking to further refine their espresso preparation, a wide range of precision tools are available from retailers like papelespresso.com.


 No products in the cart.