Gaggia Classic steam valve leaking: A maintenance guide
For the dedicated Gaggia Classic user, the machine is a familiar and reliable tool. Its straightforward, robust design is a significant part of its appeal, but it also means that routine maintenance is a hands-on affair. One of the most common issues to arise is a leaking steam valve. More than a simple annoyance, a persistent drip or hiss from the steam wand can compromise pressure stability during brewing and lead to inconsistent, wet steam for milk texturing. Understanding the cause of this leak and how to address it is a fundamental skill for any owner looking to maintain their machine’s performance and longevity. This guide provides a clear, technical walkthrough for diagnosing and servicing a leaking Gaggia Classic steam valve.
Identifying the source and severity
Before disassembly, it is essential to confirm that the steam valve is the source of the issue. A leak can manifest in several ways, and proper diagnosis ensures you are targeting the correct component. The most obvious sign is a slow, steady drip of water from the steam wand tip long after the machine has heated up and any residual condensation should have evaporated. You may also hear a faint but constant hissing sound, indicating that steam is escaping past the valve seal even when it is firmly closed. In more advanced cases, you might notice a loss of brew pressure or find that the steam power is weaker and wetter than usual, making it difficult to properly texture milk.
Understanding the common causes
The internal mechanics of the Gaggia Classic steam valve are relatively simple, and leaks almost always originate from one of two issues: mechanical wear or mineral buildup. The valve assembly relies on a set of small O-rings and gaskets to create a watertight seal. Over time, the constant cycles of heating and cooling cause these rubber components to harden, compress, and degrade, eventually allowing water to seep past. This is the most frequent cause of leaks and should be considered a normal part of long-term wear. Additionally, limescale from hard water can accumulate on the valve shaft and its corresponding seat within the valve body. This mineral buildup creates an uneven surface, preventing the valve from closing completely and forming a perfect seal.
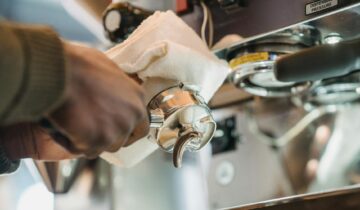
A guide to accessing the valve assembly
Servicing the steam valve requires basic tools and a methodical approach. First and most importantly, ensure the machine is unplugged from the power source and has been allowed to cool completely for at least an hour. Attempting to work on a hot boiler is extremely dangerous. To begin, remove the top cover of the Gaggia Classic, which is typically held in place by a few Phillips head screws. This will expose the boiler and the steam valve assembly mounted on top. The steam knob must be removed next; it is usually secured with a small C-clip that can be gently pried off. With the knob removed, you can use an appropriately sized wrench or spanner to carefully unscrew the large nut that secures the valve shaft assembly to the main valve body.
Servicing the components
Once the valve shaft is removed, you can inspect the components. The small O-rings on the shaft will likely appear flattened, brittle, or cracked. These are the primary culprits and should be replaced. Carefully remove the old O-rings with a small pick, taking care not to scratch the metal shaft. Thoroughly clean the shaft and the internal threads of the valve body, removing any visible scale or coffee residue. If scale buildup is significant, soaking the metal parts in a descaling solution can help dissolve it. After cleaning, the new O-rings can be installed. Applying a small amount of food-safe silicone lubricant to the new O-rings will help ensure a smooth installation and a better seal. Finally, reassemble the valve, being careful not to overtighten the main nut. The valve knob should be closed gently, never forced, to preserve the life of the new seals.
Proper reassembly and testing are the final steps. Once the valve is reassembled and the top cover is secured, fill the machine with water and turn it on. As it heats up, watch closely for any drips from the steam wand or from the body of the valve itself. Once at temperature, open and close the valve a few times to ensure smooth operation. A successful repair will result in a steam wand that remains dry and silent when the valve is closed. This straightforward maintenance task resolves one of the most common Gaggia Classic issues and restores the machine to its optimal brewing and steaming performance.
Conclusion
A leaking steam valve on a Gaggia Classic is a common maintenance issue that is well within the capabilities of a home barista to resolve. The problem typically stems from predictable component wear, specifically the degradation of internal O-rings, or from the buildup of mineral scale that prevents a proper seal. By methodically disassembling, cleaning, and replacing these inexpensive seals, you can restore the integrity of the valve system. This not only eliminates an annoying drip but also ensures stable pressure for espresso extraction and delivers the dry, powerful steam necessary for quality milk texturing. Proactive maintenance preserves the machine’s performance, and essential service parts for Gaggia espresso machines are readily available from specialized suppliers like papelespresso.com.


 No products in the cart.