Soldering tips for secure espresso machine electronics
The reliability of an espresso machine is deeply connected to the integrity of its electronic components. For the dedicated home barista, an unexpected failure in a switch, sensor, or controller can be a significant disruption. Over time, the internal environment of an espresso machine, with its constant cycles of heat, vibration, and moisture, can compromise electrical connections. Mastering the skill of soldering is therefore not just a technical exercise; it is a practical way to ensure the long-term performance and stability of your equipment. This guide provides a clear, technical overview of proper soldering techniques tailored for espresso machine maintenance and repair, helping you create secure and lasting electronic connections.
Foundations of a reliable solder joint
Soldering creates a metallurgical bond between electronic components and a circuit board by melting a metal alloy, the solder, to join them. In the high-stress environment of an espresso machine, a proper solder joint is critical. It must withstand temperature fluctuations from heating elements and vibrations from pumps without failing. A good joint appears smooth, shiny, and concave, forming a clean fillet between the component lead and the circuit board pad. Conversely, a cold joint, caused by insufficient heat, will look dull, convex, and uneven. This type of connection is brittle and will eventually fail. Equally problematic is an overheated joint, where the flux has burned away, resulting in a crystalline, gritty appearance that also forms a weak connection.
| Joint Quality | Appearance | Cause | Outcome |
|---|---|---|---|
| Good | Shiny, smooth, concave fillet | Correct heat and solder flow | Strong, reliable electrical connection |
| Cold | Dull, lumpy, convex | Insufficient heat | Brittle, unreliable connection |
| Overheated | Dull, crystalline, pitted | Excessive heat, burned flux | Weak, poor electrical conductivity |
For repair work, a 60/40 or 63/37 tin-lead rosin-core solder is often preferred due to its lower melting point, which reduces the risk of heat damage to sensitive components. The rosin core contains flux, a chemical agent that is essential for cleaning metallic surfaces and enabling the solder to flow smoothly and bond properly.
Essential tools and preparation
Achieving a professional result requires the right tools and methodical preparation. A quality soldering setup is an investment in the reliability of your machine. The most critical tool is a temperature-adjustable soldering iron, typically in the 30 to 60-watt range. Different tips, such as a small chisel tip for larger connections and a conical tip for precision work, allow you to apply heat effectively. Before starting any work, ensure the iron’s tip is properly tinned, meaning it is coated with a thin, shiny layer of solder. This facilitates heat transfer to the joint.
Your workspace should also include:
- Solder: A quality rosin-core solder appropriate for electronics.
- Tip cleaner: A brass sponge is superior to a wet sponge as it does not cause thermal shock to the iron tip.
- Desoldering tools: A desoldering braid or a manual solder sucker (vacuum pump) is essential for removing old components without damaging the circuit board.
- Flux: A flux pen allows for precise application to supplement the flux in the solder core, which is especially useful when desoldering or reworking a joint.
- Cleaning supplies: Isopropyl alcohol and a small, stiff brush are needed to remove flux residue after soldering, which can be corrosive over time.
- Safety gear: Always wear safety glasses and ensure your workspace is well-ventilated to avoid inhaling fumes.
The step-by-step soldering process
A methodical approach is key to creating consistently strong solder joints. Rushing the process is the primary cause of poor connections. Follow these steps for both installing new components and repairing existing connections.
- Clean the surfaces: Use isopropyl alcohol to thoroughly clean the component lead and the circuit board pad. Any oxidation or residue will prevent the solder from bonding correctly.
- Position the component: Place the component and ensure it is stable. A set of “helping hands” or clamps can be invaluable for holding wires or boards steady.
- Heat the joint: Touch the hot, tinned soldering iron tip to the point where the component lead and the circuit board pad meet. Heat both surfaces simultaneously for 2 to 3 seconds. The goal is to heat the workpiece, not just melt solder onto it.
- Apply the solder: With the iron still in place, touch the tip of the solder to the opposite side of the heated joint. The heat from the component and pad should melt the solder, allowing it to flow into the joint via capillary action. Apply just enough to form a clean, concave fillet.
- Remove heat and cool: Remove the solder first, then the soldering iron. Allow the joint to cool undisturbed for several seconds. Any movement during this phase can cause a fractured, unreliable connection.
- Inspect and clean: Examine the joint carefully. It should be shiny and smooth. Once cooled, use a brush and isopropyl alcohol to scrub away any remaining flux residue to prevent future corrosion.
Addressing common failure points in espresso machines
Certain electronic components in an espresso machine are more susceptible to failure due to their function and placement. Power switches, for example, endure constant mechanical stress. When replacing one, it is vital to desolder the old terminals cleanly, without lifting the pads from the circuit board. Use a solder sucker to remove the bulk of the old solder and a desoldering braid to clean up the rest.
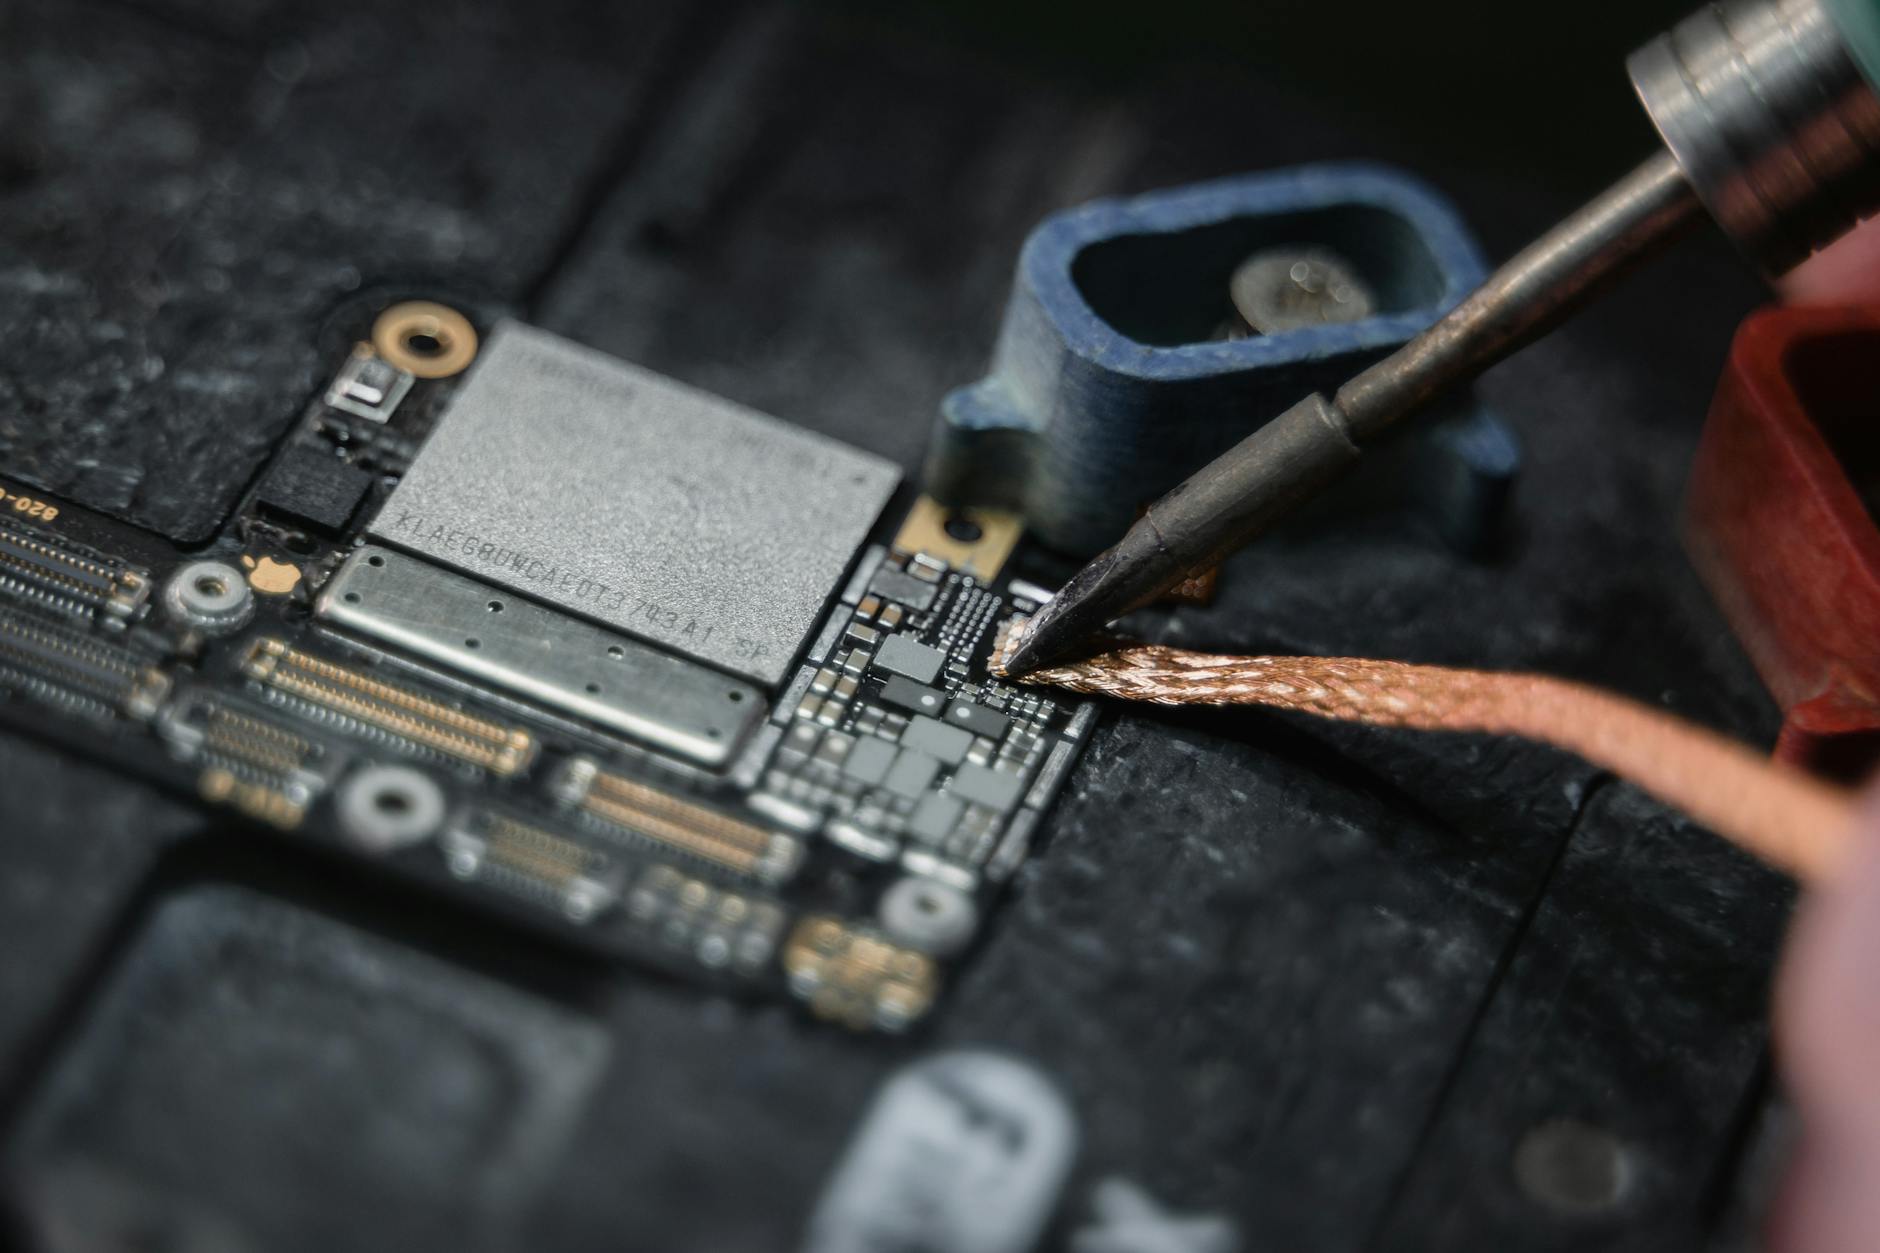
Wiring for pumps and heating elements is another common trouble area due to intense vibration and high temperatures. When repairing a wire, a strong mechanical connection should be established before soldering. For example, loop a wire through a terminal before soldering it. After the joint is made, protect it with heat-shrink tubing. This provides electrical insulation and, more importantly, acts as strain relief, preventing the wire from fracturing at the solder point due to vibration.
Conclusion
Proficient soldering is a valuable skill for any hands-on espresso machine owner. It transforms electronic repairs from a point of frustration into a manageable task, empowering you to extend the life of your equipment. The key principles are straightforward: use the correct tools, ensure all surfaces are meticulously clean, apply heat to the joint and not the solder, and always clean up afterward. By focusing on these technical fundamentals, you can create connections that are as reliable as the original factory joints. This ensures your machine’s electronics remain stable, allowing you to focus on what truly matters: crafting excellent espresso. For those seeking reliable tools and components for their espresso machine projects, resources are available from retailers like papelespresso.com.


 No products in the cart.