Planning your Gaggia Arduino mod: A pre-installation checklist
The Gaggia Classic is an enduring platform for espresso enthusiasts, largely due to its simplicity and robust build. For those seeking to elevate its capabilities beyond factory specifications, the Arduino-based modification presents a compelling path. This project integrates PID temperature control, pressure profiling, and pre-infusion, transforming the machine into a far more precise and repeatable tool. A successful modification, however, depends less on ambition and more on meticulous preparation. An unplanned installation can lead to frustration, errors, and potential damage to your machine.
This guide serves as a pre-installation checklist for experienced home baristas. It is not a step-by-step installation manual but rather a preparatory framework. We will outline the necessary components, tools, software considerations, and workspace setup required to ensure a smooth and successful upgrade. The goal is to help you organize the project logically, minimizing surprises and maximizing the potential of your machine.
Understanding the core components
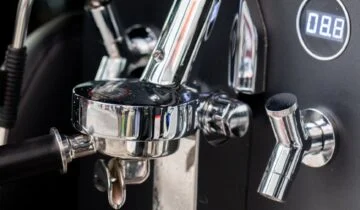
Before beginning the physical installation, it is crucial to understand the function of each primary component in the Arduino mod. This system essentially hijacks the machine’s basic controls and replaces them with a microprocessor-driven feedback loop. The Arduino board, often a Nano or similar variant, acts as the brain. It processes inputs from sensors and sends commands to control the machine’s heating element and pump.
The key sensors are the thermocouple and the pressure transducer. The thermocouple replaces the stock bimetallic thermostat, providing the Arduino with precise, real-time temperature data from the boiler. This allows the PID algorithm to regulate the heating element with far greater accuracy than the original on/off system. Similarly, the pressure transducer is plumbed into the hydraulic path, giving the controller live feedback on brew pressure. This enables features like software-based over-pressure-valve (OPV) adjustment and programmable pressure profiles.
Essential tools and preparation
A well-organized toolkit is foundational to a successful installation. Attempting this modification without the correct tools will almost certainly lead to stripped screws, damaged components, or improper connections. Most of the required tools are standard for electronics and small appliance repair.
Your checklist should include:
- A quality set of Phillips and flathead screwdrivers.
- Wire strippers and crimpers for creating secure electrical connections.
- A digital multimeter for verifying continuity and voltages.
- An assortment of M3 and M4 hex keys.
- Needle-nose pliers for manipulating small wires and connectors.
- Zip ties or other cable management solutions to keep internal wiring tidy and safe.
Beyond the tools, proper component preparation is key. This includes flashing the firmware to your Arduino board before it is installed in the machine. It is far easier to troubleshoot software on a workbench than when the board is wired into a partially disassembled espresso machine. Ensure you have the correct drivers and software development environment (IDE) installed on your computer and that you can successfully upload a test sketch to the board.
Software and firmware considerations
The software you choose to run on the Arduino determines the features and user interface of your modified machine. Several open-source projects exist, each with its own philosophy and feature set. It is wise to research these options thoroughly before committing to one. Consider factors such as community support, ease of configuration, and the specific functionalities you desire. Some firmwares are designed for simplicity, focusing solely on stable PID temperature control. Others offer complex, multi-stage pressure profiling, programmable pre-infusion, and even shot timers with gravimetric (weight-based) shutoff capabilities.
Once you have selected a firmware, take the time to read its documentation. Understand the calibration procedures for the temperature sensor and pressure transducer. Improper calibration is a common source of error, leading to inaccurate temperature readings or erratic pressure control. Familiarize yourself with the menu system or web interface you will use to control the machine post-modification. This proactive approach will make the initial setup and dialing-in process much more efficient.
Workspace and safety
Your work environment is a critical, yet often overlooked, aspect of preparation. This project involves both water and electricity, a combination that demands respect and caution. Before starting, ensure your Gaggia Classic is unplugged and has been allowed to cool down completely. Drain the boiler to prevent spills during disassembly. Work in a clean, well-lit area with enough space to lay out components without losing small screws or connectors.
A non-conductive mat can provide an extra layer of safety when working with the electronics. As you disconnect wires from the stock components, label them with masking tape. Taking clear photographs at each stage of disassembly is also an invaluable practice. These images can serve as a reference, helping you reassemble everything correctly and troubleshoot any wiring issues that may arise. Rushing the process or working in a cluttered space is a direct path to mistakes.
Conclusion
Embarking on the Gaggia Arduino modification is a rewarding project that can unlock a new level of precision in your espresso brewing. However, the success of this endeavor is determined long before the first screw is turned. A methodical approach centered on a detailed pre-installation checklist is not just recommended, it is essential. By thoroughly understanding the core components, gathering the right tools, selecting and studying your chosen firmware, and preparing a safe workspace, you set the stage for a smooth and successful installation.
This preparation transforms the project from a potentially frustrating task into an engaging and educational experience. Ultimately, the goal is to enhance the machine’s capability, and that process begins with careful planning. For those looking to equip their workspace, various high-quality tools and accessories for home baristas are available from retailers like papelespresso.com.
 No products in the cart.