The Slayer-style shot profile has become a benchmark in modern espresso, prized for its ability to transform light roasts from sharp and acidic into balanced, sweet, and texturally rich extractions. For the home barista using manual or flow-profiling equipment, mastering this technique opens up a new level of control over the final cup. This approach is not about arbitrary pressure changes; it is a deliberate, two-stage method designed to manipulate puck saturation and extraction dynamics. Understanding how to properly execute it requires a grasp of the underlying principles of flow rate, puck resistance, and staged pressure application. This article provides a technical guide to setting up and pulling a Slayer-style shot at home, focusing on the mechanics and variables involved.
The two stages of a Slayer-style extraction
At its core, the Slayer shot profile is a simple concept divided into two distinct phases: a low-flow pre-infusion stage and a full-pressure extraction stage. The magic happens in the first stage, which fundamentally alters how the coffee puck extracts once full pressure is applied.
Stage 1: Low-flow pre-infusion. This is the defining feature of the profile. Unlike traditional pre-infusion that uses low pressure (e.g., 2-4 bars), the Slayer method uses a severely restricted flow rate. A needle valve or similar mechanism is engaged to allow water to enter the puck at a very slow, controlled rate, often around 1 to 3 milliliters per second. During this phase, pressure builds gradually as the puck becomes saturated and starts to resist the water. This gentle saturation minimizes channel formation and ensures the entire coffee bed is evenly wetted before high pressure is introduced.
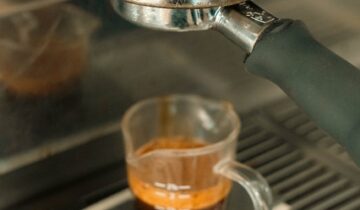
Stage 2: Full-pressure extraction. Once the puck is fully saturated, typically indicated by the first few drops of espresso appearing, the operator transitions to the full extraction pressure of around 9 bars. Because the pre-infusion stage has already done the delicate work of saturating the coffee, the full-pressure phase can proceed with a more uniform and complete extraction, reducing the risk of channeling and harsh flavors.
Essential equipment capabilities
Replicating this profile at home requires specific equipment capable of controlling the flow of water independently from pressure. A standard espresso machine with a vibration or rotary pump running at full-blast cannot perform this technique. The necessary feature is a manual way to manipulate water flow, which is typically found on machines with a paddle group that operates a needle valve or on those with gear pumps that allow for precise electronic flow control. Without this fine-grained control over the initial flow rate, achieving the gentle saturation that defines the Slayer style is not possible. The goal is to manage the speed of water delivery to the puck, not just the eventual pressure that builds.
Executing the Slayer-style profile
Pulling a successful Slayer-style shot involves adjusting your entire workflow, starting with the grind. Because the long, low-flow pre-infusion reduces the risk of channeling, you can and should grind significantly finer than you would for a conventional 9-bar shot. This finer grind creates more surface area and provides the necessary resistance for the pre-infusion phase to work effectively.
- Preparation: Begin with meticulous puck preparation. A level and evenly distributed bed of coffee is critical for ensuring the slow-moving water saturates the grounds uniformly. Any imperfections will be exploited during the prolonged pre-infusion.
- Pre-infusion: Start the shot with your machine’s flow control fully restricted or at its lowest setting. The goal is a very slow trickle of water. Observe the bottom of the portafilter. This phase can last anywhere from 20 to 50 seconds, depending on the coffee’s density and grind size. The phase ends when the entire bottom of the basket is saturated and the first few drops of espresso begin to form.
- Extraction: As soon as you see the first drops, smoothly and quickly ramp up to your target extraction pressure (typically 8 to 9 bars). Let the extraction proceed until you reach your desired brew ratio.
Adjusting key variables for flavor
The beauty of this profile is its flexibility. By adjusting the duration of the pre-infusion, you can directly influence the shot’s balance and character. A longer pre-infusion time will generally lead to a more muted acidity and a heavier body, which can be ideal for very light, dense roasts that are otherwise challenging to extract without harshness. A shorter pre-infusion may preserve more of the coffee’s bright, acidic notes. The key is to use the pre-infusion time as your primary variable. If a shot tastes under-extracted, extend the pre-infusion time before coarsening the grind. Conversely, if a shot is muddled or over-extracted, shorten the pre-infusion before making a significant grind adjustment.
| Variable | Effect | Typical Adjustment |
|---|---|---|
| Grind size | Controls puck resistance and overall extraction ceiling. | Grind finer than for a standard shot; adjust only after optimizing pre-infusion time. |
| Pre-infusion time | Determines puck saturation and influences acidity and body. | Lengthen for lighter roasts or to reduce acidity. Shorten to increase brightness. |
| Brew ratio | Defines the final concentration and texture of the shot. | Often extended (e.g., 1:2.5 to 1:3) to balance the high extraction. |
Conclusion
The Slayer-style shot is more than just a pressure profile; it is a flow-centric approach to espresso that prioritizes gentle and complete puck saturation before extraction. By separating the saturation phase from the high-pressure phase, baristas can use a finer grind to unlock higher, more even extractions from dense, light-roasted coffees. This technique tames acidity, enhances sweetness, and builds a more satisfying texture in the final cup. Mastering it requires practice and a methodical approach to adjusting variables, but the results are a powerful testament to the importance of controlling flow rate. Achieving this level of precision often benefits from high-quality preparation tools, many of which can be found at papelespresso.com for those looking to refine their technique.

 No products in the cart.