For the home barista who has invested time and effort into modifying a Gaggia espresso machine, achieving thermal stability is the final frontier. Adding a PID (Proportional-Integral-Derivative) controller is a significant step, but its effectiveness hinges on one crucial detail: the accuracy of its temperature sensor. An uncalibrated sensor can report a temperature that is several degrees off from the actual temperature of the water hitting your coffee puck. This discrepancy can lead to inconsistent extractions, making it difficult to diagnose issues with your espresso shots. This guide explains the process of calibrating your temperature sensor to ensure the reading on your PID display is a true reflection of the brewing temperature, giving you precise control over your extraction.
Understanding temperature offsets
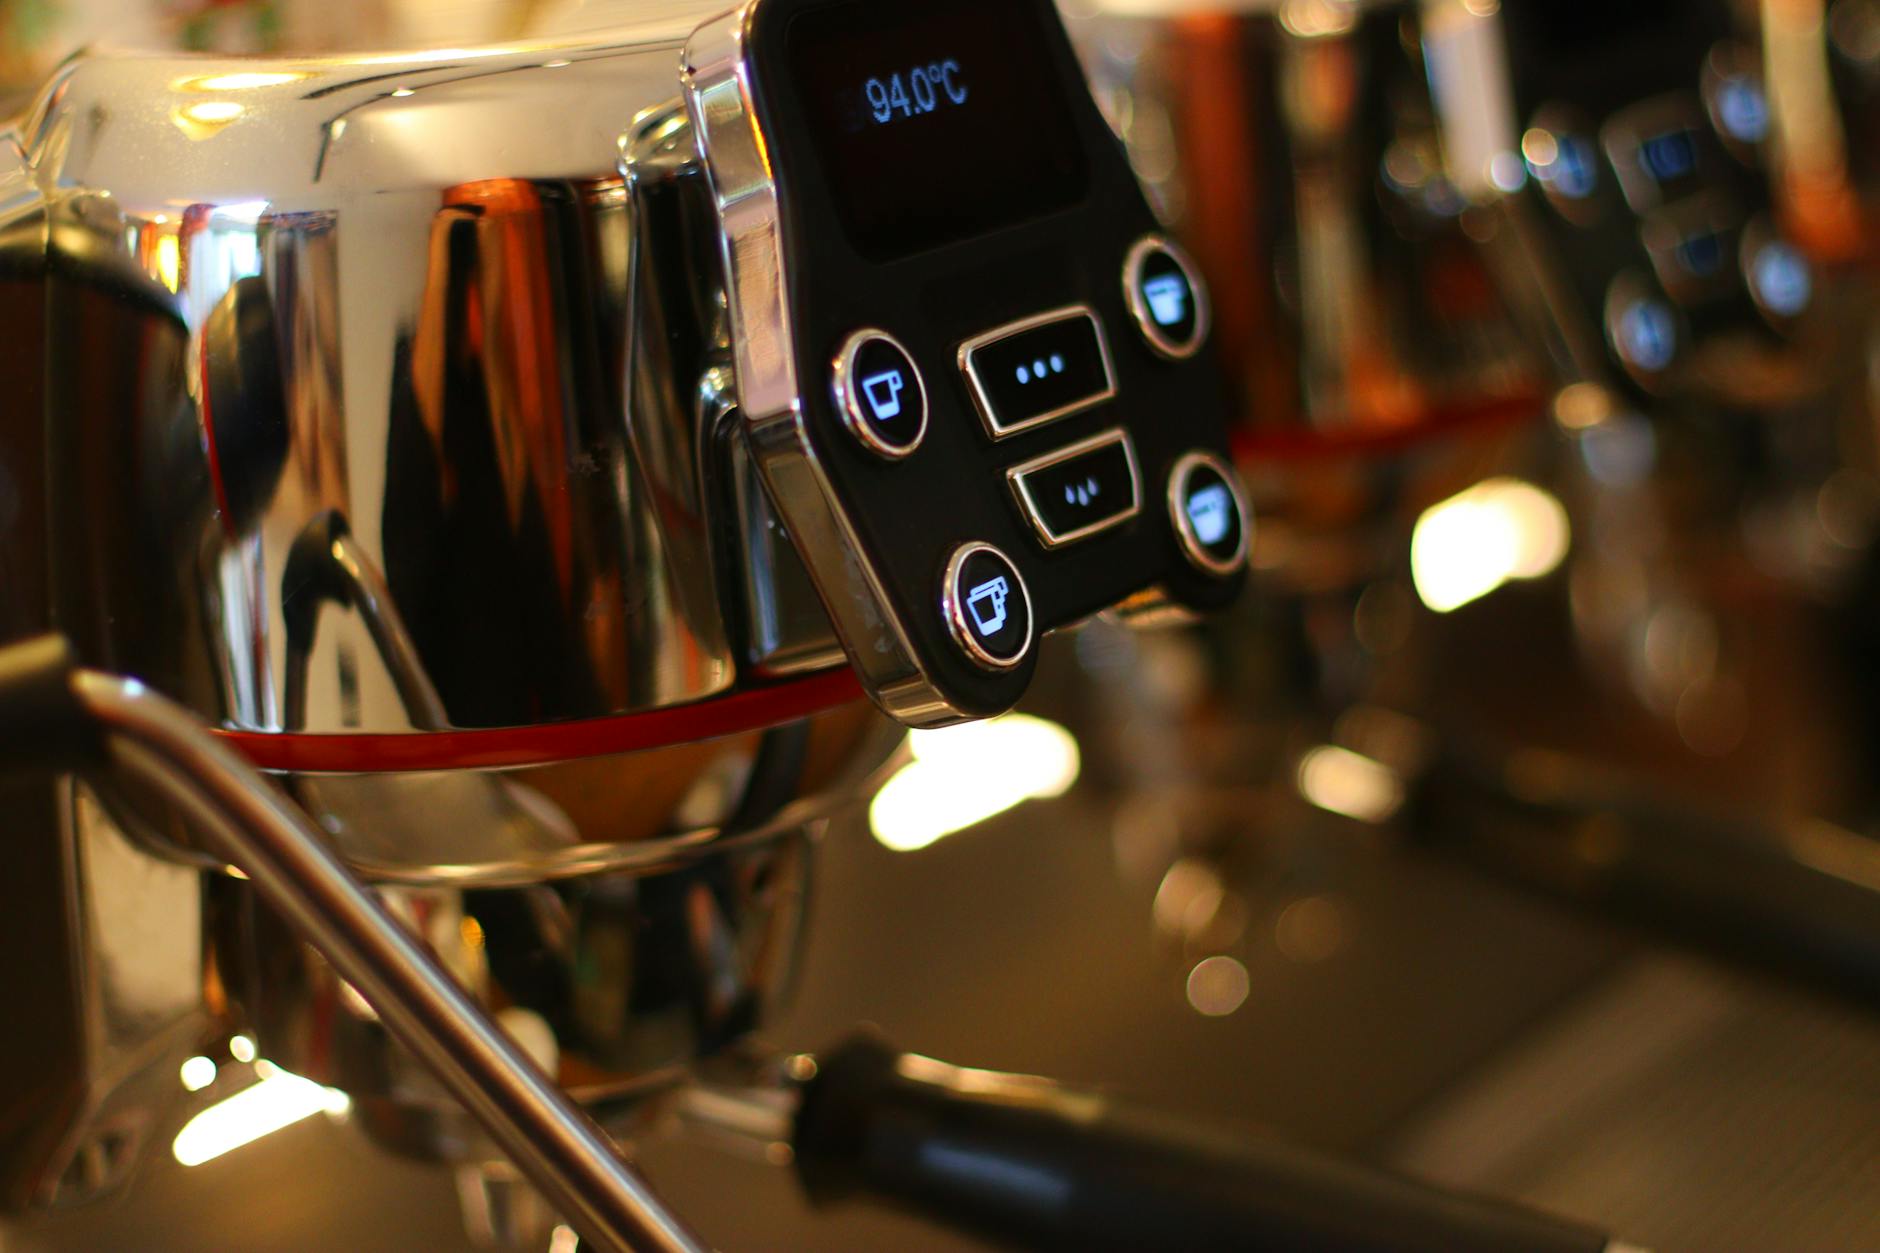
Most temperature control modifications for Gaggia machines use a thermistor or a thermocouple attached to the boiler. While these sensors are generally reliable, they are rarely perfect. Manufacturing tolerances can result in a slight, consistent deviation from the true temperature. This difference is known as the temperature offset. Furthermore, the sensor measures the boiler’s temperature, not the water temperature at the group head where the brewing actually happens. There is always a temperature drop between the boiler and the group.
The goal of calibration is to measure this temperature difference and program an offset into your PID controller. By doing so, you align the PID’s displayed temperature with the actual temperature of the water exiting the shower screen. This makes your PID a far more powerful tool, allowing you to set a target of 93°C and be confident that the water is indeed 93°C, eliminating a major variable in shot consistency.
Essential tools for accurate calibration
Precision requires the right tools. Attempting to calibrate a sensor without a reliable reference thermometer is counterproductive. You will need a calibrated, fast-reading digital thermometer, preferably one with a thermocouple probe that can be safely exposed to hot water. A purpose-built device that measures temperature and flow at the group head, often called a Scace device, is the standard for professional technicians. However, a barista can achieve excellent results with a high-quality thermocouple thermometer and a simple setup, such as a bottomless portafilter and a small cup to catch the water, ensuring the probe is fully submerged in the flow.
A step-by-step calibration guide
This process requires patience and methodical execution. Rushing the steps will lead to inaccurate results. Ensure your machine has been on for at least 30 minutes to be fully heat-saturated.
- Establish a stable baseline: Set your PID to a common brewing temperature, such as 95°C, and let it stabilize. Do not program any temperature offset yet.
- Prepare your measuring setup: Insert your portafilter (with the thermocouple probe securely positioned underneath the basket) and place a cup on your scale.
- Measure the actual water temperature: Begin to pull a shot with only water. As the water flows over the probe, monitor the reading on your thermometer. Note the highest stable temperature it reaches. It is wise to repeat this process 3-4 times, allowing the boiler to recover between measurements, and then calculate the average.
- Calculate the offset: Compare your PID’s set temperature with the average temperature measured by your thermocouple. For example, if your PID is set to 95°C and your thermometer consistently reads 91.5°C, your offset is -3.5°C.
- Program the offset into the PID: Access your PID’s menu. The offset parameter is often labeled as “OS,” “SC,” or “Offset.” Enter the value you calculated. Consult your PID controller’s manual for specific instructions.
This procedure directly correlates the reading on your PID with the reality at the group head, which is the only temperature that truly matters for extraction.
Verifying your calibration
After programming the offset, verification is key. Let the machine stabilize again at your target temperature. For instance, if you want to brew at 93°C, set the PID to 93°C. Now, repeat the measurement process described in the previous section. Your thermocouple thermometer should now provide a reading that is very close (within 0.5°C) to the 93°C displayed on your PID. If the reading is still off, a minor adjustment to the offset value may be needed. Once verified, your modified Gaggia is a far more precise instrument, capable of delivering repeatable results shot after shot, provided other variables like grind size and puck preparation are consistent.
Calibrating the temperature sensor in a modified Gaggia is not merely a technical exercise; it is a fundamental step toward mastering espresso extraction. It transforms the PID from a simple digital display into a precise, reliable control system. This process removes a significant variable, allowing the experienced barista to focus on the nuances of coffee, grind, and technique with the confidence that the machine is performing exactly as intended. While it requires a methodical approach and the correct equipment, the resulting consistency is well worth the effort. For those looking to perform these types of advanced modifications, the necessary tools and components are often available from specialized suppliers like papelespresso.com.

 No products in the cart.