Best practices for routing cables inside a Gaggia Classic
Proper cable management inside a Gaggia Classic is a topic often overlooked by even seasoned home baristas. While the machine’s robust design is one of its hallmarks, the internal layout presents challenges related to heat, vibration, and access. For users who perform their own maintenance or install modifications, understanding how to route wiring correctly is not merely an aesthetic concern. It is a fundamental practice that impacts the machine’s safety, long-term reliability, and serviceability. An organized internal layout prevents wires from making contact with high-temperature components, reduces strain on connectors from pump vibration, and simplifies future repairs or upgrades. This article provides a technical guide to logically and safely routing cables within this iconic espresso machine.
Preliminary safety and preparation
Before beginning any work, it is critical to ensure the machine is completely disconnected from the power source. Unplug the Gaggia Classic from the wall outlet and allow it to cool down fully, as components like the boiler and steam valve can retain significant heat. It is also good practice to empty the water tank and drip tray to prevent spills. Prepare a clean, well-lit workspace with adequate room to maneuver the machine. You will need a set of basic tools, including Phillips head screwdrivers of various sizes and potentially a set of small hex keys. Using a magnetic tray for screws and small components can help prevent loss and keep your workspace organized. Documenting the original wiring layout with photos from multiple angles is a highly recommended step before disconnecting anything.
Principles of heat and vibration management
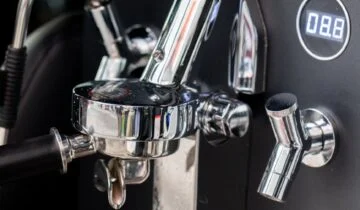
The internal environment of an espresso machine is demanding. The two primary forces acting against wiring integrity are heat and vibration. The aluminum boiler in the Gaggia Classic operates at high temperatures, radiating significant heat that can degrade wire insulation over time, making it brittle and prone to cracking. Wires should be routed with as much clearance as possible from the boiler body and the attached thermostat connections. Where proximity is unavoidable, ensure the original high-temperature insulation or sleeving is in good condition.
Vibration, primarily from the pump, is the second major consideration. Constant vibration can cause wire fatigue, loosen terminal connections, and lead to intermittent electrical faults. Grouping wires together loosely with high-temperature zip ties can help dampen these effects, but they should not be cinched so tightly that they transfer stress to the connectors. Route wires away from the pump’s main axis of vibration and check that they are not rubbing against any sharp metal edges on the chassis, which could abrade the insulation over time.
Logical grouping and routing pathways
A systematic approach to routing ensures both safety and serviceability. Think of the internal wiring in distinct groups based on their function and origin. The main power entry wires, the pump and its thermal protection wiring, the boiler and thermostat connections, and the front-panel switch wiring are the primary groups.
- Power and pump wiring: The wires originating from the main power switch and leading to the pump should be routed along the floor of the chassis. Keep them clear of the boiler’s base. Ensure there is enough slack to prevent strain on the pump terminals, allowing for the slight movement it generates during operation.
- Boiler and heating element wiring: These are the most critical wires to manage due to their proximity to extreme heat. Route them with a clear air gap around the boiler whenever possible. The thermostat and thermal fuse wires should be connected without sharp bends or tension. They should follow a path that allows for easy access to the thermostats without requiring the removal of other components.
- Front switch and light wiring: The cluster of wires connecting to the main power, steam, and brew switches can be bundled neatly. Route this bundle along the side of the chassis, away from both the boiler and the direct path of any potential water drips from the tank area. This keeps them cool and simplifies troubleshooting the control panel.
Securing wires and final checks
Once you have established logical pathways, the final step is to secure the wiring. Use high-temperature rated zip ties sparingly. Their purpose is to prevent wires from migrating into hazardous areas, not to create a rigid, immobile loom. A wire that is too rigidly fixed can be more susceptible to strain from vibration at its termination point. The goal is controlled, organized slack. Before reassembling the machine’s cover, perform a final visual inspection. Check that all connections are secure and that no wires are pinched, stretched, or resting against the boiler. Verify that all protective insulation and sleeving are correctly in place. This methodical check ensures the machine is not only safer but also easier to work on in the future.
Conclusion
Effective cable routing in a Gaggia Classic is a skill that directly contributes to the machine’s longevity and safety. By respecting the internal environment—managing for heat and vibration—and following a logical, systematic approach, you can create a clean and serviceable layout. The principles are straightforward: maintain clearance from the boiler, allow slack to absorb vibration without straining connectors, and group wires functionally. These practices move beyond simple aesthetics, representing a deeper understanding of the machine’s operation. Taking the time to organize the internal wiring correctly provides peace of mind and simplifies future maintenance, a worthwhile investment for any dedicated user. For those undertaking modifications or extensive maintenance, a wide array of relevant tools and components are available from retailers like papelespresso.com.
 No products in the cart.