Replacing the silicone tubes in the Gaggia Anima milk system
For the experienced home barista, maintaining the integrity of an espresso machine is as crucial as perfecting the grind or tamp. The Gaggia Anima, a capable super-automatic machine, relies on a series of components working in concert to produce quality beverages. Among these, the silicone tubes within the automatic milk frothing system are often overlooked yet are fundamental to performance and hygiene. Over time, these tubes can degrade, affecting milk texture, temperature, and cleanliness. Understanding how to properly inspect and replace them is a key maintenance skill that ensures the machine operates at its intended level, providing consistent results in the cup and preserving the longevity of the equipment.
The function of silicone tubes in the cappuccinatore
The Gaggia Anima’s cappuccinatore, or automatic frother, uses a venturi system to create frothed milk. This system relies on two primary silicone tubes to function correctly. The first, and most visible, is the intake tube that draws milk from an external container. The second, shorter tube is located inside the cappuccinatore assembly itself and plays a critical role in introducing air into the milk stream.
As pressurized steam flows through the frother, it creates a low-pressure zone (the venturi effect) that performs two actions simultaneously:
- It pulls milk up through the main intake tube.
- It draws a small amount of air through the internal air-intake tube.
The milk and air are then combined and agitated within the frothing chamber, creating the microfoam or steamed milk for lattes and cappuccinos. The flexibility and seal of both silicone tubes are paramount. A loss of elasticity can compromise the vacuum, leading to insufficient milk draw or improper air mixing, resulting in poor foam quality.
Identifying wear and tear
Silicone is a durable, food-safe material, but it is not immune to degradation. Constant exposure to milk fats, cleaning cycles, and temperature fluctuations will eventually take a toll. Identifying the signs of wear is the first step in preventative maintenance.
Visual signs:
- Discoloration: Tubes may yellow or darken over time due to milk residue absorption. While not always a sign of failure, it can indicate that the material is becoming less resilient.
- Stiffness or brittleness: New silicone is soft and pliable. If a tube feels hard or cracks when bent, it has lost its elasticity and will no longer create a proper seal.
–Cloudiness: A once-clear tube that has become opaque may have microscopic cracks or has absorbed minerals and milk solids.
Performance issues:
- Weak or inconsistent frothing: This is the most common symptom. If the machine produces large, soapy bubbles or inconsistently textured milk, it often points to an air leak caused by a degraded internal tube.
- Failure to draw milk: If the intake tube is cracked or has hardened at the connection point, it may not be able to form the necessary vacuum to pull milk from the container.
- Sputtering or spraying: A poorly sealed tube can cause the system to sputter, spraying hot milk and steam instead of delivering a smooth, consistent stream.
A guide to tube replacement
Replacing the tubes is a straightforward process that requires attention to detail. Ensure the machine is turned off and cool before beginning. The primary materials needed are a new, food-grade silicone tube of the correct diameter for both the intake and internal air channels.
Step-by-step process:
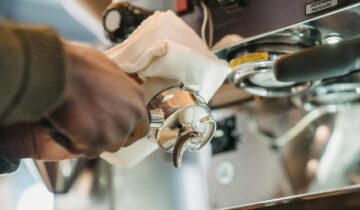
- Disassemble the cappuccinatore: Carefully pull the automatic frother assembly off the machine’s steam wand. It should detach with a gentle, firm pull. Next, disassemble the cappuccinatore itself. It typically consists of a few interlocking plastic parts. Take note of their orientation for reassembly.
- Remove the old tubes: The external milk intake tube simply pulls off its nozzle. The smaller, internal air tube is located inside the main body of the frother. Gently pull it from its connection points. If it has become brittle, it may break, so be prepared to remove any remaining pieces.
- Measure and cut the new tubes: Use the old tubes as a template to cut the new silicone tubing to the exact same length. A precise cut is crucial, especially for the small internal tube, as its length can affect the air-to-milk ratio. Use a sharp blade for a clean, perpendicular cut.
- Install the new tubes: Fit the new internal air tube onto its designated nozzles within the frother body, ensuring it is securely seated. Attach the new external milk intake tube to its port.
- Reassemble and test: Reassemble the cappuccinatore components, ensuring they click together firmly. Attach the complete unit back onto the machine’s steam wand. Run a frothing cycle with a container of cold water first to check for leaks and proper suction before testing with milk.
Extending the life of your milk system
Proper maintenance can significantly extend the lifespan of the silicone tubes and ensure optimal performance. The most effective practice is diligent cleaning. After each use, run a hot water or steam cycle through the frother as recommended by the manufacturer. This purges immediate milk residue before it has a chance to solidify.
Regularly use a dedicated milk circuit cleaner. These solutions are formulated to break down milk fat and protein buildup that water alone cannot remove. Soaking the disassembled cappuccinatore and tubes in this solution every week or two will keep the channels clear and the silicone supple. Always rinse thoroughly with fresh water after using any cleaning solution to prevent residue from affecting the taste of your beverages or degrading the components.
Conclusion
The silicone tubes in the Gaggia Anima’s milk system are small but essential components that directly influence the final quality of a milk-based espresso drink. Their gradual degradation is a normal part of the machine’s lifecycle, but proactive replacement is key to maintaining performance. By learning to recognize the signs of wear and understanding the straightforward replacement process, users can ensure their machine continues to operate reliably. This attention to detail is a hallmark of the dedicated home barista, transforming routine maintenance into an act of quality control. For those seeking the necessary food-grade tubing or other maintenance supplies, specialized retailers such as papelespresso.com often carry the appropriate parts for a wide range of machines.


 No products in the cart.